Jump to content

troopermaster

Member
  • Posts

    3,638
  • Joined

  • Last visited

  • Days Won

    12

Everything posted by troopermaster

  1. Glue the parts together first and see how they fit. If you need to trim them, cut the backs of the knees first by removing the edge/trim on the bottom of the thigh and top of the shins. This mod will help a lot without chopping down the actual length of the legs. If it is still a problem, trim a bit from the bottom of the shin at the ankle area, following the same lines as the original shape only shorter. As a last resort, trim the tops of the thghs but that really shouldn't be neccesary.
  2. I have some of the correct style snaps that I bought on ebay from a guy in Bulgaria. While they look almost perfect, the male part is too big (couple mm's) to be 100% accurate but they do look nice all the same. I can send you some if you want Keith?
  3. Send me another message if you have a query
  4. The problem Mark, is that Paul's calf muscles are larger than what the armour was made for so you would have to have one large strip. I tried that at first but it stuck out just as bad. I thought two smaller strips would be better but the problem is still there. I thought maybe some vinyl or leather on the inside to hide the black gap and just have one cover strip on the outside. I thought someone might have had the same kind of problems with their calves and might be able to shed some light on the situation for Paul?
  5. The whole sole is not painted white, just the edges and heel. If you think they are black like ANH and ESB your wrong.
  6. Yes, these new ones are not so sharp like the originals. The old ones were too sharp and the shape was not quite right. It was only up until recently when I acquired HD screen grabs from ESB that I decided to have a go at more accurate hand plates and these are the results. I'll have some hand plates available this weekend
  7. DM's are very chunky boots and not suitable IMO. Personally I would leave them and get some chelsea boots and paint them white or at least get some CAboots and paint the sole white.
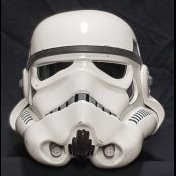
  8. It could be a VM. I only know of two helmet makers who make their helmets with a seperate dome, VM and RT. It doesn't look like an RT to me. The 'tab' as you call it is actually webbing. This is the result of poor vacuum forming and it's caused be over heating the plastic and applying the vacuum too quickly. Can you tell if it's HIPS or ABS?
  9. I personally cannot pull a welders visor on my machine, though it might be possible on a small version.
  10. AA told me the bubble lenses were vac formed into a mould so the eyes popped out. This is easy to do if you have a control valve on your vac machine like I do, but I can only form 2' x 2' sheets at the moment. I searched high and low for green acrylic in 1mm but never found anything and gave up on the idea. Now I am forced to use way too thick 3mm perspex. It does the job, but not ideal.
  11. Wasn't your first helmet an ESB2 with the square frown?
  12. Looking good from here Shawn! Good to see Matt removed the rivet overs from the belt and has got some plastic shoulder straps, though they do still look ANH without the starting box at the front, better than elastic anyway. The shins are done right too. I know the originals were assembeld any old way but I think that if the shins are not made right they feel awkward when worn, at least they did when I treid wearing mine on the wrong legs. The only thing I am not too crazy about is the gloss black paint, other than that, it's looking sweet
  13. Well there are only two people who are members here that might have photos of this mould from way back then, DL and JJ. If they do have photos that they would share, it could help help disprove Gino's claims. I for one know that the tubes were modified as well as the area behind the ear caps. I don't have any hard evidence to show unfortunately, just what I see when Gino's helmets are compared to the originals. I think there are photo comparisons with the Dave M. helmet somewhere, but Gino dismissed all the evidence as his helmet was not cast from the Dave M. Heck, I didn't know they had different moulds for each stunt helmet
  14. ANH #1 ESB #2 ROTJ #3 Those are the only Star Wars films made
  15. Yes. I'll have a few pairs next weekend and will start a FS thread when they are ready.
  16. Thanks everyone Here a quick shot showing the new plates to the old ones.
  17. Everything is looking good so far Rolf Remember the original armour had absolutely no return edges on the wrist, so you'll need to cut them back even more if your going all out for screen accuracy
  18. It's obvious that the SFS ABS or HDPE helmets Matt is making are made by forming over one of his FG helmets. It would not be hard to make forimng bucks out of the them If you know how to make moulds.
  19. Just finished the new moulds today and got these pulled. I think they look much closer to the originals than my previous effort. Just thought I would show them off
  20. Hi Ferg, Just remember to take your time when trimming. Cut everything slightly bigger then trim down once you have test fitted the parts by taping them together. It's better to use your method of measuring numerous times and cutting once. Stuka has an excellent tutorial, so make sure to check it out...MANY TIMES Everyone on here will be on hand to help you every step of the way mate.
  21. It looks like 2" poly webbing. I have only seen it available in 2" and 3" but it may be available in 2.5", not sure. You'll need to remove all the return edges on the torso in order to get the trim on correctly.
  22. Good to see you have the belt attached correctly J, but poly webbing was used for the ROTJ belts, not canvas. You'll need totally remove all the return edges on the torso and add the rubber trim. Use white velcro to attach the shoulder straps like they did on the movie suits.
×
×
  • Create New...