-
Posts
66 -
Joined
-
Last visited
Content Type
Profiles
Forums
Gallery
Articles
Media Demo
Everything posted by Sithtrooper02
-
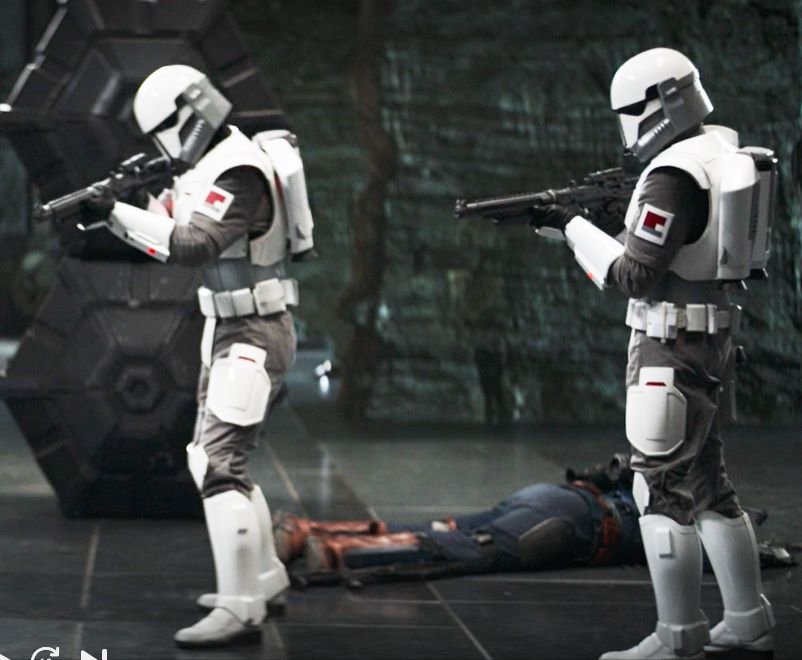
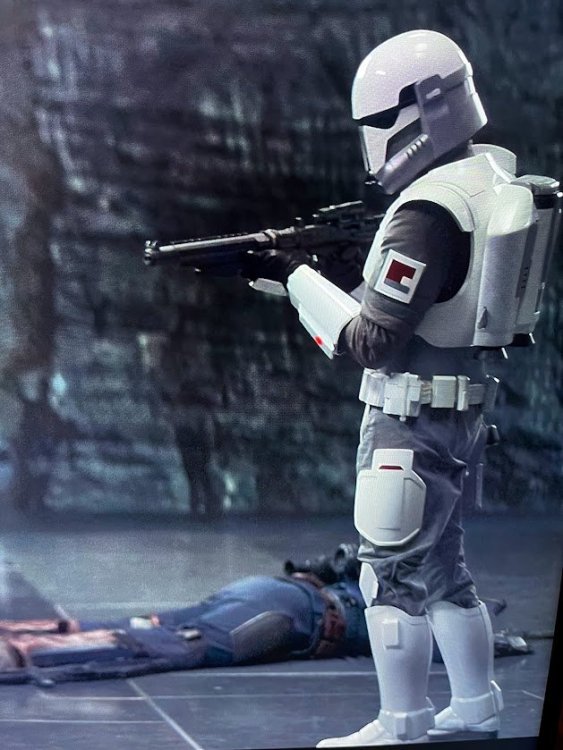
Hi, Here are proposal for other armor components, trying to list details that are referenced in the reference picture document available. Chest armor The chest armor is white and is comprised of 4 distinct sections: - The lower section - The upper section - The left and right winglets The lower section extends down to overlap the abdomen armor and is attached to the upper section. It also extends to the rear under the arm pit, joining to the back section with a minimal vertical seam on each side There is a recessed medium grey section in the center of the lower section matching the medium grey color of the rest of the armor. A white raised rectangular shape with bevels is present in the middle of the grey recess A dark red oblong shape is present on the left side of the lower section A raised rectangular shape containing the ranking of the commando is present on the left side of the lower section and has the following characteristics: - A raised white contour - A medium grey ranking rectangle that matches the medium grey color of the armor, inside the white raised contour - On the grey ranking rectangle, is present from top to bottom: - A white rectangle - 4 squares evenly spaced horizontally on a single row with these colors from left to right: black, dark red, light grey, dark grey - 2 rectangles each having two circular shapes on them. The left rectangle has 2 large white circular shapes, the right rectangle has two smaller black circular shapes under the ranking box is a red rectangle The upper section is a single piece with no visible seam and extend from the lower section to the back section There is V-shape in the front center of the upper section, on which is attached a raised v-shape white box On each side of the upper section are attached two raised shapes that gives the appearance of jetpack straps Over the wearer’s right jetpack strap is a rounded shape box. There is a medium grey grid at the front of the box that closely match the color of the rest of the medium grey of the armor. The left and right winglets are white and symmetrical. They are attached on each side of the upper section Level 2 The 4 sections (lower section, upper section and 2 winglets) and shoulder box are visibly separate parts The ranking box components have thickness and are visibly separate parts The red light is functional under the ranking box The raised box over the right shoulder is visibly a separate part and has two semi-circular recessed line on the outer side and a recessed on the inner side. The raised box grid has exactly 5 vertical rectangular grey shapes and is visibly a separate part Back armor The back is white and attaches to the upper portion of the chest armor with minimal joint. It also attaches to the lower section of the chest armor under the arm pit forming a minimal vertical joint The back armor also attaches the jetpack to the armor with a removable mechanism The back plate extends down approximately to the height of the jetpack reactors tips Level 2 The jetpack has 3 attachment points that are visibly separate parts and are metallic finish. The two upper attachment points are circular T-shaped and anchored to the back plate with a circular plate The lower attachment point to the jetpack is cylindrical with a taper at the tip and is anchored to the back plate with a rectangular plate Upper arm piece left The upper arm piece left is white and fixed to the suit without any visible means of attachment The upper arm piece left is rectangular and has the following features from top to bottom - A large recessed rectangular shape with dark red color - A raised white square at the lower right of the inside of the red colored rectangle - A raised medium grey box matching the same color as the rest of the armor medium grey - A recessed line Level 2 The box has a rectangular recess at the back Upper arm piece right The upper arm piece right is white and fixed to the suit without any visible means of attachment The upper arm piece right is rectangular and has the following features from top to bottom - A large recessed rectangular shape with dark red color - A raised white square at the upper left of the inside of the red colored rectangle - A raised medium grey box matching the same color as the rest of the armor medium grey - A recessed line Level 2 The box has a rectangular recess at the back running horizontally Gloves Gloves are made of plain soft black leather or similar material and worn tucked into the gauntlets. Logos, designs and any other non-canon details are not visible when worn. No visible stiches are present on the top of the gloves Level 2 Gloves are made of leather Glove armor Glove armor is white and has three facets. Left and right glove armor are symmetrical A thick border is present all around the glove armor with a recessed rectangle in the middle section The glove armor is attached to the glove back Abdomen armor The abdomen armor is grey and span from the belt to the inside of the chest armor, hiding the wearers suit There is a seam on the right side of the wearer that closes the two parts without a visible gap. A seam can also be present on the left side but without any visible gap. There is the appearance of 4 straps seamlessly attached to the armor There is one raised shape at the back of the abdomen armor in between the 2 rear straps There are multiple raised boxes and shapes present on the front side of the armor Level2 The abdomen armor is made of flexible material Only one seam is present on the right side of the wearer’s side The 4 straps are all identical in width and geometry There is the appearance of a clip on the straps approximately at the middle of the abdomen armor Belt Belt strap is made of white coton like material and has the appearance of being made with thick material stitched with 5 horizontal lines creating 4 wider section in the middle and two narrow ones at bottom and top The belt is attached to the abdomen armor with no visible mean of attachment and conceal the edge of the lower abdomen armor The buckle of the belt is visibly two separate parts white in color. The male portion of the buckle has a visible link to the female buckle that is trapezoidal with metal color There are boxes on each side of the buckle attached to the belt strap. All boxes are white and are attached as on reference pictures order There are 7 identical rectangular boxes with a visible recess on the front vertical edges and a small chamfer on the top 4 of the 7 boxes are attached to the wearer’s right and 3 on wearer’s left starting from the buckle and are evenly spaced There is a larger pouch on wearer’s left following the first 3 boxes. The pouch has the appearance of having an overlapping rounded cover. The top cover has two horizontal chamfer on each side and the lower edges are chamfered vertically. There are two cylindrical boxes aligned with the abdominal rear straps on each side of the wearer’s back. The cylindrical boxes have an angled top and a fin protruding on the lower portion Level 2 The push release button of the female buckle is visibly a separate component There is a rectangular recessed line on the metal portion of the male buckle The metal portion of the male buckle is followed by a black section entering the female buckle Cod plate The cod plate is white and is made of a triangular shape that curves inward in the lower extremity The main triangular section is completed by two small vertical sections curving inward on each side The cod plate has not visible attachment method and disappear under the belt and abdominal armor. There is no attachment of the lower portion of the cod to the suit Level 2 There is a visible trapezoidal raised section on the top of main triangular section Thigh plates The thigh plates are white with a dark red insert and wrap around the wearer’s thigh with no visible mean of attachmentThe left and right thigh plates are symmetrical. They have a top rectangular section that is aligned with wearer’s side. The thigh plates are curved to fit the leg shape and have rounded corners There is recessed shape that creates a contour along the periphery and leaves a rectangular shape in the center The red insert is trapezoidal Level 2 The main section is asymmetric and is larger at the rear of the wearer’s thigh than at the front. the front top section is rectangular and the rear top section is at a downward angle Knee plates The knee plates are white and fitted over the wearer’s knee with no visible mean of attachment The left and right knee plates are symmetrical and comprise 4 sections (top, inner, outer, lower) There is a recessed trapezoidal shape in the lower section There is a trapezoidal winglet attached on the outer section Greaves The greaves are white and have the spat seamlessly attached to it. The left and right greaves are symmetrical. There is a flat face at the front and at the rear the rear running from the spat all the way up to the top of the greaves If seams are present, they must be minimal and be located on the edge of front and rear flat portions A raised lip is present around the top of the greave A rectangular box is seamlessly attached to the outer top side of the greave. The top and bottom of the box are angled A smaller box, aligned vertically with the top box is attached to the spat A rectangular box is attached at the rear of the spat and finishes at an angle on the greave Level 2 The greave is a single piece construction with a seam only present at the rear and overlaps to the inside of the greave The rear spat box has a recess edge on the outside creating a smaller shape The spat overlaps the boot with minimal gap Boots FO style boot Sole is black rubber with no visible heel No visible buckles or laces The instep has stiches that run across and creates multiple sections Level 2 There are 3 stitches lines that run across the instep The instep is made of thick material and the stitches create obvious raised sections There is a vertical zipper on the inside that spans the height of the boot Hope this will be helpful!
-
Agreed, let’s not specify specific level of gloss in this document as to my opinion reviewing the reference pictures, there is not sufficient evidence to support the level of reflectivity as there are no crisp pictures that would give definite answers. The various paint colors are all reflective, but gloss level is better not be specified in basic level. Will remove from proposal above
-
Thanks for the feedback! Ok, so after doing a SithTrooper build from scratch ( completed and approved for the 501st) I was excited to diveo into the Imperial Commando. Did a LOT of research since there is no CRL and the resources/info even back in December were very minimal. I gathered the online reference and added a lot more for my own benefit, as I intend to be 501st approved once it's completed. I the absence of a CRL, I wanted to be screen accurate. Yu can find the whole screen capture reference I have made in the reference section of the imperial commando ( external document link). So first was clearing out the toughest parts of the build, the parts that are outside of my skill set . So I ordered the soft parts as follow, based on the research I have made to be as close as possible to screen reference: - Boots from Crowprops. The imperial commando as basically FOTK boots with added sewing. (Keeptrooping has them as well). I did ask Giovanni to add more foam to the top sections, which he did a fantastic job ( you need this for level 2 approval) - Gloves from Crowprops ( only shop that has them, but from picture reference, these are easy to procure, as they are leather gloves with long sleeve, like some of the mando). Long sleeves are crucial so that they do not come out when trooping (from experience). You need leather gloves for level 2 approval. - Suit from Keeptrooping. The suit is generic and you will need some tailoring. I did order one from Sheev’s... but he's not doing it anymore and after 6 months of waiting I cancelled it. My girlfriend did have to make adjustments to make it fit properly, along with moving/adding velcros at the right place to fit my body. also needed to remove stitches from the inside of the elbow to be CRL compliant. You should as Kepptrooping to have it modified directly. - Belt and holster by me (my girlfriend). Belt is made out of white cotton with low density filler inside. The screen accurate material is thick white leather like material for holster/holster straps. The belt is cotton stitched with 5 rows. I found both the cotton and filler at a local fabric store, nothing fancy. - ABS are made out of urethane foam rubber, as it is visible that the part is flexible in the screen reference and it was later confirmed on the build FB page that this is indeed the material they used. I used Smooth-on TUFF STUFF 15, as it is light, very robust and made for cosplay/props. Follow this thread as I am trying to find an easier solution to the current material for future builds and potential commissions for people that need it. - 3D printed parts are made out of PLA+ material and printed on either of my 3 Anycubic printers (2 are Kobra Max 2, 1 is a viper). I would highly recommend a large printer to do the big parts in one step, otherwise you will spend way too much time trying to cut parts and bond/solidify them afterward. For trooping, you would need to reinforce them substantially. Anycubic Kobra 2 Max is cheap and does a perfect job for all the parts. My general setting were 20% grid inflill, 3 layers, 0.2mm layers (0.1 for detailed tinny parts). If you have a resin printer, it sure would save you a lot of time for the small greeblies. Paints and coatings - Paints, I used mostly rustoleum paints, you can see them on the picture. Use ONLY flat/matte paint when possible, NEVER use gloss paint when planning on having a gloss finish over it…you're running into trouble. So flat white and white primer under it (not shown). Grey primer for most of the parts, charcoal grey for the helmet front and one of the square on the chest plate. I used airbrush Vallejo game color 72.012 scarlet red for the red parts. Flat black for all black parts. -Airbrush paints. For metallic parts, I used Vallejo aluminum (silver like parts) and dark aluminum (steel like parts- gun base coat). For gun top paint and weathering, I used the Vallejo model air black. I took a picture of the other stuff required to airbrush easily. - Clear coats. I used rustoleum satin finish for grey/black/red parts (finish is good enough for these. For the gloss white, I used high end SprayMax 2K clear glamor, more expensive but you get car finish quality. This is one area you don’t want to cheap on… so easy to ruin a part with runout and orange peel finish. This one does a perfect gloss with some practice. I used 3 cans for the armor. Finishing My technique for finishing the 3D print is the one most people will use (everyone has his own recipe, but this one I found is the most efficient and bringing you perfect finish with shortest effort… after doing a Sith trooper gloss armor from top to bottom, I have several hundred hours of finishing :). So you start by sandingthe raw print with 60 grit/200grit to remove all protruding plastic and bringing to only depressions on the surface. Then Bondo+acetone (3:1 ratio) with paint brush. Then sand down with 200 grit almost to plastic, then the depressions are all filled. Then Rustoleum filler primer, sand down with 400 grit. A second pass is normally needed for gloss sections. Then paint . For gloss sections, a quick 1000 grit+water to remove paint build ups , then clear coat. 3D modeling For the armor, I reviewed several sources and ended up procuring a few helmets design from vendors. I started with off with the Galactic Armory my without too much attention to details, but after printing the helmet, I realized it was not accurate as I would need for screen accuracy (see side by side pictures of the two printed helmets) I did use Big Fred Helmet as it was the most screen accurate, but modified some of the separate parts to make them screen accurate. For the Helmet, I printed all the helmet parts separately when required for screen accuracy and ease of printing with details. You will need separate parts printed for level 2 approval. below is GA in white and BF in grey So, I used ArmorSmith, 3Dbuilder, Blender, Solidworks to scale/ fit / create modified parts. Scaling is of course always necessary, not only to be comfortable, but also to maintain the screen relative reference. Armorsmith is a must for scaling, I did my sith trooper build without it and ended up redoing the armor more than 2x… worth the 30$ believe me. Below a snapshot of the parts on my avatar (I'm not that chubby, it’s the sizing result with the flight suit on me 😊 ) Jetpack design and adjustment/ fitting to the back armor The biggest issue I have seen on available 3D models is the jetpack, the details are all there, but proportions and fit are not screen accurate. Below is one of the 3D model available on the market fitted on the armor. The current 3D models do not hide the attachment mechanism, due to the curved armor back and the flat jetpack rear. Typical Mandalorian jetpack have a curve or staggering of the jetpack in some instances. In the screen reference, the jetpack has a visible recessed to hide/ embed the attachment points and bring the jetpack in close contact with the armor. A recessed area must be present to have the general screen accuracy. With this recess, this enables the back to be in close proximity as per the movie reference. Below is my redesigned version and better fit to armor. So to do this, I had to redo the jetpack 3D to include a recess portion, while maintaining the internal cavity for lighting. I have redrawn it completely from scratch to have a accurate and lightweight model (available Etsy milleniummaker) The jetpack should also be scaled so that the reactors do not exceed the bottom of the chest armor per reference and the top of the jetpack does not exceed the wearer’s top of collar armor. The width of the jetpack should be approximately the same size as the width of the chest armor.. So I scaled it properly to fit correctly, but this screws up with attachment points on the back, So I had to redo all of these anchors as well. I made new 3D models to be able to 3D print and be strong enough for trooping. I used 70% fill PETG for these attachments. On top of it, I didn’t want to pay a 100$ for the anchoring from JJ industries, so I made some custom ones, so then you can scale the armor easily. I painted those with dark aluminum finish. I printed the jetpack in one piece (except for all the grey and black parts that are separate components from screen reference (also way easier to paint). I added magnets on bottom reactor to be able to access easily the electronics. Top reactor is snug fit enough not requiring additional fixturing. For the top red light, I used transparent PETG. I designed it so that you are able to 3D print with clarity with 3-4 layers 100% density. Needed a lot of sanding down to a 600, then a clearcoat over the top surface. I left the interior raw printed and clearcoat to have the diffusion effect on the LEDs. Will continue later with other parts!
-
Here is the complete build thread from my armor which is now the CRL reference. Below are the images of the final build along with individual parts in high definition so you can capture the details. In the next threads below, I will explain how I did end up with this final result. I will also try to share the tips and tricks for you guys to make your life easier. I based all the design and parts on the reference document I have put together (you can find it in the reference section in my post). Here's the build vendors I used : - Boots from Crowprops - Leather gloves from Crowprops - Abs section made out of urethane foam rubber molded, per screen reference. I designed the mold and it is available on Etsy MillenniumMaker Etsy Link - Suit from Keeptrooping, tailored and internal elbow stitches removed per CRL requirement. - The hard armor is mostly parts I designed myself, as current vendors were not accurate enough to meet all screen accuracy to a CRL level and most importantly not designed for trooping). A few other parts are from Big Fred Custom (only vendor that was accurate/ very close). I have/will continue to place my designed parts on Etsy (MillenniumMaker Etsy Link ). more details in sections below. I do this mostly for fun so be patient to have 501st / CRL grade armor. I intend to have the full armor designed and offered in the upcoming weeks on Esty, PM me if you need them sooner. Soft goods made by my girlfriend (MW11271)- belt and holster, velcros, harness,...!) I have posted the build process of these parts in the following threads. I will show how everything was printed/ prepared, painted, assembled. Goal is to provide you info on how to build a suit that is designed by a guy who knows the pain of wearing the armor (my Sithtrooper is a though one to troop... ) Front top to bottom:
- 38 replies
-
- 12
-

-
For the general CRL info, I would propose a slightly different name to distinguish from the animated series, like Wookieepedia already describes: Description: Imperial armored commando, The Mandalorian Prefix: TK Detachment: First Imperial Stormtrooper Detachment Context: Star Wars the Mandalorian Season 3 Episode 23 & 24 Under the leadership of Moff Gideon, a new class of elite soldier has been trained and equipped with advanced weaponry. Highly trained in the use of multiple lethal weapons and equipped with beskar armor and Mandalorian weaponry, makes him a formidable adversary. For general construction notes, I would mention the following, as the armor can be made out of 3D printed, resin, vacuum formed parts. - All components should closely match the Imperial Armored Commando from the Mandalorian season 3 episodes 23 & 24. - All Armor is constructed from a rigid material such as PLA, PETG, ABS, fiberglass, plastic, resin, Sintra, vacuum-formed ABS, firm rubber, metal, or similar, unless specified otherwise in section below - Armor has the appearance of thickness and depth.
-
Thanks for starting the thread. Here are some proposal to adjust the titles: - Spats and greaves armor are a single piece for this armor, so they should be combined - Shoulder winglets are parts of the chest armor, so they probably should be combined As for the helmet, here is a proposal for the description: Level 1 - Lens is smoky gray or black in color. The lens must be sufficiently dark enough to obscure the costumer's eyes - Two black aerators are present on each mandible end, which are dark grey color - four recessed tube stripes are present on each side of the mandibles - A diamond shape black greeblie is present in the recessed mouth section between aerators - The nose section is black and separates the cheek plates. The nose section has a series of stripes and a single one that links the recess presents on each cheek - The upper cheek is white and has a recess line running across the nose - The lower cheek is recessed and has two sections that forms a V-shape. The upper portion is black and the lower portion is dark grey. - The brow is black, protrudes from the dome and extend to the ear caps - The top of the helmet is dome shaped and white color - A medium grey rectangular section runs along on each side of the dome and separate the front and the rear sections. - A medium grey ear cap protrudes from the main rectangular section and contain a gloss white clip greeblie. - The rear section is medium grey, starts below the dome shape and has a protruding band that joins the two middle rectangular sections. There is trapezoidal shape that protrudes and ends at the lower corner end of the middle rectangular section. - A white strap is attached to the rear section of the helmet. It has teeth and a flat section - Temple section on each side is black and protrudes from the dome - There is a white collar around the bottom of the helmet that hides the wearer’s head Level two - Protruding ear section is visibly a separate piece - Clip greeblies and strap are visibly separate pieces - Aerators and diamond greeblie are visibly separate pieces - The collar has vent oblong holes on the rear section
-
@revlimiter thanks for the nice feedback! Yes I made them available and asked that they are added to the vendor list. The STL or 3D printed version is available on Esty in the Millenniummaker shop. https://www.etsy.com/ca/shop/MillenniumMaker?ref=shop_sugg_market
-
@gmrhodes13 Sorry, my first time working to post images on a BB for a long time, there are an infinite numbers of ways to post. Now fixed!
-
Here's the pics of the finished blaster rifle! from 3D print, sanding/bondo/primer/black basecoat/dark aluminum airbrush / black airbrush and scratching/weathering. The few metallic parts are graphite finished. Only M38 scope is brass finished as original part wear out coloring. I also took a picture with my current Sith trooper armor, while the other one is far from finished to give a feel of the size and handling. [url=https://ibb.co/yBNHrSn][/url] [url=https://ibb.co/yBNHrSn][/url] [url=https://ibb.co/d6RGjjk][/url] [url=https://ibb.co/KN4ccGK][/url] [url=https://ibb.co/VHpMqZ5][/url]
-
Thanks Wompet, It is a bit similar, but many many differences. The mountain trooper gun refence is here on the CRL: https://databank.501st.com/databank/File:MT_blaster.png You can see from reference pictures in this thread above that, many things are not similar. But stock is a PDW style with two side rods, no side mag, front rail under the grip, metallic disk separating barrel from receiver, not a sterling ejector (longer and thinner), The M38 scope is on a submount, no hole in the front barrel, but 4 rows of grips,etc...
-
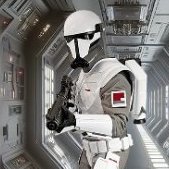
Vendors list for Imperial Commando costume parts & accesories
Sithtrooper02 replied to Sly11's topic in Quick find resources
Hi, As there were numerous ask for the Imperial Commando Rifle blaster I just created, I added both the STL files and 3D printed rifle on my Etsy page. Here are the links: 3D files from MillenniumMaker: https://www.etsy.com/ca/listing/1667406690/imperial-commando-rifle-blaster-stl?fbclid=IwAR3pJUWGN9WspwZdBYyYxyuE16qDhUkdkO6oAf8Rrt-Nw_0jByKpTGubu1M printed Rifle from MillenniumMaker: https://www.etsy.com/ca/listing/1666162956/imperial-commando-rifle-blaster-diy-kit?fbclid=IwAR1TKrSZVb1fPuHGEWAZjnaOI2lHUg9G-kbzo_vNCStcCqjgnfDuXG_1DO8 -

Vendors list for Imperial Commando costume parts & accesories
Sithtrooper02 replied to Sly11's topic in Quick find resources
Hi, Here's the latest I have looked at: Crowprops now has the gloves available. https://crowprops.bigcartel.com/product/axe-woves-gloves Belt and holster: Sheev's Emporium has both available : https://www.facebook.com/sheevsemporium/posts/pfbid02DkL8VgmCE4FqG6Kf9BwXsuw7XGDFnrGvLpqgFn1rH7rBSeHrPL9aFFRPfJCFBSLvl -
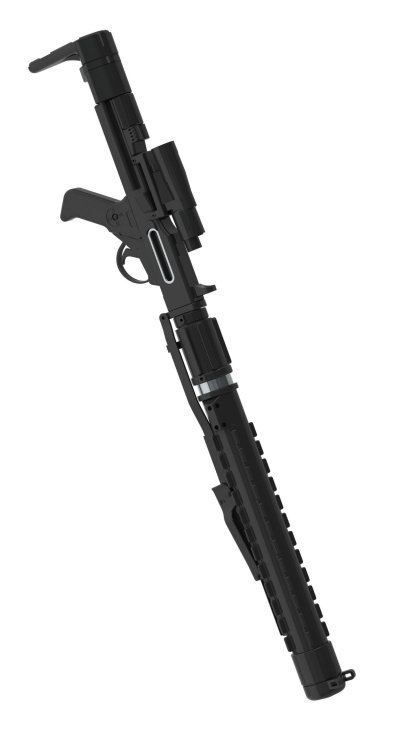
Here is the first version of the design. It's a few days from being completed to be ready for 3D printing. I have taken a snapshot with the same orientation as the highest definition picture taken in the movie. Comments/ corrections required would be welcome I can only post 1 picture here ( all thread files posted need to be below 500kb ?!?), so here's the link for a google drive containing the other views. https://drive.google.com/drive/folders/1cqZ70bAP41Jh9NEoOWGJuqDjssh0HBSf?usp=sharing
-
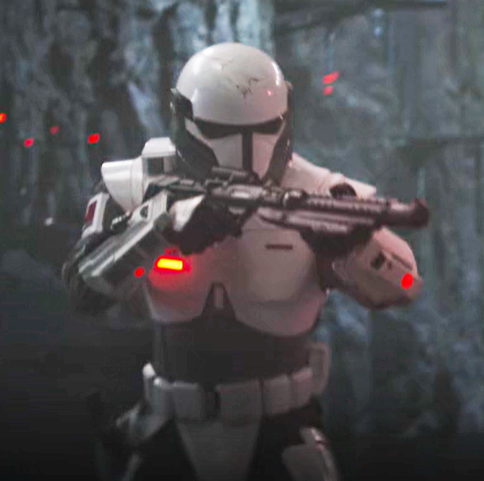
Hi, Since I'm doing my build for the imperial commando, I wanted to have a rifle and decided to design it, as none is available on the web. I gathered the pictures from the Madolorian S3 E17/E18 and here are the additional pictures I used on top of the one above in the thread to design the rifle.
-
Hi, I have done a summary of the research I have found and gathered through various sources, including the images above a en divided them by armor sections. if DrMatt you can share your link again (it’s now broken ), that would be very good. here is the link to the document I have made, way too many pictures and sections.Hope this will help defining key elements of the CRL https://docs.google.com/file/d/1kyFo-slANYcMenbP4R1iwSTxfOJ2AJoJ/edit?usp=docslist_api&filetype=msword


