

DarthChridan
-
Posts
779 -
Joined
-
Last visited
Content Type
Profiles
Forums
Gallery
Articles
Media Demo
Posts posted by DarthChridan
-
-
Update #20 - it’s been a while…
…and I felt like doing an update again after reading your last comments. Thanks for these kind words, guys!
As stated the last time, the missing work is: white letters in the scope, front sight and power cylinders. To be honest: I totally underestimated the last two of them and have to correct the completeness of the last update to something about 80%
 .
.However, my son (unknowingly) helped me with a little piece of white crayon for the scope letters.
If he knew what it has been used for, he would go crazy (yes, he is a big Star Wars fan
 ). The letters aren’t filled 100% to make it look a bit old and used.
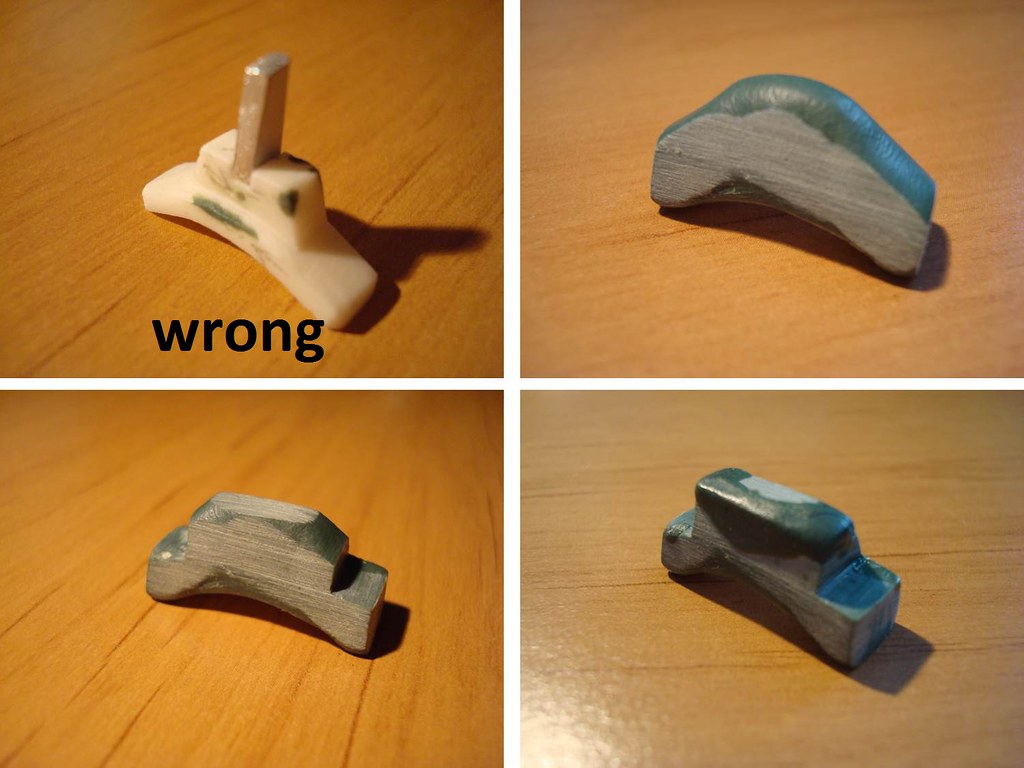
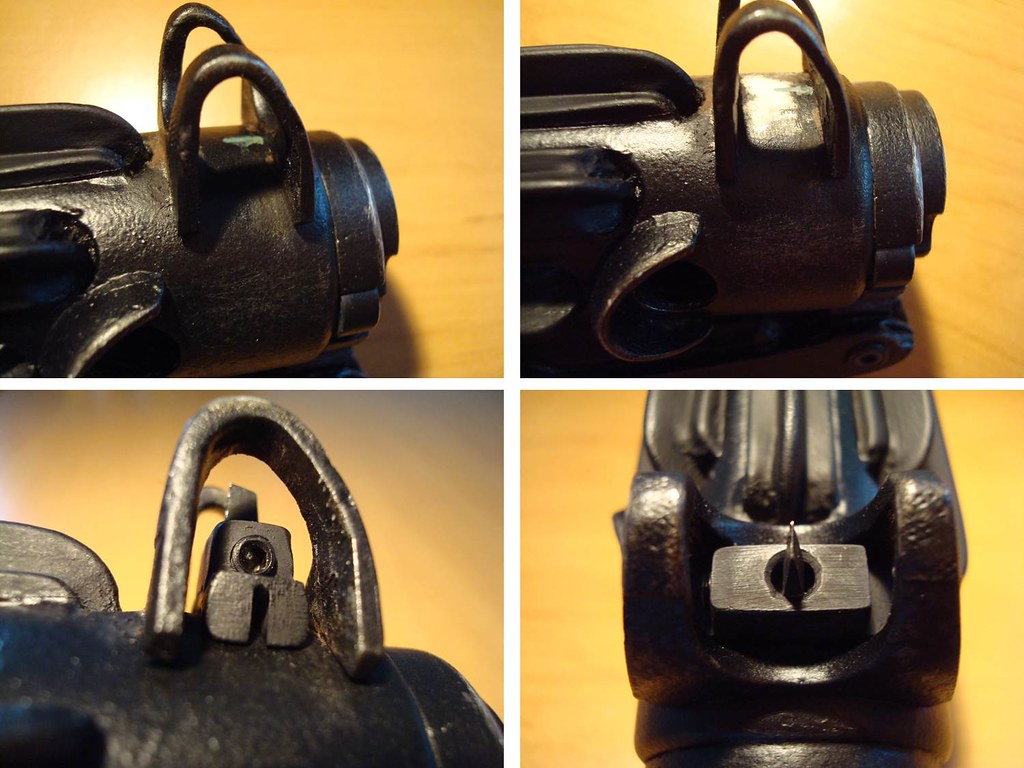
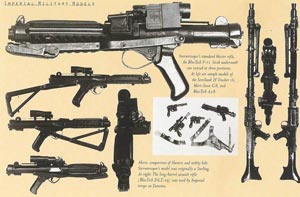
When I started work on the front sight (months ago) the ‘pin holder’ and ‘protection cover’ got separated as seen in a reference picture.
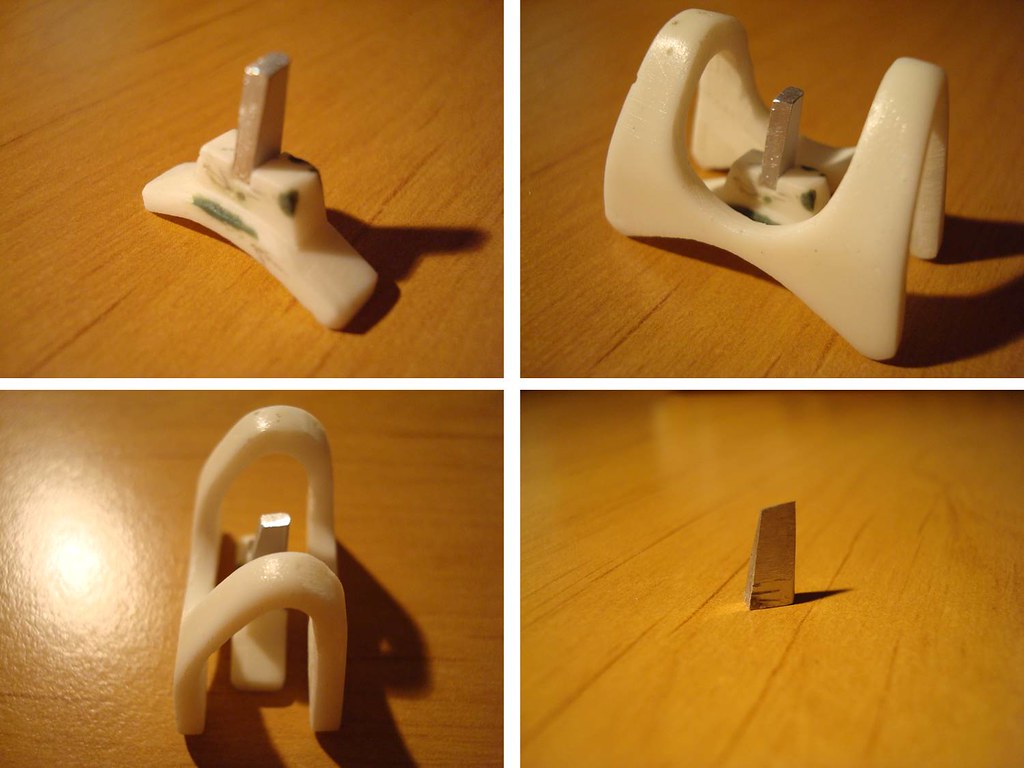
A pin was made with the Dremel from aluminum and later got slightly reshaped. Isn’t it strange to see bright resin again at this stage of the build?!
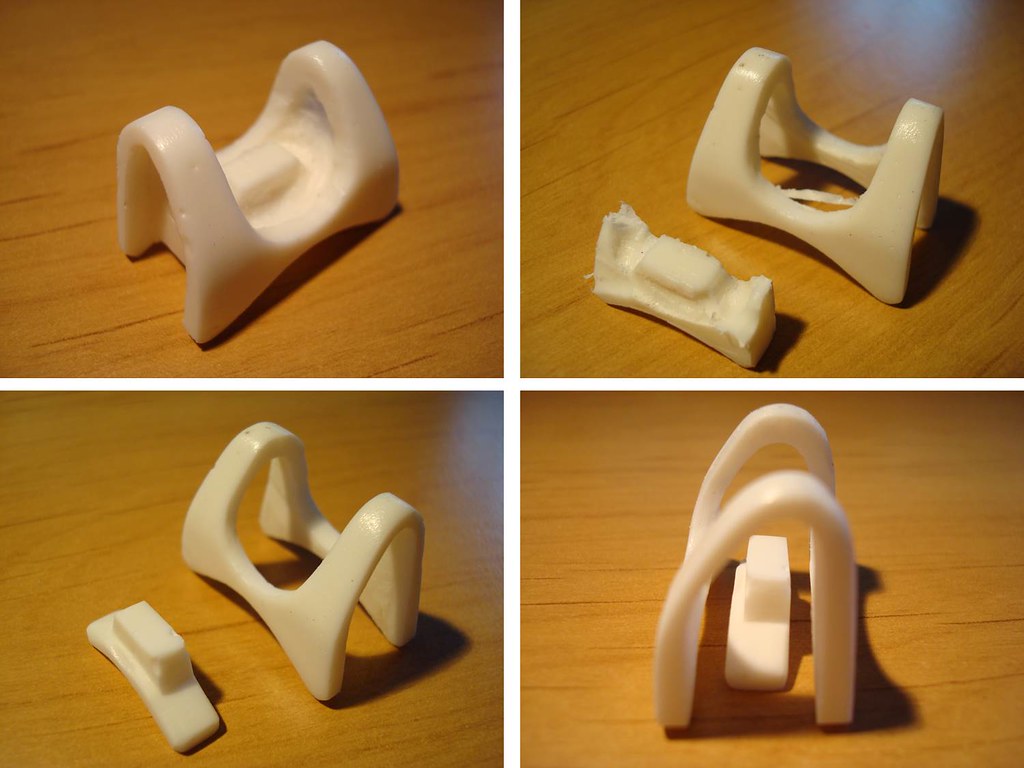
Then I noticed it was a big mistake not to frequently check the reference pictures, because I had removed too much resin and now it was totally wrong!
As the main build had to continue, I decided to move on just with the protection cover and to later add the missing pin (after I found a way to correct this error).
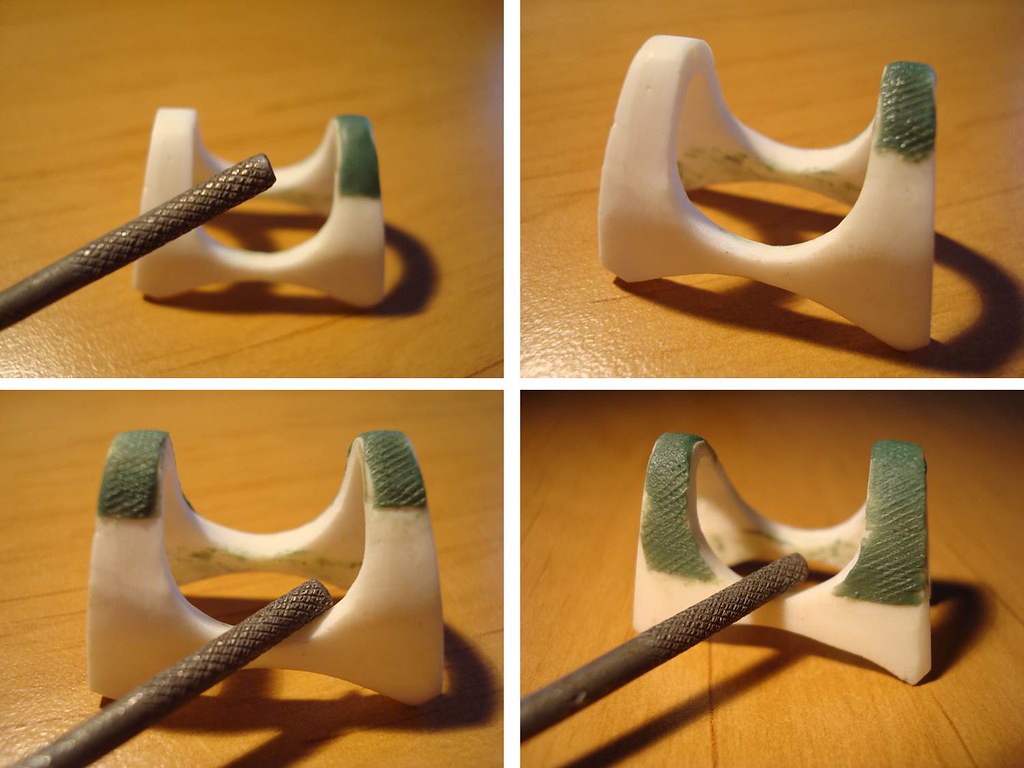
A thin layer of ‘green stuff’ was used to bring some pattern from a small file onto the protection cover. This was already visible since update #13 (page 5) but got partially covered by the paint layers.
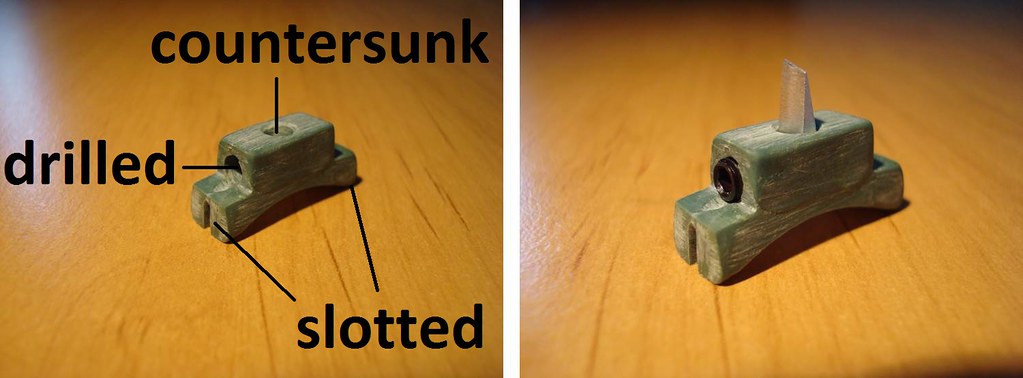
Now the ‘pin holder’ needed intense corrections. Some kind of adaption piece is placed on the round receiver barrel. A rectangular block sits on top of it, to receive the pin.
I saw no other chance than to add ‘green stuff’ again to bring it in shape step by step…
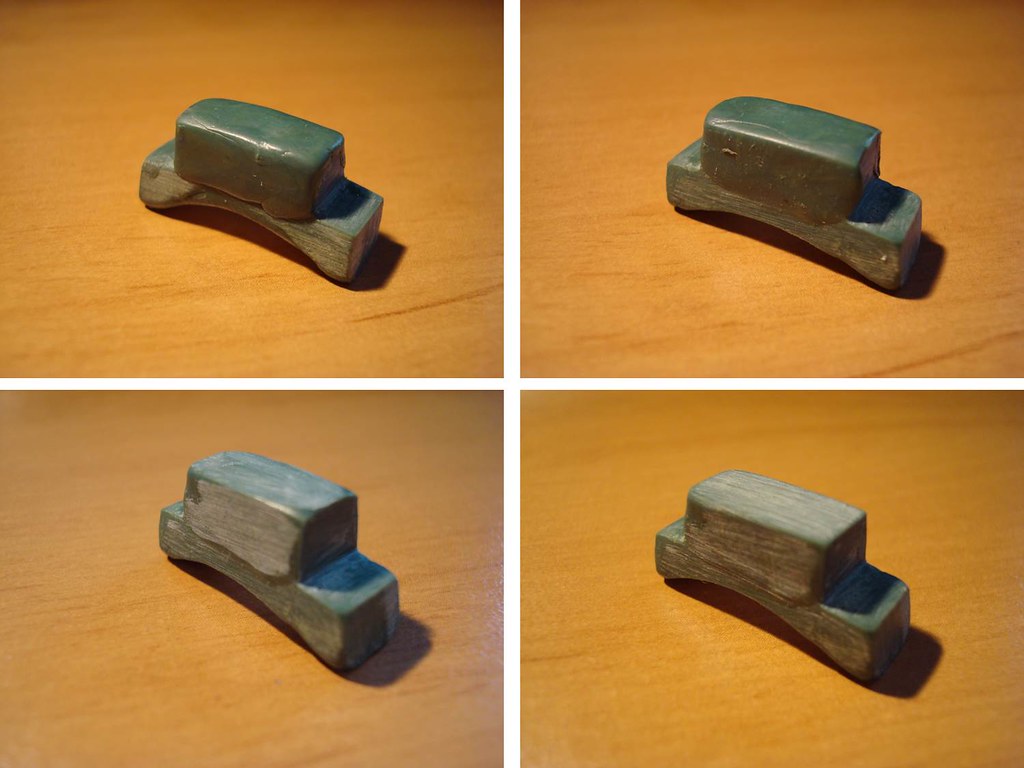
On the right side (left on my picture) there is a small grub screw, which obviously makes the pin replaceable. Found one which fitted good and installed it. Looks real but its very short, so it doesn’t reach the pin.
IMHO the front sight should look something like this, but that doesn’t seem to be the common opinion, as in most builds the front sight is left in one piece. Has this ever been done before?
Then I filled the little center gap on the barrel, removed a bit of the paint (for better adhesion) and glued the parts together.
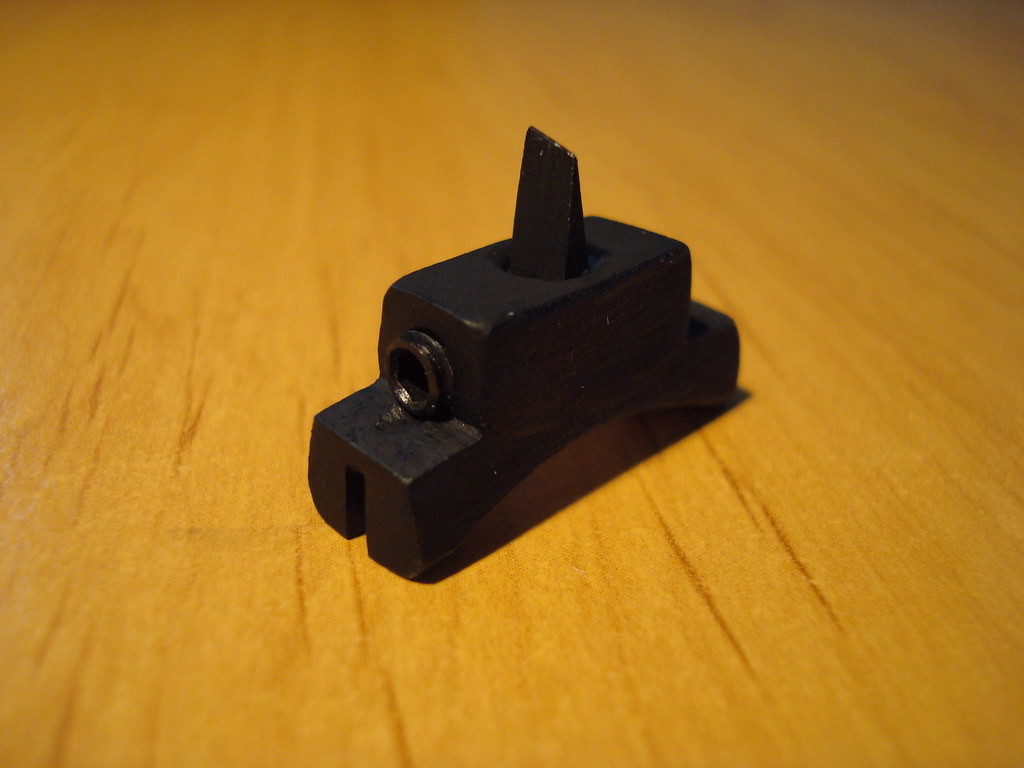
The last picture clearly shows there are two separate parts, the side slots, the screw and the pin.

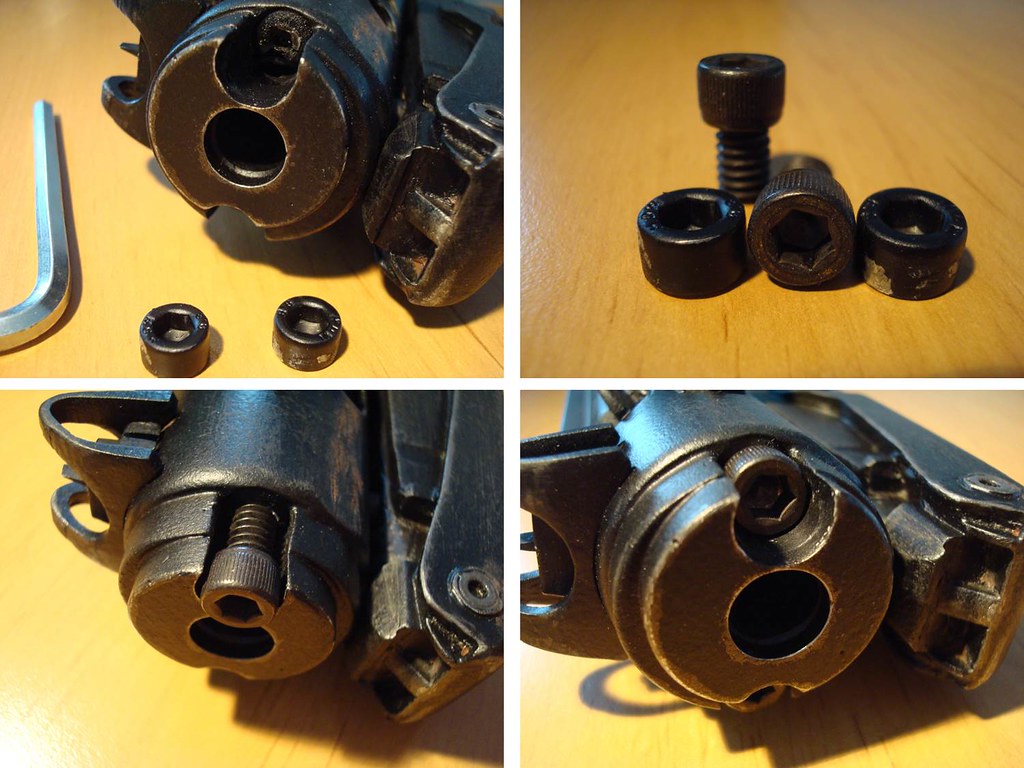
During the last weeks I managed to find more accurate hex screws for the muzzle and replaced the existing M6 with real 1/4"-20. The new ones remained in original size.
Alright, that’s it for today already.
Now I have to start this tricky power cylinder issue – and I already did some mistakes on the resin part
 . Next update (hopefully this year) will show, if and how I solved these…
As always, please feel free to leave comments / critics.
Awesome man...just awesome...great attention to the details....really great. Now my E-11 is a booger against yours


-
Great work, Tino....and very inspiring

-
Completely unrelated but we have the same computer mouse
 .
.And the blaster looks really fantastic! And btw, who said you need power cylinders and hengstler to be ANH accurate?

And of course, the Hero Luke's blaster

Lol....yap...the good old Logitech MX518 for the good old gamer times...I like this mouse
 For this blaster is missing the breaking point of the hengstler counter....but I don't need this detail, because in the near future there will be add a hengstler. But maybe...I let it soThanks for your kind words.
REALLY NICE!!! Since it seems to be a topic of recent interest for many, I'll ask how you did the "textured" paint?
With 'Hammerite paint:--->>
At first I have paint the whole main body black...after the desiccation I have dap with 'Zewa kitchen roll paper' the black hammer blow on the main body over the whole surface. Then I have add the brown paint on the still wet surface of the black hammer blow paint. This was is whole secret of this awesome surface. My buddy Felice here in this forum is the 'inventor' of this awesome surface...it looks really real like the surface of a sterling submachine gun
Here's the that I have used--->>

-
Aloha...
I've updated my ANH E-11 blaster...there was a few things I didn't like it....especially the magazine, firing pin/ ejector port and the surface of the main tube.
Currently the blaster is an ANH Hero E-11...nevertheless a hengstler and the power cylinder will be added in the near future.
The paint is like my 'Tunisian E-11 Blaster'


And here is the Hero Blaster and the Bapty one side by side--->>

Cheers....
-
Aha...ok...for a short time I was a bit confused
-
Hi Markus....
Welcome aboard, mate

You said, you're stanioned in germany....what does this mean? You're not a german?!?...maybe an american, or what!??!
However...have fun here

Cheers...
-
You're a beast!!!!
-
'Kindergartenprojekt'....loooool
...Soren...you're funny
But you're right...this build is really impressive -
I vote for your paper dabbed. Brilliant!!
Dido--->>
You know my version


-
Thank you, guys
-
Hope it works also for you...
-
Thank you for your kind words, Tino.
You will laughing...I was on the search for the 'perfect' surface too....I've tried everything, also hammer blow paint(from thespray can)...nothing was good for me. Until a good friend of me, Felice, has found a really great technique to realize this awesome surface. It's really simple
But I have not forget to add the paint chapter...it's Felice' "invention" and I didn't want to reap the laurels about this technique
Use the hammer blow from a normal paint container. At first you paint the whole main body black...after the desiccation you dap with 'Zewa kitchen roll paper' the black hammer blow on the main body over the whole surface. Then you add the brown paint on the still wet surface of the black hammer blow paint. This was the whole secret of this awesome surface.
This was my paint--->>
-
Thx Germain for your input. As far as I know, there wasn't an interlocksystem in the folding stock at the tunisian version. As you know, the company 'Bapty' has modified the sterlings for the tunisian movie sets. This place that you've marked is rather the shadow of the upper side....not the interlocksystem. Trust me, I have long considered and compared if this an interlocksystem
About the scope...well, it was a real scope...even the hengstler...it was all of them original parts. So, hence the letters was white.
But you look out precisely on it...I like it
-
Awesome work so far, Tino...
I see you make a new bolt...great attention to the details
-
Aloha white guys....
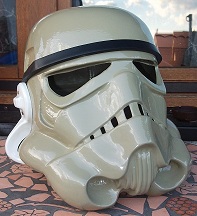
some time ago, I've started with my build of the screen used tunisian E-11 blaster. This was my model/example--->>
My goal was, that I build/ make the details as close as possible.
Well, it's finished except for the power cylinder.
Here's my WIP topic--->>
http://forum.mepd.net/index.php?showtopic=12624
...and here is the previous result--->>


Cheers....
-
Really great assembling, Tino
..and great moddings of the parts as well , especially of the folding stock
...really well done ...oh and hey, the magazine clip is really close to the original.I'm looking forward to see your end result.
But all in all, the only thing that I don't like from the doopydoos blaster is the magazine. It's to small opposite of the original magazine...look at this pic, than you can see what I mean--->>


I got another resin part of the magazine with better details of the original--->>


-
Well Vern...I think it's more about the optics of the surface of the blaster to replicate the browning of the sterling.....not the color per se.
-
This looks really damn close
 ....really interesting. Thanks for sharing, Steve.
 -
-
-
Good morning, Jason.
Welcome aboard, mate....
About the fiberglass armour...well, this stuff is much more heavier than an ABS armour...especially for trooping. I think a fiberglass armour is rather for a display. But like Andy wrote, post some pics of your armour and maybe we find a solution.Cheers...
-
Hey whiteys....
have a good slide into the new year....and stay clean
-
There is only one chance to bring this in experience....ask George Lucas
.....everything else is, as Stefan wrote, only conjecture....
-
Hey german mate...
looks interesting
...enjoy your build, Alex But why you get your parts step by step?


TK-29119 Requesting ESB Stunt Centurion Status[TM][131]
in Request Centurion Status
Posted · Edited by DarthChridan
Hey Alex....
really well done ......'mate'
  ...now I'm looking forward to our team
Congratulation for the 400th EIB-Status