-
Posts
12,619 -
Joined
-
Last visited
-
Days Won
317
Content Type
Profiles
Forums
Gallery
Articles
Media Demo
Everything posted by justjoseph63
-

revlimiter's R1/Remnant/??? Fiberglass TK Build
justjoseph63 replied to revlimiter's topic in Remnant Build threads
SUPER nice job on that weapon, Adam! "And lastly... a glimpse into my disorder. How does this happen you might ask? Gradually. It happens gradually". Amen, brother. It becomes an obsession. -
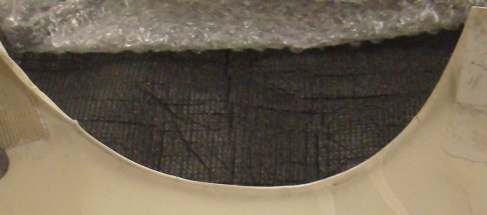
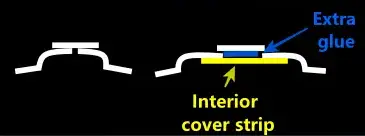
Another option is to use a wide interior cover strip. The first image below shows a pretty much standard placement, in this example used over one of the raised areas, with the second one showing an example for those who need a bit more room but don't want a wide exterior strip in order to cover the gap. After the glue on the interior strip is set, you can glue the exterior one on top. Hint: Use extra glue as inside the space it will have as shown below.
-
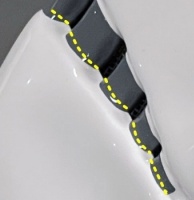
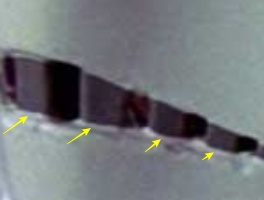
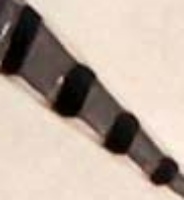
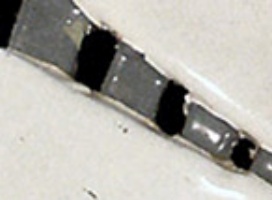
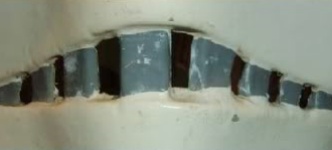
Hi Caleb! Truly spectacular work on that armor, sir, but before we can move along we need a favor. As per the CRL for Basic approval the "Frown is painted gray and does not leave the teeth area". We just need you to grab some toothpicks, a few cotton swabs and some (non acetone) paint remover and dial back the bottoms a bit. Should take all of 15-20 minutes! Reference images (Note unpainted gaps at the bottom). Once you get this done, please post up a few pics and we can get that well-deserved EI badge under your name!
-
Can I say for the record that this is one of the most anticipated 501st basic approvals in FISD history? You did it, Caleb, and you did it right. DANG I'm proud of ya'! A hearty "Welcome to the ranks, brother". Now that you have your official TK # it's time to get out with the GA. Garrison, show off that spectacular build and put some smiles on faces! I'm in north Florida so I just may see you on a troop at some point soon.
-
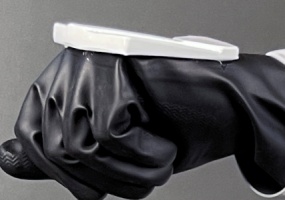
OK, here are my personal views.. First, in looking at these photos I would have no issues passing this at Centurion. Heck, if every pre-approval looked this sharp we D.O.s would be out of a job, lol! Although technically correct, one thing that jumped out at me was the size of your rubber gloves. If you find them comfortable that's awesome, but I myself prefer them to be a little more form-fitting which gives me a bit more dexterity. I have those available in smaller sizes, and if interested just shoot me a PM and I'll send you a pair (no charge). Now, as for the thigh ammo pack being raised that is 100% your GMLs call. However... I have passed many a Centurion showing part of the lower thigh ridge.. As a matter of fact, in looing at the reference image below only one is showing it otherwise! You nailed it on so many levels, Caleb. It's always heartening to see when folks take their time to "do it right" right out of the gate as you have. Your hard work and attention to detail have paid off in spades, sir, and for that my bucket is off to you!
-
Way to go, brother, and well deserved!
-
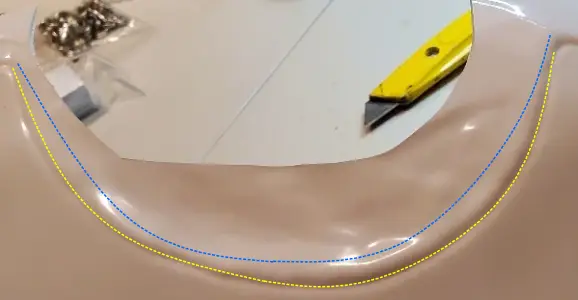
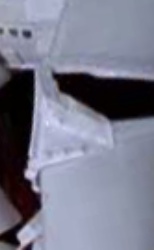
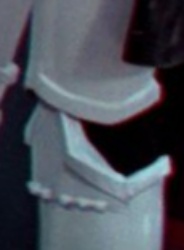
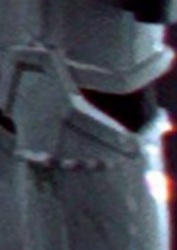
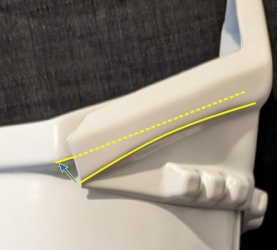
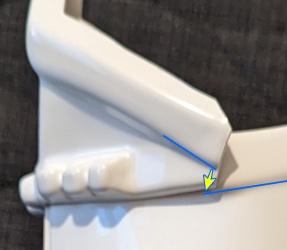
For the neck opening, I would trim to about where the blue line is. You can use a razor knife to score and snap it or use tin snips/ABS scissors. I would then use a Dremel to trim down to the yellow line, as you have more control. You should have a some return edge in that area (see reference pic) for strength and to prevent cracks.
-
Another thing to think about is the cost. When I was at WDW a few years ago the going rate for a fully built set of First Order armor was $6,700.00 (plus about $450. tax). It was not custom fit so probably not 501st approvable right out of the box and came with a no-returns policy. Building a set yourself can be quite a task, but we are here to help! Not only will it be custom tailored, you can also save yourself at least 5 or 6 thousand dollars.
-
I wouldn't worry about it, Chris. As long as the tops line up you are in good shape, especially since the right side lines up. Besides, your ABS / canvas belts, drop box and holster should pretty much cover that entire area, but if not, don't sweat it. GREAT start to your build thread, btw I have a thread here which will help, but keep those questions and photos rolling in!
-
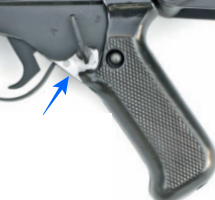
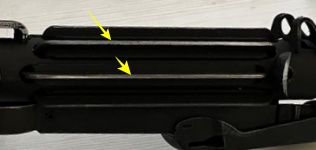
Glen is spot-on, Alan. The interior parts of the mechanism were of course metal, and the trigger guard plate (pic 2) and selector switch were normally painted black, but the interior assembly (pic 3) was not and the base metal could be seen (pic 4), so your weathering there is fine. The grip and T-tracks were synthetic (plastic) and although they can have scratches (like the one in the first pic) any weathering should not have a metallic appearance, so what you have is ideal. Note how shiny the grip is as compared to the matte finish of the trigger guard. Not sure how accurate you want to get, lol, but the M19 scopes were made of brass. No worries at any level of approval if you want to keep the silver, just a heads-up from an old guy with OCD. Keep up the great work!
-

ANH Stunt "fitting/adjustment" thread (AP)
justjoseph63 replied to BAZINGA's topic in ANH (Stunt and Hero)
-

New to armor and would like help in Arizona.
justjoseph63 replied to Dscollins23's topic in ANH (Stunt and Hero)
Welcome to the FISD, David! There are a LOT of build threads that you can study here, but can I ask who the maker of your armor is? The reason is that each one has their own little nuances, and that way we can more precisely direct you to ones that will help you the best. Where to begin. Hmmm. A lot of folks start with something simple like the biceps then work their way up to the helmet. As Glen mentioned, starting your own build thread will help immensely. You can ask a million questions (which we will gladly answer) but posting photos will be the most important part. I have a link here which will help with that. We do have an Imperial Attaché named Eric @GoofTrooper who lives in the Phoenix area and may be able to help on a local level. You can PM him via his profile here. Be patient, though. Just remember to take... your... time on your build. We are here to help, so never be shy about hitting us up for information or assistance. -
Thanks for the detail photos, Nicholas! Unfortunately we have one last item to add to your list. As per the CRL for Level 2, the "Sniper knee plate must be aligned with the ridges on the shin". Were there misaligned ridges in the film? You bet (see red outlined reference pic), but as most were aligned this is the reason it's listed in the CRL as a requirement. Can this be achieved with your armor? Absolutely! The last 2 photos below show others who have done a fantastic job with their AP kits. Hopefully you used E-6000 for attaching them. If so, it will require some of your time but will be well worth the effort and is not as difficult as you may think. You are more than welcome (and encouraged) to contact me if I can help, but hopefully Adam @revlimiter and Gerald @Doggydoc can provide some better insight as they have mastered it. Don't give up, brother. You are SO close..
-
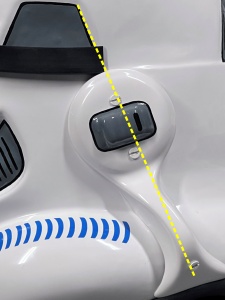
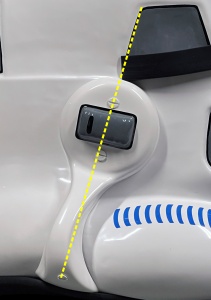
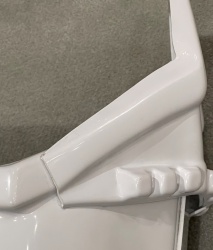
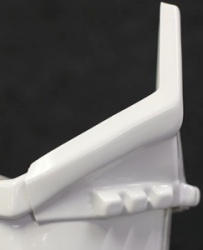
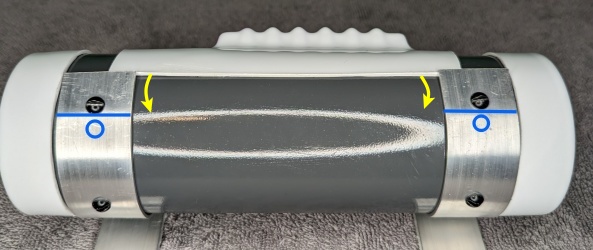
Hi Nicholas, and thanks for your submission for Expert Infantry! Before we can get started and get that badge under your name we need a few tweaks, but in seeing how well you built that armor they should be pretty easy! The first two are actually requirements for Basic approval: As per the CRL "The white control panel raised rib pad faces the rear..." and yours is facing more toward the top. Reference images Hopefully the clips are not glued on, but to fix this what I would suggest is to remove the screws, cut off the ends of the clips, rotate the plate down, re-drill the holes near the ends and then re-attach the screws. Should take less than 15 minutes! "Frown is gray and does not leave the teeth area". This is a common issue we see a lot, and actually not that hard to take care of. You just need some (non acetone) paint remover, a few toothpicks, some cotton swabs and a paper towel or two. If you have any questions, feel free to ask! Reference images For Level 2 you will need to add some white paint around the rim of your Hovi tip. "...the rim of the mic and the inside are white or painted white". It doesn't have to be a heavy line, and should take all of 3 minutes. EASY! Reference images Last up.. Can you post a few more photos showing different angles of your sniper knee plate connection? Thanks! I have every faith that you can take care of these items, but if you have any questions or concerns please feel free to contact one of us on the D.O. staff and we are ready to help. Looking forward to seeing the new images so that we can get you processed as the newest EI in the Florida Garrison!
-
That's the spirit! To paraphrase a tagline from Home Depot, "You can do it, we can will help"! The one thing to remember above all is that you should never, ever be shy about asking for advice. Your questions are just as important as our answers.
-
Congrats on your BBB day, Alan.. the kit looks awesome! Once you've suited up I would suggest taking some pics and submitting them in our "Pre-Approval" thread (info. link here). This way we can give you any pointers for when you get ready to apply for Basic 501st approval. As for the photos you will need, I would advise taking a look at some examples of the required ones for EI (link here). It will also help to have those example pics nearby for reference when taking your photos. The size of the photos cannot be "too big". Larger, detailed pics will help, and there is no limit to how many you can/should post. The more the merrier! Blaster looks great as well! Although blasters are not required for Basic approval I noticed that it has the M19 style scope instead of the more common M38. Not to worry, though, it is 100% approvable at all levels! It may be just a reflection in the photo, but it looks as if the T-tracks have some "weathering" (silver paint). If so, not a big deal, but if you are (hopefully) aiming for Expert Infantry approval they will need to be solid black (the originals were made of plastic) so just a bit of black spray paint will do the trick. Looking forward to seeing your Pre-approval, and if you have any questions or issues just ask!
-
Welcome to the home of shiny white armor, Bob! Building a set of armor can be a challenge (but not as much as being as educator, lol) and we are here to help in any way we can. Research will be your best friend, but what I would suggest at this point is to start your own build thread here. This way you can ask as many questions as you would like as well as post up lots of photos. Looking forward to following your TK journey!
-

Fixing my old sand trooper for deployment
justjoseph63 replied to Gorm's topic in New Member Introductions
The link that Glen provided is for The Mos Eisley Police Department (MEPD). Even though the Sandtrooper's basic armor style is almost identical to a regular Stormtrooper, they have their own unique requirements for 501st approval which are different than those we use and have their own Detachment. To give you a better idea, you can check out the CRL (Costume Reference Library) for approval for Sandies using this link. We do have quite a few members here that are also Sandies that may be able to help, but the MEPD is where you would sign up to get more information. Best of luck on your journey to joining the 501st!! -

ANH Stunt "fitting/adjustment" thread (AP)
justjoseph63 replied to BAZINGA's topic in ANH (Stunt and Hero)
I would hold off on gluing the Velcro onto either your boot(s) or armor. The industrial type would probably stay adhered to your armor, but not sure about the boots. Over time (and depending how much you troop) it can lose it's connective properties, so if it's glued on it would be much harder to replace. As far as the size piece you should use, I'll let someone who uses that method give you a more precise answer. Once you find the right size, I would keep a couple of extra pieces the same size in your armor bin as a backup. You can't be too prepared!


.webp.b69ec64d7b7b8c1b172c8052d4f89319.webp)
