-
Posts
4,043 -
Joined
-
Last visited
-
Days Won
23
Content Type
Profiles
Forums
Gallery
Articles
Media Demo
Everything posted by gazmosis
-
Fuumantroop's AM armor build
gazmosis replied to fuumantroop's topic in Build Threads Requireing Maintenance
Watch that line on the ear bars. The outline should be a pinstripe around the gray. Not too wide. I believe you could trim down the ear thickness just a little more. The round part is still a little thick. If you take that down another couple millimeters, your gap,at the cheeks will go away. -
Yes it will. Because the crayon is wax, a damp cloth will not have an effect. Just some firm pressure on the cloth will do the trick. Unless you go at the wax with something sharp,and scratch your scope, it's really hard to mess this up.
-
Which TK are you going for? You have an ESB holster there which just loops around the belt worn on the right side. If you are going for ANH, your holster to belt straps will need to be converted to single strap brown or black leather straps then mounted to the canvas belt by snaps, pop rivets, or Chicago screws in the location similar to the diagram provided by Eric above.
-

Hitman's RMQ Build
gazmosis replied to thechosenhitman's topic in Build Threads Requireing Maintenance
I would still dampen a brush with thinner and smooth out some of those gray paint areas so it doesn;t look so jagged. IT will make for a much cleaner look. Nice job on the build. -
That all depends on how much work you are willing to do and what version of the armor you want to end up with. ROTJ armor has MANY details that differ from the ANH suits from the helmet all the way down to the boots. If the armor was originally targeted towards ANH, I'd stick with that.
-
WHOA Tim!!! I agree that this huge number would be cool to achieve, but making sure that peoples' armor is looking good is the number one concern. More and more people are looking straight to Centurion. EIB ends up being part of the process. Rushing your build to get to a number is not what I suggest. IT takes more time to fix a mistake than to do it once...and do it right the first time. I do love the enthusiasm , though.
-
The primer pen pack that Mathias suggested should be all you need. My handplates are silicone which is something the NOTHING except silicone should stick to and that worked. It worked so well that when I needed to change my gloves I had to cut the rubber glove around the handplate because I couldn;'t get it off.
-
You can also heat the crayon in a small vessel and drip it into the lettering. It will get into all the little crevices and cool instantly. I wouldn;t use a knife to scrap it. you might hit your paint and scratch it. I used a credit card or similar material to GENTLYscrape at the CRAYON ONLY. If you scrape too much too quickly, you may very well pull it all out of the lettering. Once you have sheered off enough of the crayon, you can polish the rest off with a t-shirt and some pressure. I like Andy's idea of leaving a little out for weathering and realism/
-

TK-42430 requesting ANH Stunt EIB status [NE][402]
gazmosis replied to maxsteele's topic in Request Expert Infantry Status
Hey Ron! You finally made it! Your long journey has brought you to your EIB application! Although everyone has been watching your build (except local news) let's take a look at it here!!! CRL and EIB Application Requirements: All required submission photos (and then some) have been posted. Congratulations on a great set of very well built armor which has all the required elements to qualify for EIB!! With that I would like to welcome you to Expert Infantry!! Other-Armor Fit/ Assembly: This is the section where myself and your fellow troopers provide suggestions to improve the overall look of your armor. These suggestions will not affect your application outcome. I wouldn't pull too much of your hair out regarding the bit of extra glove you have showing near the wrist. No two humans are built the same; neither are the armor kits. What the concern I am sure you were focused around was not having too much gap at the elbow. You did it right. If this means a little more glove shows....so be it. It seems like your second entry shows you have solved that nicely. Most will tell you that with gloves AND hand guards on, your hand won't fit through the wrist opening. It's a pain but it's what us troopers need to endure. Anyway, nice upgrade pics of your painted rivets on the ab and thigh pack. It just blends better and is needed should you shoot for Centurion. I wonder if it would be an idea to trim a little off the outer most edge of your sniper plate. It looks like this might dig into the side of your knee or get snagged. Trust me, you don;t want your sniper plate getting snagged! Other than that, I really don;t have much to say. Well done! Centurion Suggestions: Honestly, I was surprised to see the few things you left out of your build that would instantly put you into Centurion land. As a few have already pointed out: Your cod rivet, your butt plate crotch area male snaps, rubber/flexible handplates, upper right side ab plate male snap are all things that are needed to the base armor. Next is something I might get flack for because it is something that actually would affect basic approval. The overall length of the thermal detonator should come in at between 7 1/4- 7 1/2 inches. Your looks long to me. Then I saw the pic of it on your work mat. If the squares on your work mat are 1 inch increments, that puts your detonator at around 8 inches. Your control panel looks correct. It's the space between the end caps and the control panel that looks big to me. Typically, this gap should be in the 1/2 inch range maybe a LITTLE more but not much. Yours looks more like an inch. I know you want to make the tops of those clips flat, too! Congratulations again, Sir!!! -

Need some shoulder/bicep help (11 pics)
gazmosis replied to BigBadaBoom's topic in Build Threads Requireing Maintenance
Definitely. Take most if not all the return edge off the top of them. This will allow you to size them down to fit you better. Have someone help you to squeeze the parts around your arm when you have the halves separated. It is hard to do by yourself. Squeeze them together until snug then let off just a tad until comfortable. Flex your gun to make sure it's not too tight. Mark both sides at the overlap, cut and re-glue -
Just curious.....may I ask what the boots are being painted for???
-
There are many photo references here and a butt ton of pics with a regular internet search. Building one is always a challenge, but keep your eye open for Sci-Fire (Hyperfirm) . They pop up with fair regularity with ones for sale and if DLT-19s aren't on sale when they post, at least you can contact them to find out when the next run will be
-
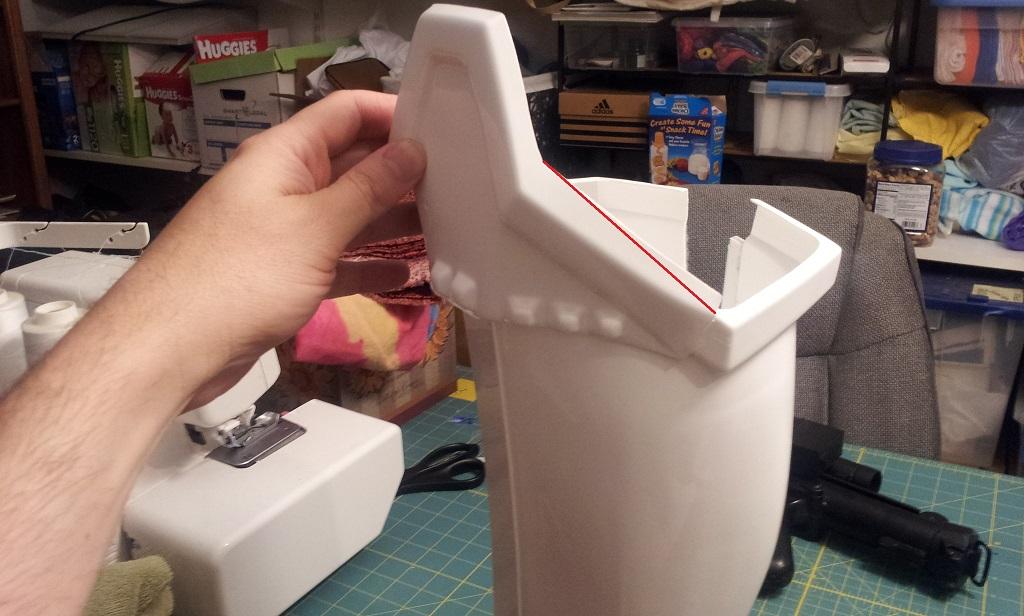
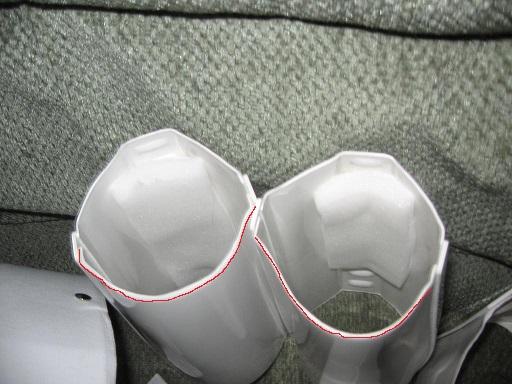
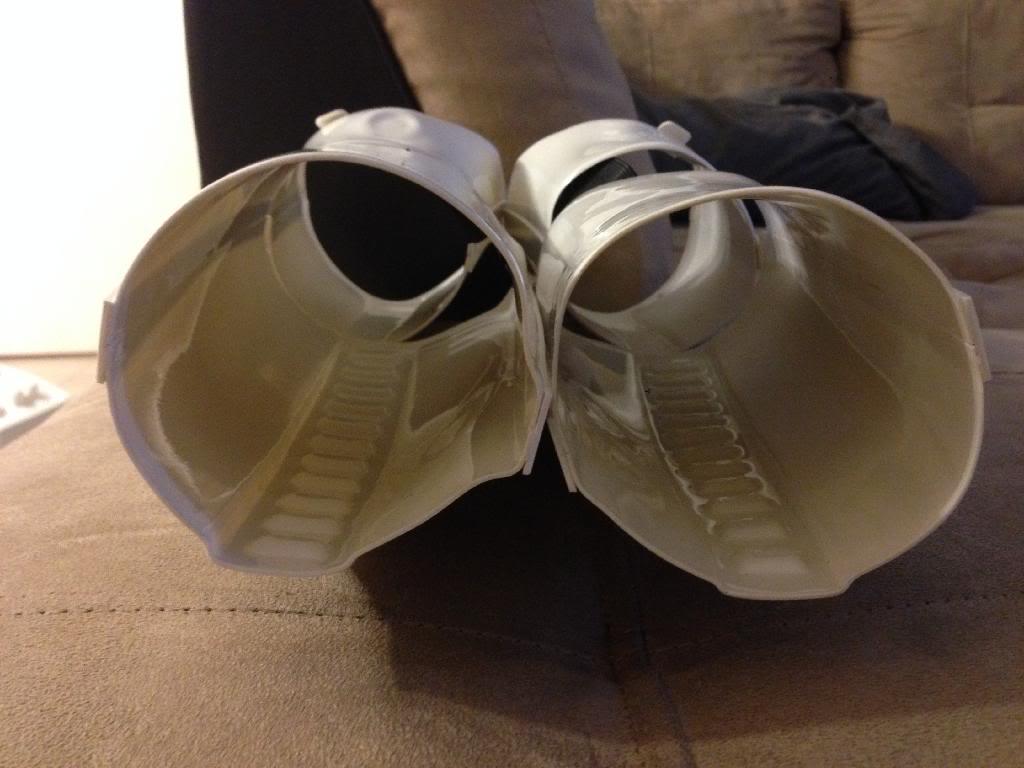
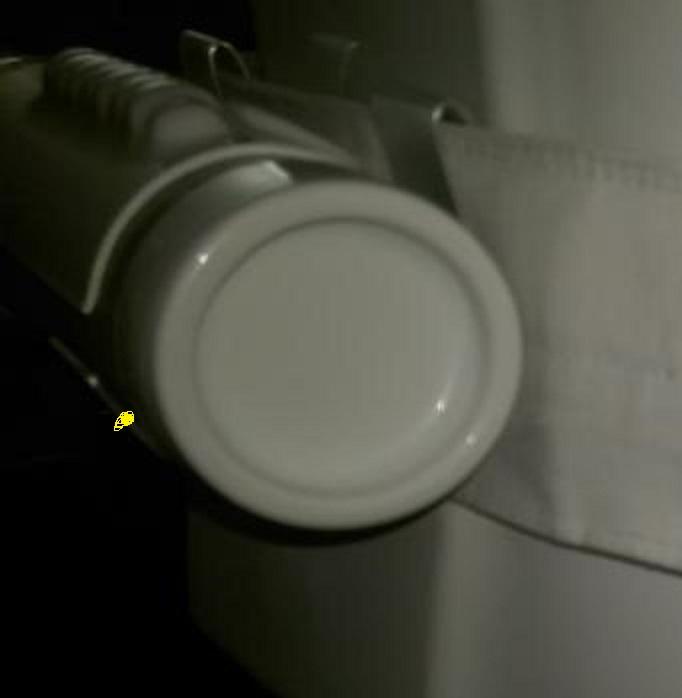
Hey Chris! Thank you for your Centurion application!! Let's look at your armor!! CRL and Centurion Application Requirements: All required submission photos have been posted. I'd like to commend you for your efforts so far. You have come a long way. Being a "beefy trooper" comes with its challenges and you have taken many of them head on and conquered. I can only imagine the work that went into your side and thigh shims, but they turned out great! You have made other subtle adjustments that have your armor fitting much better. The paint work on your helmet makes it look TONS better! There is still a little work that needs to be done before Your armor will reach Centurion. First is the return edge on the wrist side of the forearms. The top half that has the square indent ridge is good. I am seeing return edge on the bottom half, though (marked in red) Here is a set of forearms where no trace of return edge remains: The next thing I want to cover is your Thermal Detonator. It took me a while, but I finally figured it out. I would still like to see you swap out the pop rivets for the screws, but more important right now is the position of your control panel. You should be able to make out all the details on the panel as seen on this ATA: Sorry this pic is so big. Anyway, the reason that your control panel is sitting so high on your detonator has to do with two factors: #1 the ATA TD is slightly smaller in diameter than the screen used ones which means (#2) the TD clips need to be reduced in size. Your clips are a "U" shape when they really need to be more of a "J" shape. When installed, this will allow the TD to be rotated down exposing all the details on your panel. I marked where you can trim yours: In you EIB application, your belt was in the proper position under your button plate, it is sagging here?????? How is your belt attached to your ab plate? Lastly is what my main concern centers around......your cover strips. You fixed the ones on the back of your thighs. WOO HOO!!!! However, the ones on your biceps are still huge and the one on the back of your right calf looks bigger than the left. Sometimes it is proposed that a larger cover strip is used because of the necessity of closing a large gap. I have built some big ATA biceps and I cannot imagine you have a gap that big to require a cover strip of that width. These strips need to be consistent. The arms should be close to the same as should the legs.(the backs can be a bit larger than the fronts) You have taken on challenges with your armor that are much harder than these little fixes. Take your time and Centurion will be your in no time.
-
Troopermaster uses screws that measure 6 MM across. So as long as you can get some near that size, you will be fine. His are also actual course thread screws. If you can fine threaded bolts with nuts that can screw on from the inside, as long as the head is slotted and black it will work
-

TK-21707 Requesting EIB status [ATA][401]
gazmosis replied to TKheehaw's topic in Request Expert Infantry Status
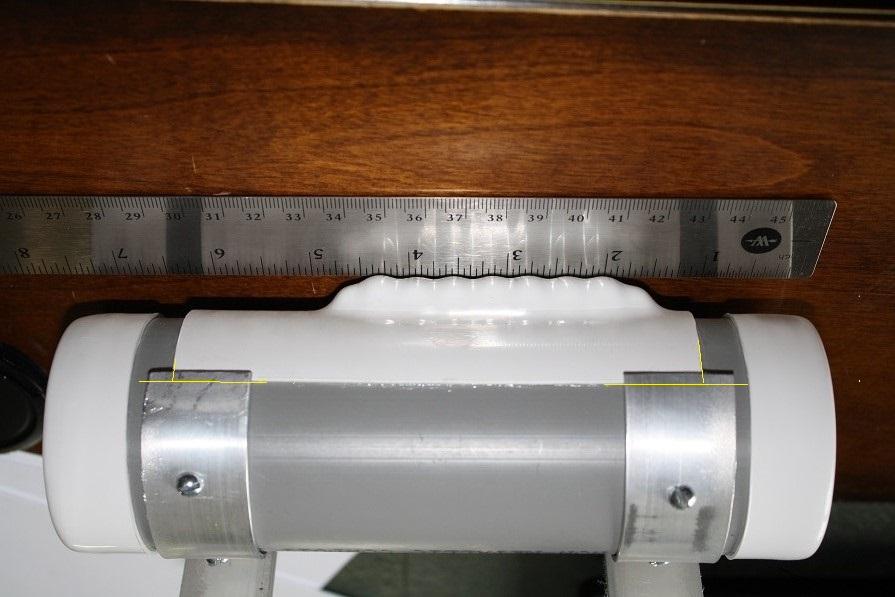
Hey David. Thank you for your EIB application! There have been some great observations by your fellow troopers here. Just remember that we are all on the same team striving to help you look better. Let's take a look at your application and your armor!! CRL and EIB Application Requirements: Very thorough application. Well done! All required submission photos have been posted and your armor meets the requirements for EIB. With that, I would like to congratulate and welcome you to EIB!!!!! Other-Armor Fit/Assembly: This is the section where suggestions are made that won't affect your application, but are geared towards improvements to your overall armor look. Let's get this out of the way first regarding the cover strips and molded ridges. There was mention earlier about "overlap" and I was killing myself to see where you overlapped your seams. Turns out the "overlap" was referring to the molded cover strip ridge showing outside the edges of the cover strip itself. Let's all remember about the molded ridges that the cover strips sit on. Armors like ATA and AP have extra molded ridges that were not present on the original armors. Original armors had no molded ridges on the underside of the forearms, NONE on the biceps, and none on the backs of the thighs or the shins. I have been poking at makers to remove these ridges but MTK seems to be the only one that has begun this slow upgrade. Anyway, with all armor builds, comfort is something we HAVE to take into consideration. We are required to spend hours (sometimes) in these suits. We should be able to function. If that means leaving a MM or two to make it comfortable, that is fine with me. I looked carefully at the fit of the parts in comparison to your body type. If the parts were large and out of proportion to your body, I would say that they would need some re-adjustment. However, the parts all seem to fit you very well which tells me the parts were sized properly. If that meant leaving a couple Millimeters of ridge on either side of the cover strip,...fine. I will get on my soapbox here and say loudly that I disagree with the statement that no matter how wide the molded ridges are, they should be topped by cover strips that are the same width. No. + or - 15MM for the arms, + or - 20mm for the leg fronts, + or - 25mm for the leg backs. As long as they are in proportion and consistent looking. There was also mention of the gap between your shoulder bells and chest. I believe this is just caused by broad shoulders. ATA's shoulder bells are not the biggest things to begin with. The armors are not one size fits all. We can't fit to the armor...it has to be made to fit us. If you are a beefier trooper, measures need to sometimes be taken. Ok..I am done with that. NEXT!!!! Nice work on the paint details! It was mentioned that the 4 button plate might be a little too big. Would I like to see it a tad smaller? Sure. Unless you can successfully pull it off and trim it, the risk might be bigger than the reward here. Since it is pretty much the exact size of the stage, I'll let it go. I will discuss your thermal detonator in the "Centurion Suggestions" but I did want to comment on the good idea with applying soft velcro to the backside of the clips to protect your armor. Nice! Centurion Suggestions: The small details you have built into your armor right out of the box suggest you are thinking Centurion. I hope so! There are a couple things that need to be changed or clarified before you can go forward with that. First off, you will need latex/flexible handguards. I appreciate your pic of your thermal detonator showing the gap between the end cap and the clip. However, this is an outdated requirement falling in favor to having the clips close to the end caps with little or no gap like this:Another thing I would like to see addressed is the overlap you have of your clips over the control panel. Here is a pic of your detonator I flipped upside down and marked in yellow what can come off. If you remove the clips to trim, you might be able to slide them over a bit as well. If you do venture in for Centurion, I would like you to post a pic of the inner portion of your thigh pack on the lower right thigh. The pack should be connected to the thigh at the upper corners both inside and outside. It almost looks like you have your connected in the center on the inside of yours. Overall, you have some great looking armor and should be proud! Nice build! Any questions fell free to contact me and congratulations again!!!! -
Oh nom nom frickin' nom!
-

PGHtoolman AM armor build
gazmosis replied to PGHtoolman's topic in Build Threads Requireing Maintenance
That's better! -
Um..... What armor do you have that requires sanding? Are you painting the armor or just scuffing surfaces for gluing?
-
Awesome start!!! Post pics of your build so we can watch and answer questions you may have
-

ATA: right thigh and battery pack
gazmosis replied to Bloodwalker's topic in Hard Armor (General Discussion)
DA speaks through actions.......not words -

ATA neck trim - S or C?
gazmosis replied to charlesnarles's topic in Hard Armor (General Discussion)
The "C" trim you speak of is actually "U" channel trim. Just sayin' -

ATA: right thigh and battery pack
gazmosis replied to Bloodwalker's topic in Hard Armor (General Discussion)
It is not necessary to center the box on the seam. What is most important is to have the same amount of material off the ends of the outer most boxes. With ATA, you will have more and need to trim it.


