-
Posts
4,043 -
Joined
-
Last visited
-
Days Won
23
Content Type
Profiles
Forums
Gallery
Articles
Media Demo
Everything posted by gazmosis
-
Maybe it's just the pic but that gray looks really dark.
-

TK-77077 Requesting ANH Stunt Centurion Status[RS Props][142]
gazmosis replied to Vadier's topic in Request Centurion Status
Hey Sven: Thank you for your Centurion application and what an application it was!!! Note: Any Centurion application should follow the photo checklist on the PDF file found here:http://www.whitearmor.net/forum/topic/22605-centurion-application-photo-checklist/ This makes the application complete and easy to both follow and review. Centurion applications should show the armor in its CENTURION form. I know, Sven, and appreciate what you were trying to do by showing the upgrades that you made and that was fantastic. However, too many photos of the armor in the pre-Centurion form can get confusing to newer members. A brief description of the change you made is usually enough. Anyway..........GREAT WORK!!! I am blown away by your weight loss and being able to trim the armor sides down. This really brought your armor from awesome to exceptional!!! Let's take a look! CRL and Centurion Application Requirements: I think the application thing was covered. The only missing pictures I see were a close-up of the hovis and the crotch rivet. We can see the crotch rivet in your torso shot and I am sure that RS didn't provide you with bad hovis. If you can add these close up pics, that would be great. You can do that when your new thermal detonator screw arrive? Your armor contains all required elements for Centurion. Both you and your Garrison should be proud! Congratulations and welcome to Centurion, Sven!!! Other-Armor Fit/Assembly: Take care of those weapons! They are incredible!! The only thing that seemed to be brought up as a concern are the rank markings on your ears. I agree that they should be consistent on both sides of your helmet. I know that Sven was emulating a helmet that is seen in our photo gallery plus this is not a violation of the CRL. It would be nicer to have them the same, but it would be nicer to have black, slotted thermal detonator screw for everyone as well. But until that happens.......... This next suggestion has nothing to do with your armor's appearance. Only with it's future. You are getting quite a bit of fraying on your waist belt and your interior elastic. Although the belt fraying was accurate, for our purposes, too much fraying can lead to a compromise in belt structure if it gets to the stitching. I have always suggested to trim the longer frays and brush the belt edges with diluted fabric or other water based white glue. As for your interior elastic, you can seal the edge by pulling a hot nail or other heated metal object slowly across the edge. Great work, Trooper!! Stay well!! -

TK-10466 Requesting ANH Stunt EIB Status [MTK][414]
gazmosis replied to starsaber25's topic in Request Expert Infantry Status
Shoulder bells bells bells! Sorry, I meant shoulder bells! I edited the post -

How many drop boxes?
gazmosis replied to ShavedWookie's topic in Build Threads Requireing Maintenance
Seems like that is the case with that original belt pic -
-
Read your build and how to threads!!
-

ATA helmet has arrived and Im.....
gazmosis replied to Polar's topic in Build Threads Requireing Maintenance
Brian is going to clean the paint from between the teeth as well as slim down that left ear. -

TK-10466 Requesting ANH Stunt EIB Status [MTK][414]
gazmosis replied to starsaber25's topic in Request Expert Infantry Status
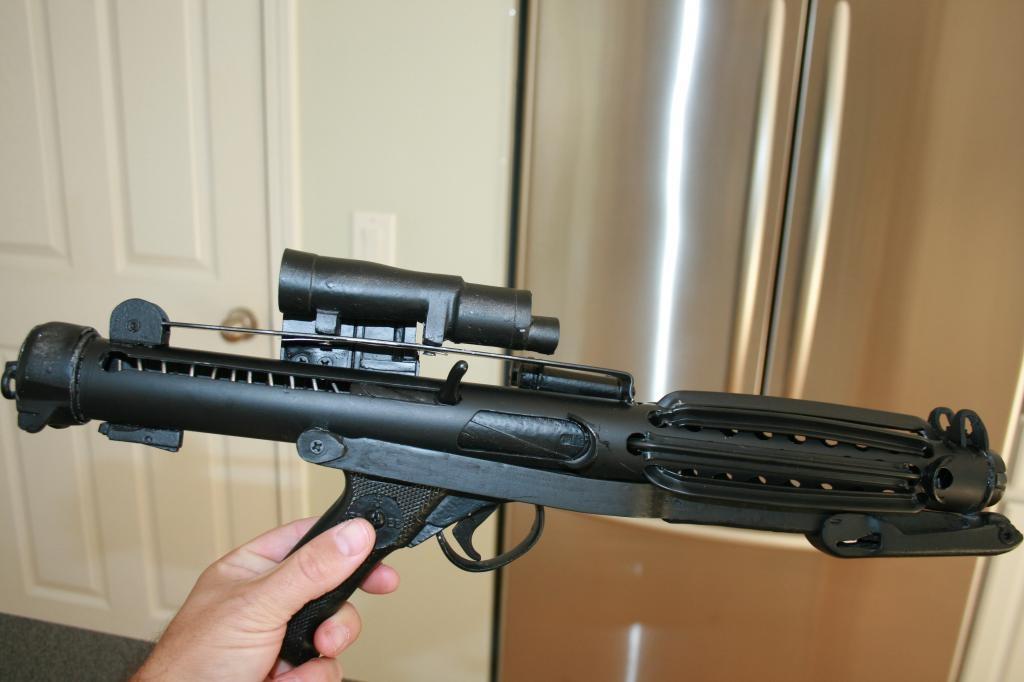
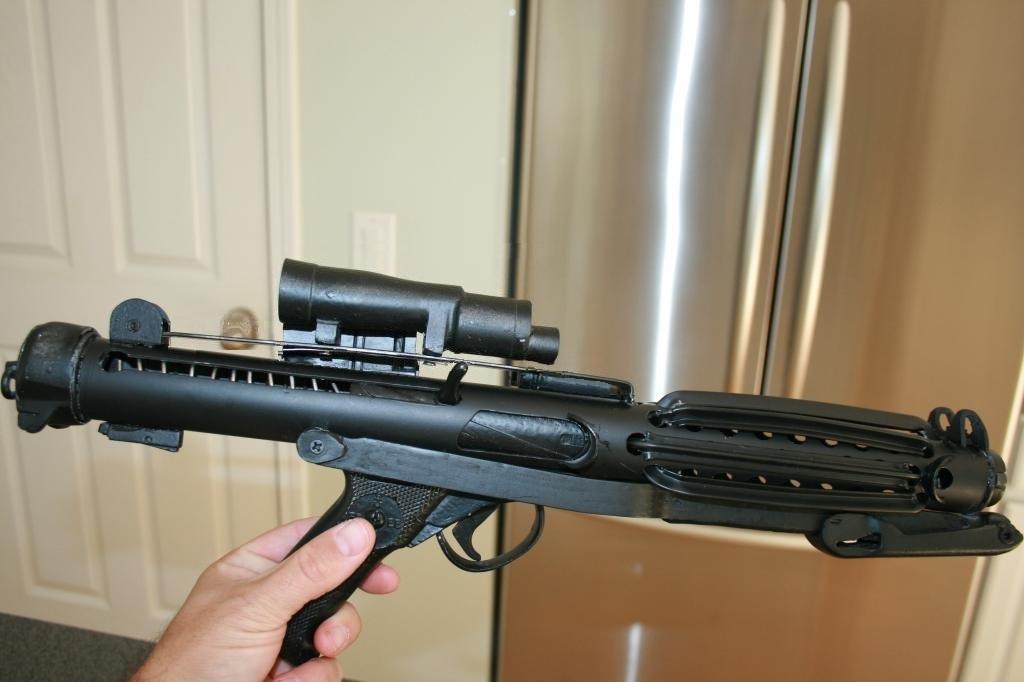
Hey there, Steve!! Thank you for your EIB application. MTK is a great armor and his little tweeks towards greater accuracy are great to see. Let's take a look at your armor!! CRL and EIB Application Requirements: There are two required photos that are missing. I will still move forward with your application seeing as one of them is a close-up of your Hovi-tips. I can't imagine that Troopermaster would provide you with bad tips with his helmet. The second pic is a close up of your crotch hardware. Although we can see the INSIDE on your interior strapping shot, I need to make sure you haven't painted this hardware which is not allowed for Centurion. I would need to mention it if it was. Please add these pics as soon as you can. Your armor, is excellent and well built. It contains all necessary elements required for Expert Infantry. With that, I would like to congratulate and welcome you to EIB!!! Other-Armor Fit/Assembly: WARNING!!! Someone shot a hole in your thermal detonator!!!!!! Anyway, this section is used by myself and your fellow troopers to point out suggestions to improve the overall look of your armor. These are suggestions that will not change the result of your applications. It was mentioned to install frown screen. Troopermaster doesn't install the frown screen because it was not on the helmets in the original film. Frown screen is an invention of the 501st to hide the costumer from close meetings with our fans. It is totally up to you to install it or leave your frown as it is. ​I would definitely work on securing your calf closure. In my experience working with the TE mold lineage armor, the shins have a tendency to splay open when assembled. If your grieves close freely around your calves when you squeeze them, you might want to consider giving them a boiling water bath. Tie string around the grieves compressing the closure together. Then place the shins into a 5 gallon bucket or tall garbage can. Boil a huge opt of water and slowly pour this over your shins. This requires a lot of water so boil two pots if you have them. Leave them in the water for about 5 min and you should be set. Using the strap and hook closure works as well. The only thing I can see as fixable is the scope rail on your blaster. As you can see in this shot, the scope rails were up off the receiver only about as far as the thickness of the bolt heads holding the scopes on the rail. About 1/4-3/8 inch. This is a pic of your blaster next to apic I re-did of your blaster with a lower rail: Centurion Suggestions: This is the section where I feel certain aspects should be changed prior to a Centurion application. I assume from your efforts and all the details that is your intention. Your shoulder bells do need to be raised. The tops should come darn near to or even touch the ribbed shoulder bridges. Raising them will also close that chest/shoulder gap that was mentioned. MTK shoulder bells are wide as they are. Much wider than the originals were at the bottom. I would stay away from widening them as you mentioned. It's an unnecessary step. The second is your waist belt, I would like to see the droop taken out and it raised a bit to touch or even slightly overlap the bottom of the button plates. Congratulations on a great set of armor! -
I'm confused about the "notch to fit over the rear sight" With the middle portion of the sight being an "L" shape and always up, how does this fit over it?
-
What kit are we seeing?
-
That explains it!hahahaha Weenie a doodle do!!!
-
Those front cover strip ridges are huge. I wonder if they are overlap or butt construction. I just don't remember FX ridges being that big
-

TK ab plate to TD modification parts needed
gazmosis replied to ukswrath's topic in Assembly, Mods, and Painting
Good luck! The FX button plate is molded in TK style. TD plates are totally different. No buttons. Remember that 4 button plate needs to be 3 -
Going to move. This thread to ANH blaster builds
-

White elastic for free floating shoulder
gazmosis replied to fuumantroop's topic in Hard Armor (General Discussion)
It would not void a Centurion application. As long as the chest to back elastic is white is all that would be seen. -

Sterling Sub Machine gun from HobbyKing
gazmosis replied to Chivo's topic in Build Threads Requireing Maintenance
I wish we could see the other side. But as it is there is nothing that would make this weapon not accepted. It even has the "D" ring -
Dang!!! I wish the people who deac these weapons would just weld the mag feed into the receiver. I guess you could still manually chamber a round.....whatever... It's a shame nothing else but the trigger moves
-

Twin AP TK builds from the valley of the sun
gazmosis replied to DesertMonkey's topic in Build Threads Requireing Maintenance
Lay down the ears until you have the two halves of the helmet joined permanently. There will be micro adjustments you will need to make that you can only do correctly with the halves joined. -

White elastic for free floating shoulder
gazmosis replied to fuumantroop's topic in Hard Armor (General Discussion)
I know of several troopers that have installed a small snap to the underside of the shoulder bridge. -

TK-22304 Reporting for duty
gazmosis replied to Sir Tomasu's topic in Hard Armor (General Discussion)
Spectacular!!! -
Oh yes! Ssssssssmell the plastic!
-

Small brown box arrived (MTK bucket content)
gazmosis replied to cm325i's topic in Build Threads Requireing Maintenance
Dude, nice work!! Didn't that give some extra solidness to the helmet?? -
Yes yes yes yes!


