-
Posts
4,043 -
Joined
-
Last visited
-
Days Won
23
Content Type
Profiles
Forums
Gallery
Articles
Media Demo
Everything posted by gazmosis
-
As I have said before, the brilliance within this Detachment is astonishing!
-
TK46800 requesting EIB status ANH Stunt[TM][417]
gazmosis replied to mr_hair's topic in Request Expert Infantry Status
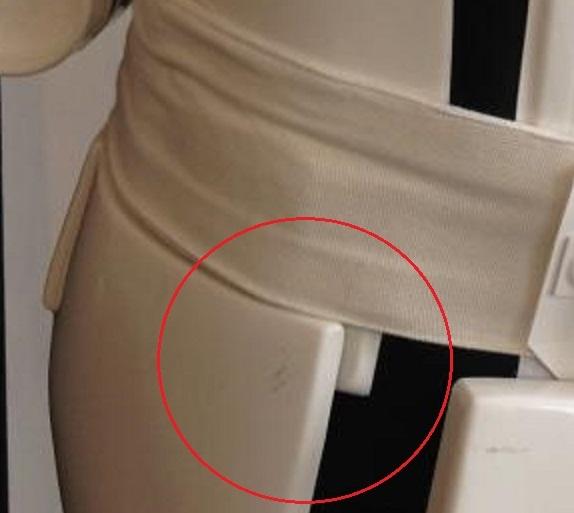
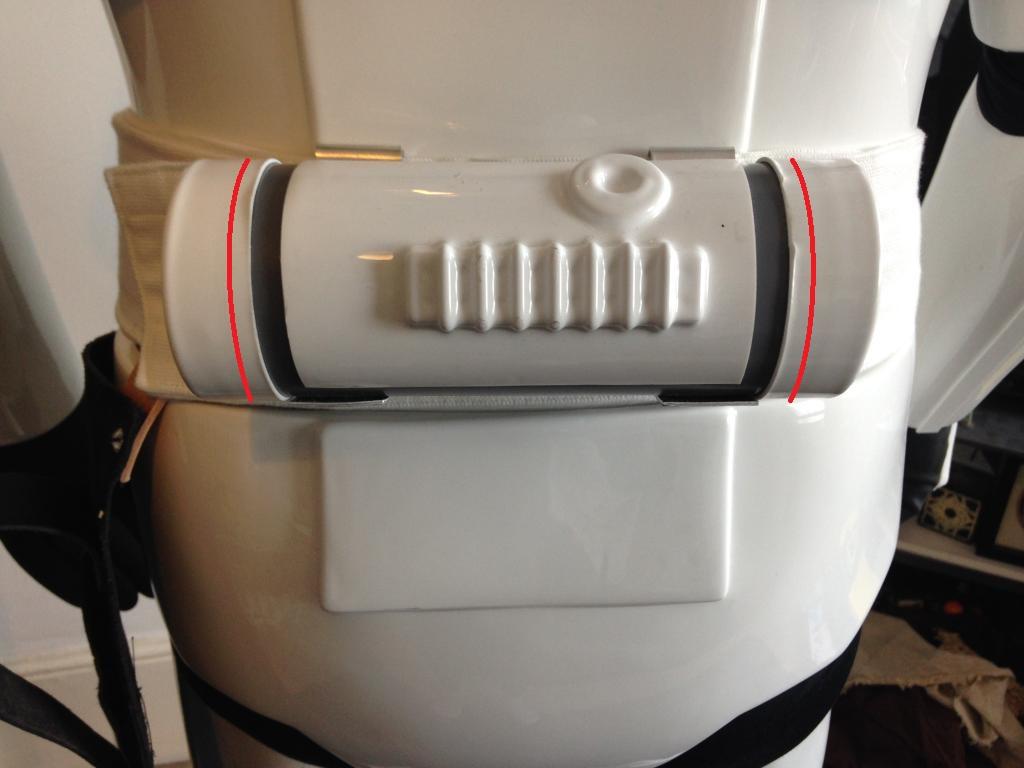
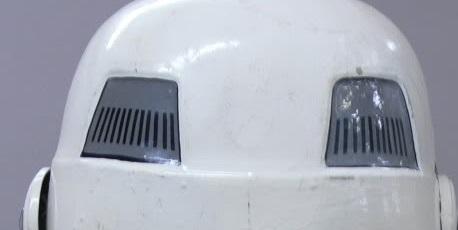
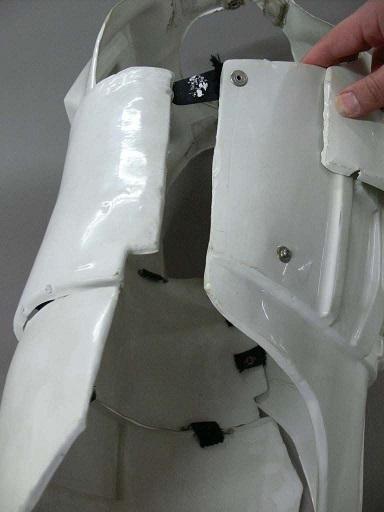
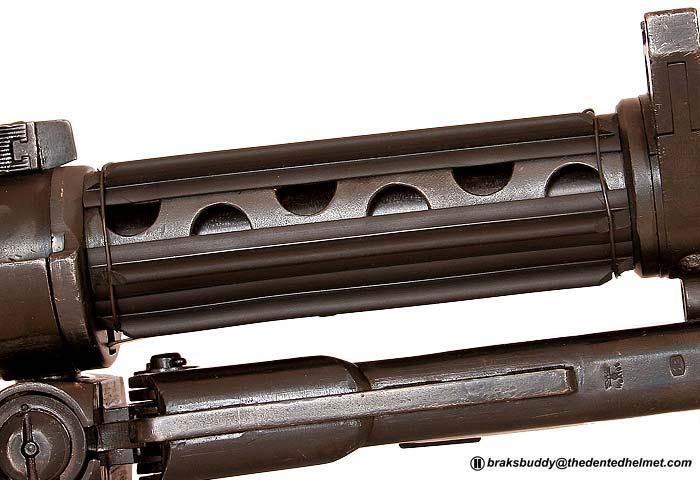
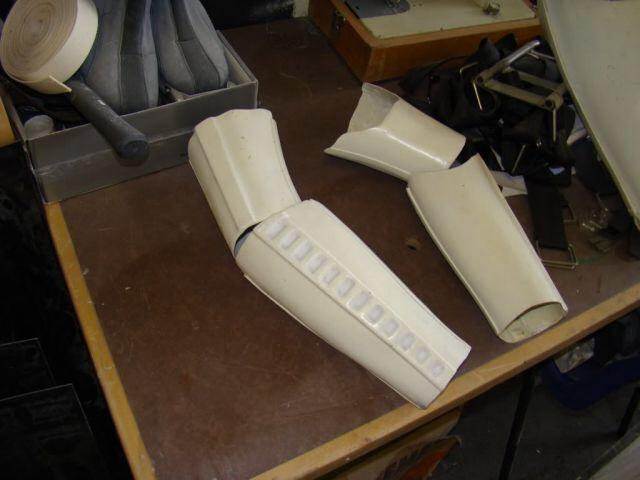
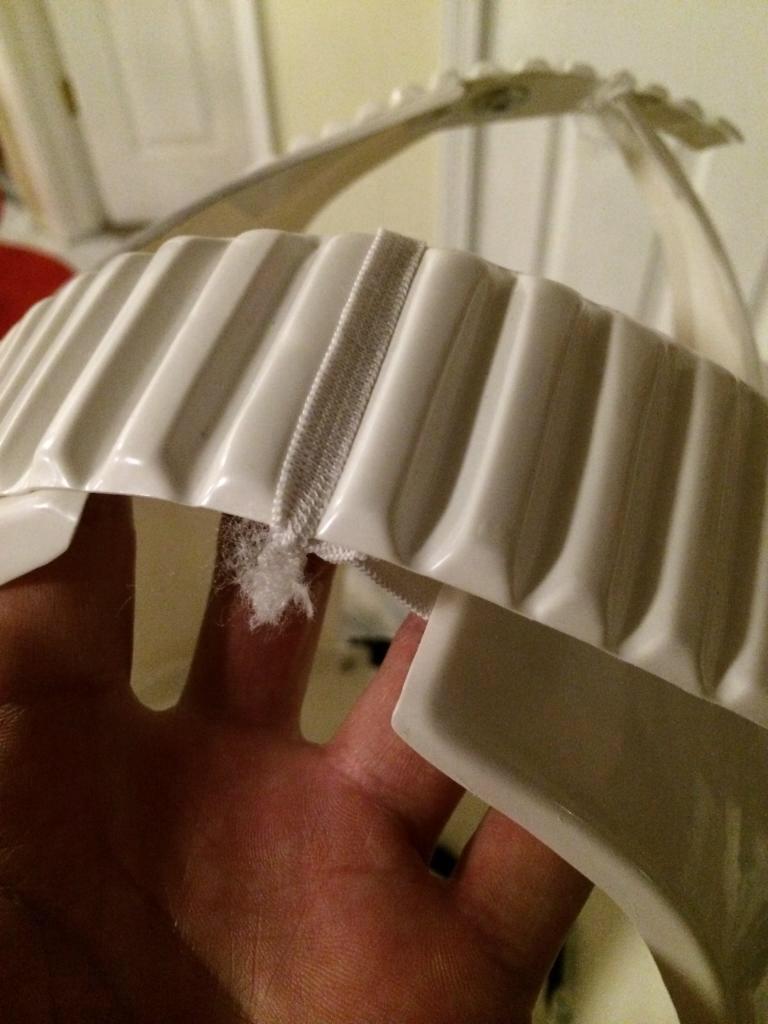
Ok James!!!! *I need to note that James was kind enough to work with me to re-format his original application. He added the proper pictures that were missing and re-arranged them to make them much easier to view and follow* Thank you for your help on this!! Now lets look at your armor!!!! CRL and EIB Application Requirements: All required submission photos have been posted. Some people may question the gap on your right side as exceeding the 1/2 inch (12 MM) limit for side gap. I m my opinion, I think this might have been accentuated by the tendency to inhale as you raise your arm. I believe this is close enough not to argue over a few MM. If you wish to post a picture in a more relaxed state with your belt tightened up and show this gap can be closed further, by all means be my guest! Other than splitting hairs over that, your armor contains all required elements for Expert Infantry. With that, I would like to congratulate and welcome you to EIB! Other-Armor Fit/Assembly: This si the section where myself and your fellow troopers provide observations that will go toward the improvement in the overall look of your armor. Unless stated, these suggestions will not affect any application. I want to start at your helmet. Looking AT your helmet, the left side ear has a great deal of material from the outer curve that can be removed yet. A little bit of adjustment here will go along way towards giving your helmet a much more balanced look. You did a good overall job on the hand paint work!!! A couple of your outlines specifically the traps over the eyes, have areas of choppyness. If you moisten a brush with thinner and massage the uneven bumps, it will give your details a much cleaner look. I need to mention one other thing, but look in "Centurion Suggestions" for that point. This is awkward, but I need to discuss your butt! The center mounting strap between your kidney and butt plates is pulling the butt plate up so far it is overlapping your kidney. There should be a single seam line between these two plates with no overlap. This is just me being picky, but if you used the end cap of your thermal detonator as a guide, you could use this to trace the proper curve at the bottom of your thigh pack. Since we are on your thermal detonator, although I am sure not much can be done about it now unless you DIDN'T glue the end caps down, but eh you left your caps a bit wide. They should be around 3/4 inch (20 mm) wide. Is there any possibility of re sizing your left thigh. It looks really big specifically around the knee. If you took this down to fit proper, it would make your movement much more comfortable and natural. Although not required, greater accuracy for your DLT-19 can be achieved by sourcing the wires for the t-tracks on the main barrel. Centurion Suggestions: There is going to be a little bit of work if you are planning on a Centurion application. First off, you will need to adjust your back plate so it has MINIMAL or no overlap over the kidney. I sad above that I needed to mention something here regarding a paint detail. The vent lines on the rear traps should NOT be all parallel with each other. As seen here: the vent lines should be painted in the shape of the trapezoid itself. Although acceptable for EIB, your side gaps will need to be eliminated completely for Centurion. Either side shim addition or waist reduction will be necessary here. Although your original pics showed it and the present ones do not, your male snap on your right side is way out of position. You can get an idea of this in the interior strapping shot. Anyways, TM provides a seam line that the ab side hardware should be mounted on. When done, it should look close to this: Germain made the suggestion that with a new snap and a little ABS paste, this can be an easy adjustment. Next are the mounting straps on your holster. They look wide to me. Proper straps should be 20 MM (3/4 inch) wide. Please make sure that kidney /butt issue is resolved! Germain also pointed out and provided a guide to the removal of all return edge on the wrist portion of your forearms. Make sure for your Centurion photos that outer edge of your right drop box aligns with the outer edge of the waist belt. Please don;t hesitate to contact me if you should have any further questions. Take your time and this should be some easy fixes for you. Congratulations again on your EIB!!! -

TK-921 AP (authentic props) build.
gazmosis replied to TK921's topic in Build Threads Requireing Maintenance
Congrats! Those jitters were well earned! -

My very first Helmet build
gazmosis replied to Comfy Turtle's topic in Build Threads Requireing Maintenance
Who made the helmet? Just make sure you remove enough of the teeth and make them square not Twinkie shaped -

EJGreen's RT-MOD (Stunt) Build Thread[*RT]
gazmosis replied to EJGreen's topic in Build Threads Requireing Maintenance
The original forearms did not have the "square indent ridge " end on both the wrist and the elbow sides so if trim that off you will be fine. As for the 35 mm ridge, if you still have excess room in your forearm, trim the ridge on the top of your arm down to the 15mm and leave the underside as it is. -
Armor master
-
What do you plan on using for an adhesive to bond the CF with the resin parts?
-
Fashion world WATCH THE HELL OUT!!!
-
3/8 of an inch is a safe number to shoot for your chest, ab, back ,butt, and kidney. Go a bit smaller on your thighs and shins. No return edge on the inside of your shoulders but leve a bit on the bottom. Biceps are up to you whether to leave a tiny bit or remove it. No return edge on the twist side of your forearms but you can leave a tiny bit on the elbow side if you want.
-

Red_2's NE ANH TK build ...
gazmosis replied to Red_2's topic in Build Threads Requireing Maintenance
I want to confirm something else. The NE suit was based off the molds of RS props which was the screen accurate suit. It had a definate left and right forearm. You might be wearing them backwards. Each forearm has both a raised ridge that the cover strip sits on and a side that has no cover strip. The raised side should be on the top of each forearm. -

TK-31501 Requesting ANH Stunt EIB status [AP][422]
gazmosis replied to CRISTONAMO's topic in Request Expert Infantry Status
Sand down the forearm edges to make the angle change a bit smoother but it looks good. If the drop boxes can't be pulled apart just leave them. -
You used a razor knife to cut your strips. You will have a little raised edge on your cut lines. Make sure these are removed before gluing anything up as they will prevent a flush, flat fit.
-

TK-921 AP (authentic props) build.
gazmosis replied to TK921's topic in Build Threads Requireing Maintenance
What a huge improvement!! Outstanding!! Watch your belt. It has a bit of a droop. The top edge should be resting right at the bottom of the button plates. You're drop boxes should be sitting even with the outer edge of the waist belt. -

Doopy build...real Sterling folding stock
gazmosis replied to gazmosis's topic in Build Threads Requireing Maintenance
Thank you Andrew!! It definitely was a learning experience. -

TK46800 requesting EIB status ANH Stunt[TM][417]
gazmosis replied to mr_hair's topic in Request Expert Infantry Status
PM sent to you Mr. Hair! -

TK-31501 Requesting ANH Stunt EIB status [AP][422]
gazmosis replied to CRISTONAMO's topic in Request Expert Infantry Status
-
Keep your drop box back flush with edge of the box it is sitting in. No need for fillers.
-

R4ZORB4DE'S ATA Build
gazmosis replied to R4ZORBL4DE's topic in Build Threads Requireing Maintenance
You should stand up and cheer! Well done!! Nice work!!! -
Can't wait to see your progress!
-

HOW TO: DIY rear calf closure clips, aka Bra Clips
gazmosis replied to ukswrath's topic in Tutorials, Tips and HOWTOs
We should probably move this thread to "tutorials" -

HOW TO: DIY rear calf closure clips, aka Bra Clips
gazmosis replied to ukswrath's topic in Tutorials, Tips and HOWTOs
HA!! Last time I tried that I broke two needles and one almost went in my eye. -

ATA Outer Shin Armor Length Question
gazmosis replied to Pale Rider's topic in Hard Armor (General Discussion)
Aside from removing the return edge at the very bottom, I can't see why it is being made such a big deal. Trim the bottom return edge and 1/2 inch up and see if that makes him happy. -
Germain is right about that ear. I would also raise up your backplate just a bit more so it doesn't overlap the kidney. Make sure your left bicep is worn with the molded ridge not the butt joint on the outside. The molded ridge on the bicep should align with the one on the shoulder. Is your left thigh really big around the knee?? Great looking build!! Awesome joints and seams. Well done!
-

HOW TO: DIY rear calf closure clips, aka Bra Clips
gazmosis replied to ukswrath's topic in Tutorials, Tips and HOWTOs
In thus case, re inventing the wheel us fine with me. Hand sewing the original loops rakes oso much time. Even making these bends and sewing them takes less time than hand sewing. -

TK-31501 Requesting ANH Stunt EIB status [AP][422]
gazmosis replied to CRISTONAMO's topic in Request Expert Infantry Status
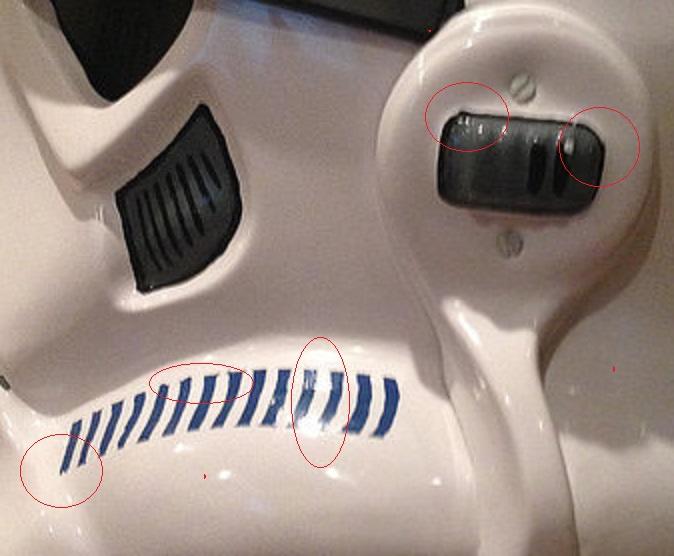
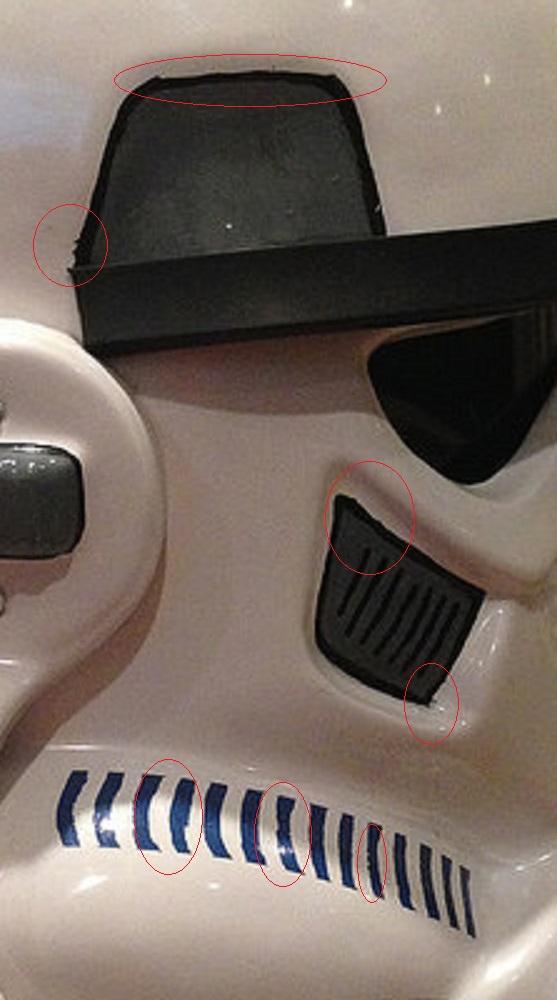
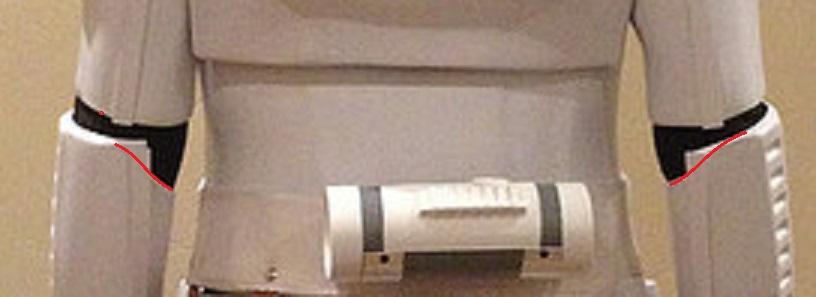
Hello Cristian!! Thank you for your EIB application!! You have been around for quite some! We were all waiting! Anyway, let's take a look at your armor and application!!! CRL and EIB Application Requirements: You have a few pictures missing from the required submission photos list. Please post a close up pic of your cod/butt plate attachment, a hovi tip close up, and a close up of your belt/holster attachments. Next, I am going to need a close-up of the back of your calves. In these pics here, it just doesn't look to me like you have cover strips on the calf closures. Please post these pics and we will move forward with your EIB application Other-Armor Fit/Assembly: This is a section used by your fellow troopers and myself to provide suggestions to improve the overall look of your armor. Suggestions made here will not affect application outcomes. You have a nice overall fit to your armor. Well done!! There are a few things I feel are worth bringing up, though. Let's start at the top. I always applaud anyone who takes on the job of hand painting their details. It can by a daunting task because these are details that everyone looks at because they look at our helmets first. There is a difference, however, between the "handpainted look" and choppy. Hand painted to me will always mean mildly uneven lines. You are not that far away but I would suggest to grab a paint brush and some mineral spirits and sit down with your helmet for a few minutes. In these areas circled: dip your brush into the mineral spirits and dab the excess off on a rag. You want the brush damp not dripping. Then massage the edges until what is making them uneven is removed. When finished, you will see how clean the overall appearance of your helmet will become. You might consider tidying up your ab buttons while your at it. TAME YOUR CROTCH STRAP!!!! The next thing I want to touch on is your forearms. Having seen dozens of AP builds and having built AP armor myself, I know the elbow side of the forearms can line up better than that. If disassembly and repositioning are not an option, I would strongly consider reshaping these areas so it is not so uneven and distracting. Here is sort of what I am talking about: You can also remove alittle bit of that top return edge. IT might make them more comfortable if they are not. Lastly, and again, I don;t know if this is adjustable at this point but your drop boxes from your belt look really thick to me. This is usually my guide to how thick they should come close to: Centurion Suggestions: There is a little work that will need to be done before a Centurion application can be submitted. On your helmet, I would strongly suggest doing those paint adjustments and while you have the brush out, you will need to remove one of your rank bars. There should only be one per side. You will need to install the 6 split rivets on your left side along the kidney/ab seam. With your arms down, you seem to have a bit of an overlap of your back over your kidney plate. I would make sure this is not excessive but it should rest on top of the kidney and not overlap at all. This can be done with an adjustment on your chest to back strap which I cannot see even exists! If you don't have these connection straps, they should be white. They are typically elastic but can be nylon as long as they come close to the width of your shoulder bridges. You will need to make sure you have two(2) inward facing male snaps on the crotch portion of your butt plate. You will need a split rivet installed on the crotch portion of your ab (it doesn't need to be functional, just present) Your gloves will need to be changed out to rubber chemical gloves. You handplates are fine. Just make sure they are glued down enough. Keep in mind that your shoulder bridges must float free in the back. It almost looks like you have velcro under them on the back. I don't doubt that you can make these simple corrections/installations. These items are readily available for you. As for the EIB, please post the pics I mentioned and once I get a good look at your calf closures, we can move forward!


