-
Posts
4,043 -
Joined
-
Last visited
-
Days Won
23
Content Type
Profiles
Forums
Gallery
Articles
Media Demo
Everything posted by gazmosis
-
Nice work on the scope rail! And everything else!
-
This is indeed the consensus and the recommended finish. I am not going to go all nazi on someone who uses gloss. Until it becomes a point on the Crl(which it probably won't) I will recommend satin/matte but if someone uses gloss, it is what it is.
-
Alright, Glen! Thank you thank you for your Centurion application! Always great to see the final results of hard work. Let's look at this great armor!! CRL and Centurion Application Requirements: Thank you, Glen for coming back and adding the necessary pics. Your attention to detail has served you well and your armor contains all necessary elements for Centurion! Congratulations on being 2015's first Centurion!! Other-Armor Fit/Assembly: Points were brought up regarding your sides . I am certain that the slight gap that appeared in your right side was caused by raising your arms for the shot. Clearly this is not a fit issue. I do agree that those white tabs seen in the seams on both on your right and left sides should either be colored black or removed. I am not so sure what the right side one is for. I know the left one is to keep the halves together but you could do this easier by replacing the stretchy elastic with nylon webbing. Either way, it's not that distracting to me and certainly doesn't warrant holding back an award for this fine set of armor. Congratulations!!!
-
It was a point that was in the "Centurion" section of the CRL that stated that NO small elastic shall be on the back of the ribbed shoulder bridges. Since the elastic IS indeed seen in the film, this point has since been removed. You may leave your white shoulder bridge elastic.
-
DVH Pipe Build with Extras
gazmosis replied to I'm Batman's topic in Build Threads Requireing Maintenance
An easily compressible spring that is available is called EZ-coil. It is made for automotive radiator hoses. IT wraps around them allowing them to bend without kinking. IT has one little tab that needs to be removed but after that it works perfect.http://www.veyance.com/ProductsDetail.aspx?id=16154 -
Bravo!!! Mike gas been steadily making more and more improvements! Impressive. I totally agree on the removal of the cover strips. Mike already got rid of them on the thighs. The back of the shins and the underside of the forearms are all that remains.
-
Never too many blaster builds!!! By the way.....you are welcome, sir. Thank YOU!
-

Just what the world needs now. Another Doopy
gazmosis replied to syllander's topic in ESB BlasTech E11
You WILL ad pics! -
http://www.whitearmor.net/forum/gallery/image/1243-star-wars-empire-strikes-back-bluray-capture-104/ http://www.whitearmor.net/forum/gallery/image/1148-star-wars-empire-strikes-back-bluray-capture-09/
-
Do you have any idea what you would sell a parts kit for?
-
That is so cool. Looks like a kevlar or other protective lining.
-
Alright Glen! Thank you for your EIB application. Let's take a look at your armor!!! CRL and EIB Application Requirements: For the exception of a missing ab detail shot and hovi tip close-up, all other required photos have been posted. Other pictures clearly show correct button placement and paint color. Your armor contains all required elements for EIB. With that, I would like to congratulate you an yet another EIB achievement!!! Please edit in the missing pics please. Other-Armor Fit/Assembly: This sections is for myself and your fellow troopers to provide suggestions that may improve the overall look of your armor. Unless specifically stated, these suggestions will not affect any application. The only thing I can see as a possible adjustment is the slight droop in the front of the belt. I like to see belts sitting tight to or slightly overlapping the bottom of the button plates. I can't believe you haven't ironed out the right bicep thumbprint. This armor fits you so well. I am jealous! Centurion Suggestions: I don't have anything to add here. Awesome! Thank you, Glen, for your dedication to the 501st and your aggressive costuming efforts! You're an inspiration!
-
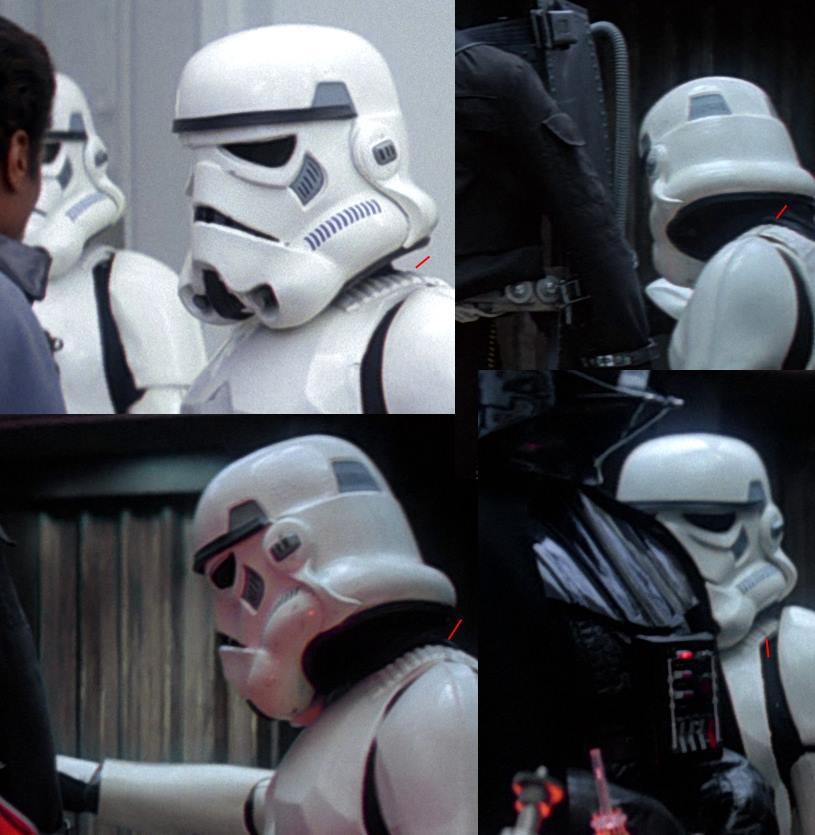
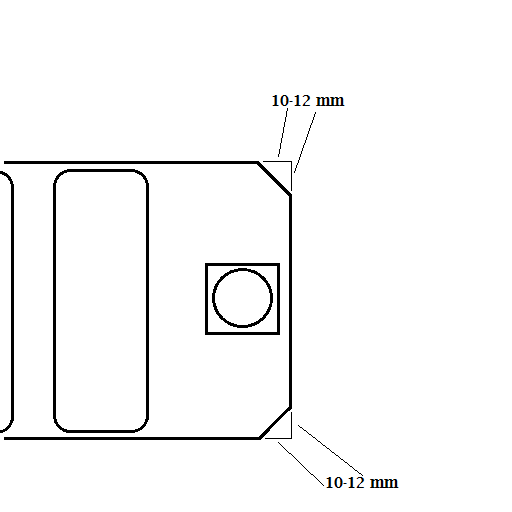
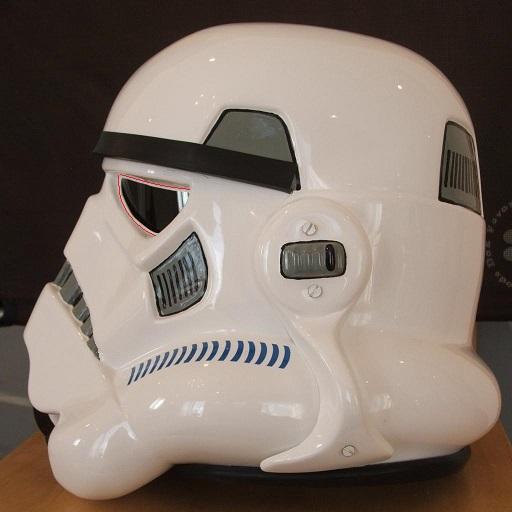
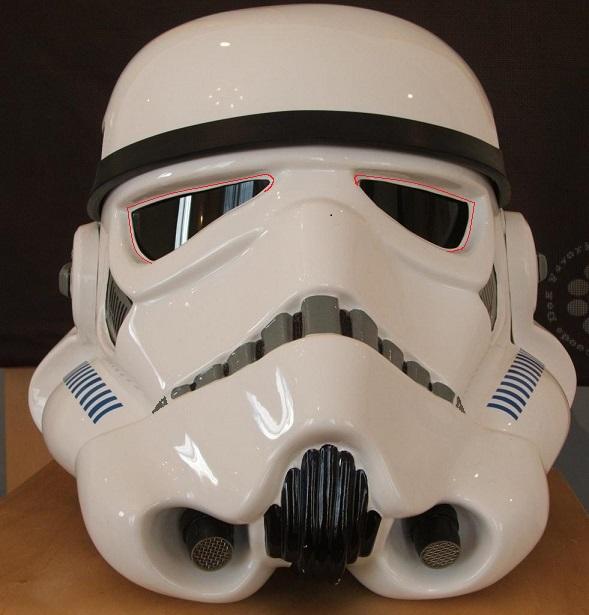
Hey Amir!! Thank you so much for sharing your TM armor with us! You have already been out in the trenches making people smile and we thank you also for that! Now let's take a closer look at your armor! CRL and EIB Application Requirements: All submission photos have been posted. You aremor represents all elements needed for EIB. With that, I would like to congratulate and welcome you to EIB!! Other-Armor Fit/Assembly: In this section, myself and your fellow troopers provide suggestions to further improve the overall look of your armor. Unless specifically stated, these suggestions will not affect any applications and are up to you to change. Over all, you have a nice clean build. You should be proud! As many already know, I am a fan of the beefy trooper. Every Garrison needs its muscle! But sometimes, parts that are too loose can do more bother than benefit. In my opinion, the thighs and shins are the foundation that the TK stands on. These are parts that should be well fitted to the trooper to give a sleek, balanced look to the armors' base. In looking at your legs, it would seem that the fit can be tightened up a bit at your ankles and your knees. If they can't be resized then they can't. I also noticed that the cover strips on your thigh fronts are a bit wide. They should be near 20 mm but I have seen worse. The only other thing that I wanted to mention as an optional change is to lower the scope rail on your blaster a bit. The space between the receiver body and the rail really should not be larger than the bolts that connect your scope to the rail. (about 10 mm). No big deal if you don;t A good point was brought up regarding your Thermal detonator. The belt clips should be touching the control panel in the front. If you wanted to step up the accuracy, pop rivets were never used to attach the clips to the main body. You could switch them out for pan head slotted screws and paint them black to make them even MORE accurate. Well done on your handpainting! Your outlines are very consistent and balanced. I should state that you may have been a bit enthusiastic with trimming the corners of your waist belt. They should be trimmed about 10-12 mm up the from the corners on the vertical and horizontal sides. I want to add one more suggestion, and that is to glue down your rubber handplates a little more. They stick out quite a bit and will get torn off if caught on something. Centurion Suggestions: I hope to see a Centurion application from you in the future! There are, however, a few upgrades/adjustments that you will need to make prior to an application. I want to start with your helmet. I am going to show you two things on these pictures. First is the frown. The far ends stop a little blunt and need to be a bit more tapered. If you want to, you can taper the last tooth as you have it or extend the frown past the indent of the 5th tooth. The side picture of your helmet shows your helmet if the last tooth was tapered. The front shot of your helmet shows the frown with the extra tapers added. Now, the red lines on these pictures show the extra material that I would like to see you remove from the eye openings. These lines are in suggested locations just to give you an idea of what I am looking for. Use reference photos, screen shots and other TM EIB and Centurion applications to prefect the trim line locations. Next is the need to adjust the fit of your back plate to NOT overlap the kidney. The back should rest on not over the top of the kidney. This may or may not be possible, but your drop boxes are a little thick. Proper thickness should be around 12 mm but if there is no way of trimming them down without extensive damage, leave them be. Your Centurion pictures, however, need to show the outer edges of the boxes even with the outer edge of the waist belt. Next point will be a challenge. You will need to fill in the seams created by the added shims on your sides. Because the kidney has a return edge here, your best bet would be to create a straight line to trim. This will make the surfaces of both the kidney and shim sit even making filling the seam easier. You may need to make a couple applications of ABS paste to fill in everything and make it smooth but I have seen some excellent examples here. It was mentioned before that your shoulders will need to be adjusted so they sit very near if not touching the ribbed shoulder bridges. Lowering your biceps and forearms will balance things as well. Make sure you dab some white paint on your thigh pack rivets. All return edges from the wrist portion of your forearms will need to be removed as well. Most of these fixes are simple. Though the kidney/shim seam will be a challenge, it has been done many times. If there is any question about how to proceed with this, please ask me or post a thread. Congratulations again on your EIB!!!
-

DVH Pipe Build with Extras
gazmosis replied to I'm Batman's topic in Build Threads Requireing Maintenance
Nice work on that! -
This is great!
-
I did not prime the inside. But like I said before, I heavily washed the interior before assembly and veiled it out again with mineral spirits prior to application
-

Build goofs that everyone has made
gazmosis replied to Tusken RTT's topic in Hard Armor (General Discussion)
I fell in love with the rapid set plasti-weld but found out you need scientific precision to apply it because it will destroy your finish on contact of it squeezes out. Too much = mess! Too little and the parts won't bond = must re sand all glue off and star over. Hard lessons learned -
I have used this on almost every helmet available here: ATA, AP, MTK, and RS which is the thinnest plastic by far. No issues with any.
-
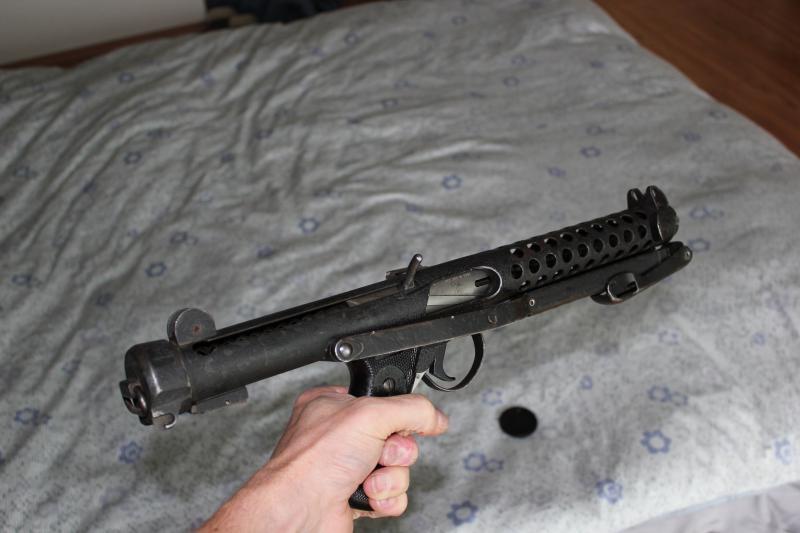
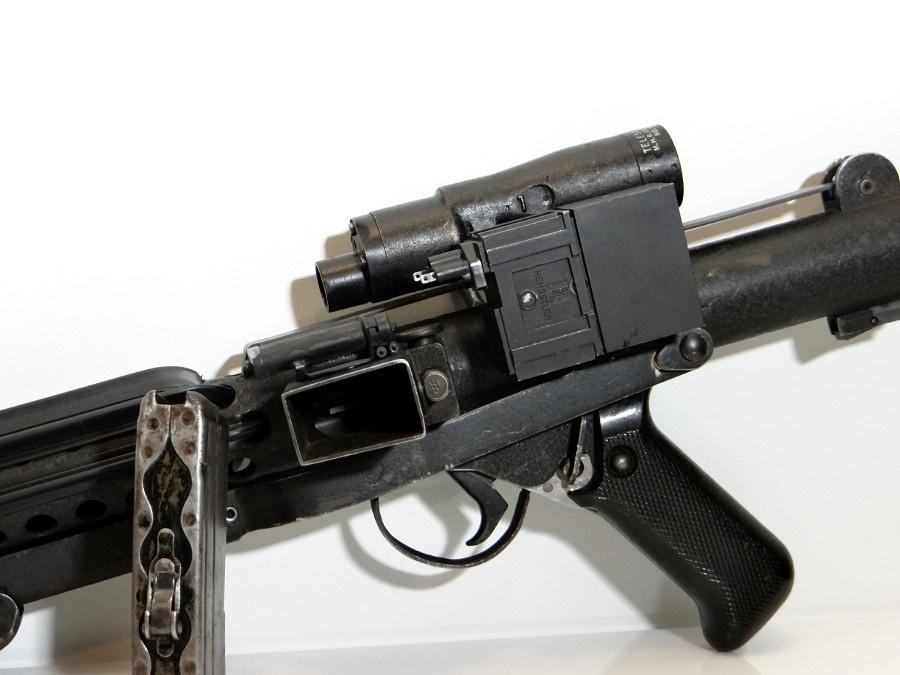
Well ash, you are two for two out of the box. The amount of work that went into this had to be astounding. Congrats!! I would definitely consider tweeking a few things, though. From back to front: The buttcap has excellent detail, but is missing the "d" ring retainer on the end. Secondly, the main receiver tube has a collar with locking tracks that the butt cap locks on to. This is slightly larger in diameter than the main tube. The main charging bolt is short. As you can see here, the bolt extends to almost the back of the pistol grip. The tracking strip on your bolt is way high as well. Looking at that same pic, you are missing the rivets on the hinge point of the folding stock. The mag area is a topic brought up,a lot. The walls of the originals were 1/16 th of an inch thick (just under 2 mm I don't understand why your walls need to be so thick. It gives the magazine a flattened appearance. Lastly, I would make the front sight pin a bit smaller. The detail you have achieved here is mind blowing. You have a gem of a product developing here!!!
-
Contact the guys at Armor Master.
-
ATA, AP, MTK always have helmet kits available
-

TK-55239 Requesting ANH Stunt EIB Status [NE][432]
gazmosis replied to Pencap510's topic in Request Expert Infantry Status
Thank you , Ty for getting the cylinders on. I know you have better ones coming but regardless, congratulations on your arrival at Expert Infantry!! -

E 11 power cylinder area... Help!
gazmosis replied to justjoseph63's topic in General Weapons Discussion
Don't get too hung up on the counter to cylinder wires. It has never been a centurion requirement to have them. If you do go that route, less is more. Here is what I used -

My first build. RS Armor
gazmosis replied to EDaniels's topic in Build Threads Requireing Maintenance
This one will be a nail biter. Since you can't really trim down the round portion of the ears any more, it will be hard to get those gaps closed like you want to do. As for the brow, you shouldn't have any gap between the brow trim and the face area above the eyes. It's an easy fix to adjust that because if you need to move the rivets and reposition them, it's all hidden under the ears.


