-
Posts
4,043 -
Joined
-
Last visited
-
Days Won
23
Content Type
Profiles
Forums
Gallery
Articles
Media Demo
Everything posted by gazmosis
-
I can't really see the bottoms, but you could still take a bit out of the middle two to make them a bit taller. Just my opinion, though.
-
They said he walked away from it. Albeit with a bloody face......but he did walk away from it.
-
Hey Charles! Awesome work with two costumes in one week for EIB! Obviously you had this planned! CRL and EIB Application Requirements: All required photos have been posted. For the record, a "bucket off" pic is not required for EIB applicants. Only for basic approval at the Garrison level. ​All components of your HWT are present to qualify for EIB. With pleasure I can say congratulations on your EIB approved HWT!!! Other-Armor Fit/Assembly: I very nice overall base armor build to upgrade the FX to EIB level is the foundation of this costume. A very well detailed backpack as well! You hit the nail on the head in regards to the definition of light weathering. Just perfect. Centurion Suggestions: Sadly, the FX armor does qualify for Centurion status. This doesn't mean that you shouldn't be proud to troop in this awesome costume! Maybe an armor upgrade is in your future, maybe not. Either way, you look great and your Garrison should be proud!
-

Cutting ATA forearm DIAMETER?
gazmosis replied to russellr2d2's topic in Hard Armor (General Discussion)
Keep in mind guys that if you are to remove these ridges, it should only be on the underside of the forearms. The tops of the originals HAD the raised cover strip "stage". -

TK 72627 Requesting ANH Stunt EIB Status (FX)[446]
gazmosis replied to Templar726's topic in Request Expert Infantry Status
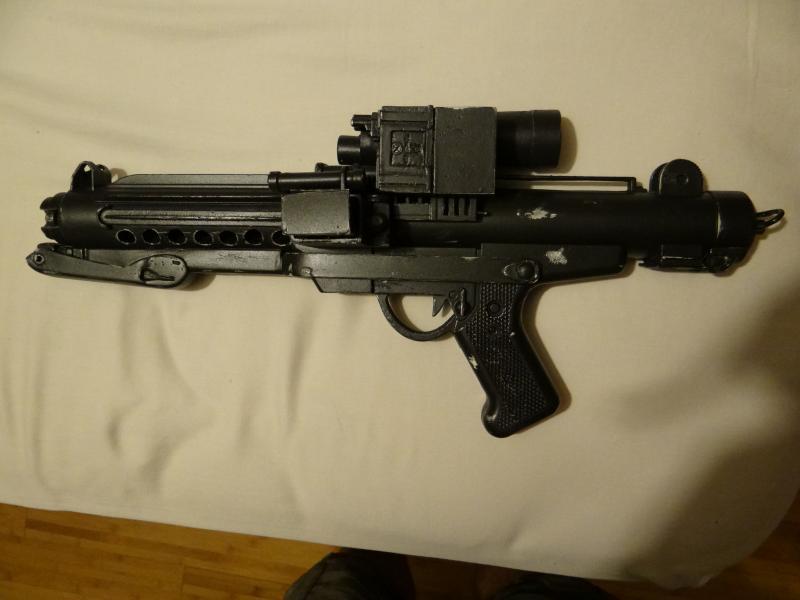
Thank you for getting that picture up so quickly, Charles! In addition, thank you for your application for Expert Infantry! Oh.....NICE PHANTASM BALL!! Let's have a look at your armor!! CRL and EIB Application Requirements: All required photos have now been posted. Although your armor represents all the necessary requirements for EIB, there needs to be one change in regards to your blaster. The lower most T-track on the magazine side needs to be removed. Once removed, new holes need to be drilled. Your final appearance should look similar to this: Make this one small change and you are there. Other-Armor Fit/Assembly: You have done a wonderful job in both the fit of this armor and your build. You have really brought this FX to the next level with your upgrades like the new belt rivet covers, drop box backs, thermal detonator, new cloth belt, and of course; the AP bucket. Wonderful job on that build as well. You even have many of the accurate details not present on many basic builds. Even fixing the once riveted sniper knee. I bet you have made many smile! Centurion Suggestions: Well as nice as this armor is, sadly the FX suit does not qualify for the Centurion program. The good news is that it is clear that you have the talent to build a fantastic suit. With what has been done to this current one, you will make some trooper very happy if you plan on upgrading and selling this one. Thanks again for a great build and get that blaster updated so we can assign you that badge!! -

TK-61972 Requesting ANH Hero EIB [NE] Status[445]
gazmosis replied to Haribon72's topic in Request Expert Infantry Status
ATA hero ears.....check!! -

TK-13058 Requesting ANH Stunt Centurion Status [NE][151]
gazmosis replied to Mutter's topic in Request Centurion Status
I actually thought that bridge elastic was wider than 3/8. When you do get around to moving those rivets, post the repair here so we can all see your improvement. -

who has or sells thermal detonator
gazmosis replied to TK1024's topic in Getting Started - Read this First!
You can also check with MTK and Armor Master -

TK-13058 Requesting ANH Stunt Centurion Status [NE][151]
gazmosis replied to Mutter's topic in Request Centurion Status
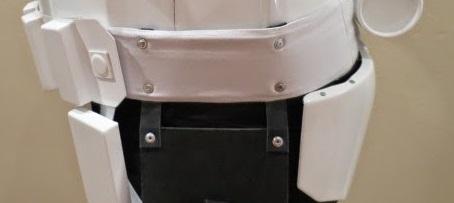
Thank you, Greg for you application to Centurion. Let's get to it! CRL and Centurion Application Requirements: All submission photos Have been posted. Your armor has all the necessary elements that are required for Centurion. Congratulations! Other-Armor Fit/Assembly: This is a very nice overall build, Greg. Your adjustments that you have done since EIB have made a big difference. The new button plate on your ab, the trimming at the back of your thigh pack, wrist openings. Nice! You even have your forearms re positioned so it just looks better. Although the CRL makes no specific mention of it,(It just didn't occur to me during your EIB review) your shoulder bridge elastic is looking a bit wide. Let's keep the elastic to around 1/4" (7mm) folks. Germain brings up a decent point regarding your side rivets and their positioning. I did see this in your EIB application but simply made a decision. Do I think that perhaps the top two rivets could be moved up a bit? Yes. Is the process of filling the old holes with ABS paste then drilling new ones a simple fix? No. Considering the quality of the build and the other changes and adjustments that were made here, I didn't put this in the same category as overlapping construction or missing blaster components. Congrats again, Greg! -

TK-31415 Requesting ANH Hero Centurion Status [ATA][150]
gazmosis replied to Zaphod's topic in Request Centurion Status
Hey there, Pete! Thank you for your application for Centurion!! CRL and Centurion Application Requirements: All required photos are posted. All "hero" elements are present. Bubble lenses, 3 tooth frown, 3 rank bar ears, 2 ear screws, 4 holster attachment points. You said you were going for the "Han" look of your armor. I think it's cool that you even have the two different hand plates! Nice detail! Since the "Han" look here is a generalization and not a costume replication, certain Centurion requirements like blaster details must be met. Now that we got that out of the way, I am pleased to be able to congratulate and welcome you to Centurion!!! Other-Armor Fit/Assembly: I was really hoping to see your shoulder bells moved a little closer to your bridges. I would also re-tie your shoulder bridge elastic. With it that loose, it's not a matter of if but when you will lose those. Great fit on your sniper plate. The upgrades you have done really make a difference. I'll bet that your chest is a lot more comfortable after you lowered it since it's not cramming up into your neck. It looks so much better as does your waist belt. Great overall work. It would be an honor to troop beside you! Congratulations!! -

TK 72627 Requesting ANH Stunt EIB Status (FX)[446]
gazmosis replied to Templar726's topic in Request Expert Infantry Status
Hey Charles! Before I do your full review, there is one picture I need to see and that is a picture of the magazine side of you blaster. There are specific changes to the base toy blaster that need to be done that EIB requires. If you have already done that...AWESOME! If not, check the CRL in the blaster section. http://www.501st.com/databank/Costuming:TK_anh_stunt Thank you! -
the circle is now complete!!!! Welcome, Sir!!!
-

TK-61972 Requesting ANH Hero EIB [NE] Status[445]
gazmosis replied to Haribon72's topic in Request Expert Infantry Status
Mr. Walter!! Thank you for letting us see this sweet armor. Thank you also for your application to EIB! Let's get to it!! CRL and EIB Application Requirements: Thank you for sharing your library of photos with us! All the required photos from the checklist have been posted. Although Andrew correctly mentioned about the thigh pack rivet being a requirement for EIB, it is not a required photo. I have spoken to Eric in regards to having this added. Thank YOU for adding it! All aspects of the "Hero" armor are present: Bubble lenses, 3 tooth frown, 3 rank bar bump ears, two ear screws, and 4 holster belt attachments. The rest of your armor meets all requirements for EIB. With that, I would like to congratulate and welcome you to Expert Infantry!! Other-Armor Fit/Assembly: In this section, I will summarize observations by myself and your fellow troopers that go towards improving the overall look of your armor. These "suggestions" will not affect any application unless specifically stated. Nice job overall! I know this took some work because you needed to incorporate shims to the sides. Working with ABS paste is always a challenge. You have successfully eliminated your seams. If you have the ability to make up some additional paste, you might have one more go at the seams to help blend that color difference. Or maybe, it just needs some light sanding with a very high grit sand paper(600-1000) and some polishing compound???? I was surprised at how well the ears match with the rest of the helmet. Who was your ear supplier? This is the second time in as many weeks that this has showed up. I am talking about the holster straps being attached to the front of the holster rather than the back. The CRL does not recognize this so there is no violation. But the straps were typically attached to the rear of the holster. If there is a specific reference photo that clearly shows this, I would love to see it. We are never too old to learn something new! Centurion Suggestions: I would think and hope we will see a Centurion application in your future. The only thing I would like to see you change is to grab some black acrylic paint or something else that won;t come off and knock down the gold on the scope of your blaster. Historically, This has always been a little "enthusiastic" with the Hyperfirms but this was never the case on any of the movie weapons. Congratulations again!! -
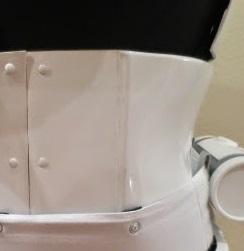
Hello Andrew!! Thank you very much for letting us marvel at yet another RS work of art! Thank you also for your application to Expert infantry! CRL and EIB Application Requirements: All but one photo is present. The crotch hardware is not an EIB requirement but we like to see it because some people paint them and that would be a point to mention for "Centurion Suggestions". I assume from all the other details that they are there. Please post this if you get a chance. Your armor hits all the marks that that the EIB program requires. With great pleasure I would like to congratulate and welcome you to Expert Infantry!! Other-Armor Fit/Assembly: I guess its a compliment if I can't tell whether you or RS built this set. Outstanding work either way. In this section, I summarize suggestions from fellow troopers as well as my observations for improving the overall look of your armor. Unless specifically stated, these "suggestions" will not affect any application. Thankfully, there are not too many things to mention here! It was touched on above that you seem to have a lot of movement in your left side between your ab and kidney. Split rivets are easy to pull out so replacing the elastic with nylon webbing, even if it is just on the top connection, may help this to stay in place better. The connecting brackets always give a classic look to armor. Dabbing a little white on the screw heads might make them stick out a little less without taking away from the accuracy aspect. Dabbing some black marker or paint on your Thermal Detonator clip screw will do the same. SPECTACULAR helmet details!!! Right on! Can you do me one favor......Please grab a measuring stick and post a pic telling the width of the straps that connect your holster to the belt. These need to be in the realm of 20mm and many holsters that come out of RS have 25mm or wider. These look good but I am just checking. Thanks. Your gray ab buttons could be a tiny bit bigger, but that is just me being picky. Centurion Suggestions: Truthfully, the only thing I would do is to re-take the pic of your left side with the proper alignment of your ab and kidney, This will really showcase this lovely armor. And make sure you have that crotch hardware pic! Congratulations again!!
-

TK-69323 Requesting ANH Stunt EIB Status(ATA) [456]
gazmosis replied to sylverbard's topic in Request Expert Infantry Status
Post pics of what you mean regarding the helmet traps -
Just brilliant!
-
With the micro pic of the right side it can't really see anything but your set up is good and positioning seems ok. What are your concerns specifically?
-

HELMET FACEPLATE MEASURES- a comparison.
gazmosis replied to TK bondservnt's topic in Hard Armor (General Discussion)
Pics or this can get confusing! Or never happened! -
Some cons have weapons inspection areas. If you are not secretive and prove thus is in now way capable of firing, they will pass it and mark it with a fluorescent zip tie. You might be required to do something with the barrel end like an orange insert.
-
So you drilled the stock hinge point all the way through? Gutsy!! Great result, though!
-

Quick Question re: Right side Snap on Ab Armour
gazmosis replied to dark_jedi_ire's topic in Hard Armor (General Discussion)
If you find a supply of them, let me know! -

TK-69323 Requesting ANH Stunt EIB Status(ATA) [456]
gazmosis replied to sylverbard's topic in Request Expert Infantry Status
NO!!! It's terrible. I will be sending you my address so you can send it to me for proper disposal. Seriously though, it's really nice. You even have the wire on the front. -

TK-13058 Requesting ANH Stunt EIB Status [NE][443]
gazmosis replied to Mutter's topic in Request Expert Infantry Status
You'll have a sunny day eventually! The fact that you had no mobility issues amazes me but it's great to hear you didn't have them. On the forearm issue, you should have no rounded edge. I'm anxious to see your Centurion application. -

Clear Coat Automotive Polish?
gazmosis replied to Outer Rim Tim's topic in Assembly, Mods, and Painting
You can use ant type of auto polish on it. If you have any duller spots, use a polishing compound first like Novus or an automotive compound.


