Leaderboard
Popular Content
Showing content with the highest reputation on 02/24/2024 in all areas
-
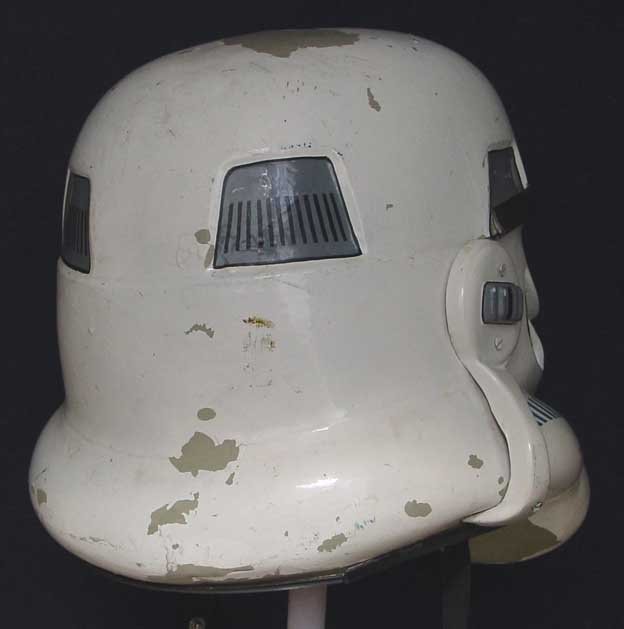
Hi Tyler! Great to see your Centurion submission !. You did a great job with some of the required Centurion fixes, we need you to make and extra final effort so we can place that Centurion Badge under your name. First of all I'll need to add some missing photos according to the Check list like: 9. ___ Thigh ammo pack connections (interior and exterior, left and right sides) 10. ___ Sniper knee plate (left and right sides) 11. ___ Wrist openings 12. ___ Abdomen button plates (close-up) 18. ___ Close-up of Hovi tips 20. ___ Ear screws (close up, left, right and bottom). 25. ___ Boots (tops and sides) By the other hand, as it has been noted by fellow troopers Caleb and Glen, there are some issues that need to be fixed : 1- Helmet rear traps lines This is a suggestion in case you would want to improve a little more your helmet. Is and easy and quick fix , just adding a half centimeter of gray paint to the upper section of the taps. BEFORE AFTER REFERENCE 2-Shoulder Bridges and White elastic. CRL L3: These shall be glued in front. The plastic shoulder straps need to be held down in the back via a white elastic band to the white fabric that connects/bridges the chest and back piece. I'll need a close photo of the front section of the shoulder bridges showing they're glued and not velcroed. and move the white elastic to the rear section. 3- Ab-Kidney Connection: Your armor shows a little overlap in the right side and a noticeable gap in the left one. CRL L3: Ideally there no gap between the abdomen and kidney armor. Abdominal and Kidney Plate align horizontally at top. A single visible seam line is present. 4- ABS Ammo Blet position: This was a Centurion requirement from your EIB review. CRL L3: The top of the ABS ammo belt should sit at or just above the bottom of the central and vertical abdomen button panels. Finally: As you rightly noted , the resolution can be improved so we can see more in detail. Remember that Centurion is our top level and the more scrutinize Glen's Note Also your full body images are quite small in resolution 435 x 580, makes it hard to magnify to see some details Photo Guidelines Size: Photo size larger than 800x600 (preferably 1280 x 960) to allow the DO to see your armor's details. 1024x768 Almost there Trooper !!3 points
-
Hi everyone, it's been a while! So, as always I have been looking to improve on my builds. Recently I have been working on cold casting the scopes. Step 1 was to cold cast in brass Step 2 was to overlay with a coat of matt black Step 3 was to buff the black back Sent from my SM-G950F using Tapatalk3 points
-
Tomorrow, Sunday the 25th of February, at 15:00 GMT there'll be a meet-up in the Discord Video Chat. If you're interested in seeing a few familiar faces from the forums, chatting about Stormtroopers, Star Wars and FISD, and maybe even getting to know a few troopers, feel free to join! I'm looking forward to seeing you there! And don't worry if it doesn't work out this time, we're aiming to have this as a regular event with and will be having this at different times and dates in the future to allow everyone to join in.3 points
-
3 points
-
I cracked it! [emoji1320] Sent from my iPhone using Tapatalk2 points
-
The resolution is terrible. Ill try to fix this. Thanks for the feedback! I am sooo close that I can almost taste it XD2 points
-
I think I got it figured out. I saw the bolt inside and was able to wider the first ring so that it catches the bolt. and puts pressure on it. We'll see how it holds. Thanks for the offer to help. I'll keep working on things and, if it's ok, I'll keep posting things here as I gear up for level 3 approval.2 points
-
At least we know the exact material for the wrapping, but again a possibility that the wrapping is also artistic license as long as it resembles the application rather than the positioning. 20 different CRL's for the one costume, an absolute Night trooper mare! See what I did there The complete costumes I've seen on FB posts have all looked pretty awesome, regardless of what armour the person used, some followed a particular seen on screen trooper, others just went for it and WOW! So far the only thing settled on is that 100% they were R1 costumes used, our source from the set confirmed it was between 17 and 20 full sets that were Dremelled, painted, Gold Leafed, and they thought it was funny that they used every costume they could get their hands on. The thought was, so what are they going to do now there are no standard white R1 TK kits left.2 points
-
2 points
-
Good news, my armour has been cleared. What a journey and massive thanks to all who has contributed on my thread (especially you Glen). It’s taken a while but never would have thought I would be able to build my own stormtrooper when I joined the 501st in 2021. The journey isn’t over though. I’ll be submitting my Expert Infantry pics soon and hopefully Centurion. Sent from my iPhone using Tapatalk1 point
-
There are no requirements to remove rear return edges on the forearms or biceps, really depends how they sit on their arms, many of us with smaller frames keep them so there are not big gaps seen when wearing them. Screen suits had little to no return edges1 point
-
I've never used that glue, but I'm sure someone will be able to give you some advice. Maybe soaking it in warm water, or using isopropyl alcohol, or mineral spirits might help. What is very important, is that you don't use products with acetone.1 point
-
1 point
-
Yea copy that. I was reading through some of the threads regarding 3D printing and saw that. I printed a trooper helmet and did exactly that and it turned out pretty nice. I'll post pictures of the blaster when I get it all done. Thank you for the info!!!1 point
-
Thanks for reminding me on this, Chemi. I’m a few millimetres out on this. Only one small problem, I can’t get the end caps off. They’re glued on pretty well. This is an RS kit and one thing I would say is that the tube part of the TD is pre-cut with the clips already screwed on. The end caps and front piece was cut by me to the trim lines. From what I can see of the measurements, the tube is a little short on what RS provides. Any suggestions on how I can get the end caps off and I’ll glue back on and not push right up to the clips. Sent from The Empire1 point
-
The armor looks great (the TD is a little crooked and a little high with respect to the canvas belt,a simple dressing issue, lol). You shouldn't have any problems for basic. P.S.: Did you check the the gaps and endcaps on your TD, that @gmrhodes13 pointed out?1 point
-
So, aside from a few adjustments (tighter elastic to hold down shoulder bridges and kidney/ab overlap) I think I’m pretty much ready for basic clearance. Thoughts and suggestions welcome. Sent from my iPhone using Tapatalk1 point
-
1 point
-
1 point
-
Hi Jim. Welcome to the FISD. I also have an AP kit. mark is great and the kit holds up really well. As others have said, we are here to help and never be afraid to ask any questions no matter how small. It is better to do it right, than to make a mistake and need to order a new part. ‘Looking forward to following your build.1 point
-
Welcome to the ranks! We look forward to seeing your build thread! There a lot of helpful folks here in on the forum, be sure to ask lots of questions. There is no such thing as a bad question. We all were at your point once and we all know how somethings just need some extra explaining! Best of luck, can't wait to see your approval post!1 point
-
Hello and welcome aboard, looking forward to seeing some Big Brown Box photos soon Make sure you get rid of all the 3D print lines For higher levels of approval EIB and Centurion: For costumes with only blasters. 3D printed blasters cannot contain visible print lines and must be sanded smooth for a more realistic appearance. For costumes with both blasters and accessories. 3D printed blasters and any approvable accessories cannot contain visible print lines and must be sanded smooth for a more realistic appearance. E-11 Blaster OPTIONAL L2 3-D printed blasters can not contain visible print lines, and must be sanded smooth for a more realistic appearance.1 point
-
Nice work trooper A couple of tweaks before the DO's get here, they may be mentioned: Appears your shoulder straps aren't affixed on the chest and the elastic has moved forward. Shoulder Straps OPTIONAL Level three certification (if applicable): These shall be glued in front. \ Normally the position of shoulder straps on the front is 1 large tab and 4 1/2 to 5 small tabs BUT ATA won't allow this due to the chest angle, I manage to only get 1 large tab and 2 1/2 small tabs to sit flush. You have some overlapping on the sides, kidney to abdomen, perhaps add some tabs behind the kidney Something which may have been missed at EI are the tube stripes, they should fall forward from the top at the front HELMET OPTIONAL Level two certification (if applicable): Fall of tube stripe tops ideally lean toward the front. You have a bit of a dip in the brow trim, you may want to straighten Rear helmet stripes are a little high Abdomen Armor OPTIONAL Level two certification (if applicable): Any gap between the abdomen and kidney armor is no more than 1/2" (12.5mm) wide. " For Level 3, the top of the ABS belt shall sit at or just above the bottom of the central and vertical ab button panels. A slight overlap is suggested, but not required" Also your full body images are quite small in resolution 435 x 580, makes it hard to magnify to see some details Photo Guidelines Size: Photo size larger than 800x600 (preferably 1280 x 960) to allow the DO to see your armor's details. 1024x768 These are just suggestions as the DO's may or may not require any of these items addressed Good luck with approval trooper1 point
-
Right!, this is an unusual one for FISD with so many variations, and something that will be under discussion to work out how we get some kind of balance between flexibility and what we see on screen. I think one important factor is to try and keep it easy, not convoluted, which in turn can get confusing. This is only an extreme example, but we don't see an all grey Night Trooper on screen, so that seems logical to dismiss. We do see several different combinations of components in grey, but what might be nice is to simply have a minimum of say one grey component, and possibly a maximum of Three. That's if you wish to have grey components because quite a few had none. (options!!!) Find one on screen you like and match it, or even make your own combo of 1 to 3 components, or none of course. I agree there are so many possibilities, this could be our fist CRL that allows more flare than others because they are so different and so many. Then there is the cracking, I really feel that should be an open aspect, we are not trying to make a level like MEPD where you must pick one and make it exactly like the picture for Level 3. Personally, I've never been against having a new level to go that extreme, but there has never seemed to be much interest to pursue it. I am interested to hear from as many members and staff as possible so we can land on common ground to be honest. Above is only an idea to drive conversation and move us forward, but it is a great question to have asked.1 point
-
Hi Matt. Try filling the inside of the sliding bolt by gluing some black foam (or any other black material, being careful not to let it show from the outside). This will prevent the spring from sliding forward. Gluing the spring to the end cap doesn't seem like a bad idea either(using a glue that withstands the hard life of a trooper).1 point
-
Troop 120: 10/21/2023 - WA State Toy Show - Ridgefield, WA (284th troop overall)1 point
-
I think Glen is at about 20+ approved costumes, so that's gonna be a tough one... (I secretly think he has an airplane hangar for storage).1 point





.thumb.png.ff401943e444bbadb762b395df17773c.png)
