Leaderboard
Popular Content
Showing content with the highest reputation on 01/25/2024 in all areas
-
*I need to begin this thread by giving the biggest thanks and appreciation to @justjoseph63. If it weren't for him, this project would have ended badly. He put up with my endless questions to try to get this as screen accurate as possible... so I humbly bow to you in greatness!* I was 12 years old when ANH was released in 1977, and ever since then I wanted my own E-11 blaster. As time went on, I still wanted one, but could never afford a "real" one. The blaster slipped my mind for a while, until I stumbled on one by accident. It was one by Blaster Master on MyMiniFactory. Here is the link: https://www.myminifactory.com/object/3d-print-star-wars-storm-trooper-blastech-e-11-blaster-rifle-by-blaster-master-72283 It was an old upload, so the electronics that could be used with it were no longer sold. I wasn't sure if I wanted sounds/lights yet... I just wanted to build it anyway. It was printed using Hatchbox Black ABS on a Sovol SV01 FDM printer, with some parts printed with an Elegoo Mars 3 Pro resin printer. I'll start the thread with a picture of some of the parts printed and assembled. The barrel was in 3 pieces, glued together and sanded to hide the seams. The magazine is 2 pieces. The tail end comes off. I use it to hide the battery for the electronics I used (more on that later...). The T-Tracks were 2 pieces, the top rail part printed with TPU, to keep it looking and feeling rubbery. I got the spring from Blaster Factory... I had to actually cut it down a bit because the compression was way too much for this build, but it worked great. Every part in this build was sanded numerous times, painted with matte black primer/paint, then sprayed with a matte clear coat. Another note: I'm sure things in this build won't conform to any certification, and I won't be doing the full armor anytime soon, but I TOTALLY respect this community, and plan on being here for a long time. If this will get me a weapon certification, that would be pretty cool, but I'm still not too up on how that all works yet...4 points
-
4 points
-
4 points
-
So here it is...almost completed... Still need to add the pins on the Hengstler. It's the best pic I can grab right now. I'm 3D printing a stand for it as I type. When it's complete I'll take a better picture.3 points
-
So other than the tabs on the Hengstler, and the stand, this build is complete! 6 or so months later.... lol... I'll post a final picture when the stand is complete, probably by the weekend. Again, I REALLY want to thank @justjoseph63 for his EXTREMELY EXPERT guidance throughout this build. And if anyone has any questions or comments, PLEASE let me know. I'm sure I didn't do some things right, so I'm not afraid of criticism. After over 40 years I FINALLY got my blaster!!!!!!!!!!!2 points
-
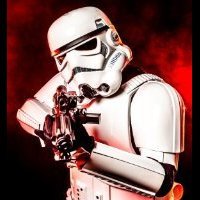
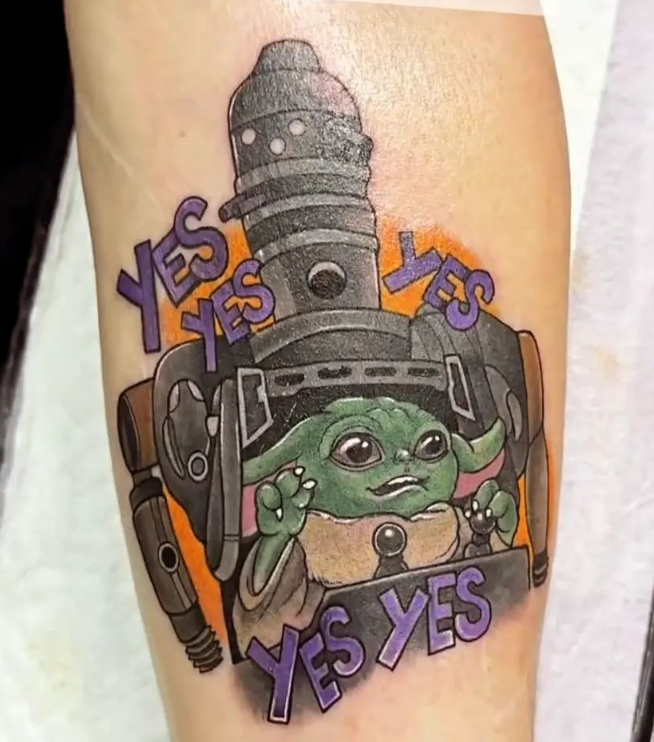
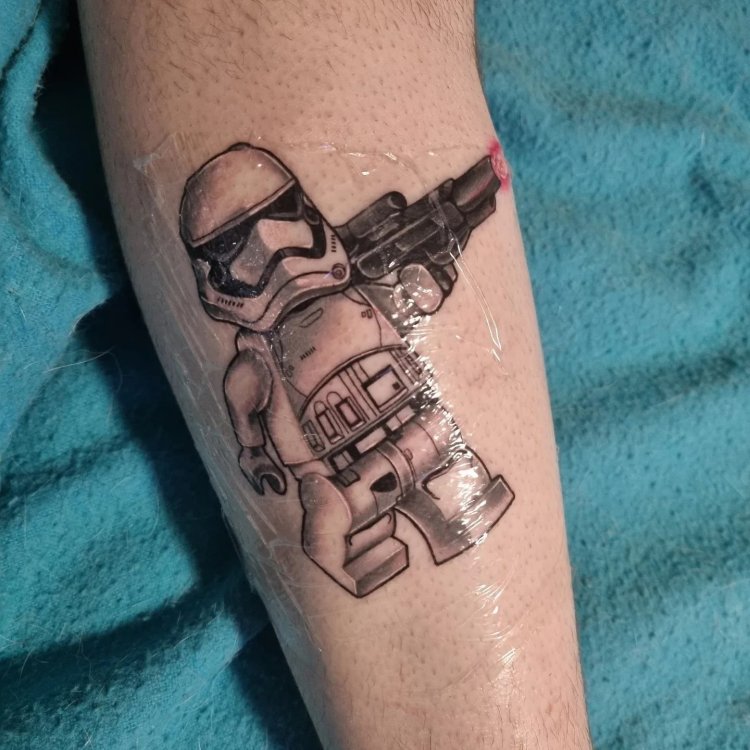
Just got a tattoo yesterday. Initially I was going to get the Imperial cog mashed up with another of my interests (the Wheel of Time) but decided to change it and add a stormtrooper helmet and my TK ID. The helmet is the same as in my profile picture, which was one of the first pictures taken of me in armor.2 points
-
Hello all, I am freshly minted TK-74759, and I have a separate 50 gallon bin for Kylo, so I wanted to make this bin my TK/Trooper bin. First thing I did was strip the stickers, painted it white (masked handle/wheels/tires). I have TK Name Plates and 501st Decals on the way. I also would like to add some lights/switches and OLED type displays on this thing. I also want to 3D Print a rod to hold up the removeable drawer on the extended handle, and I'll show that design here eventually. I added Imperial cog wheel covers, and I have a black handle I'll be adding opposite the extending handle to aid in lifting the box into my truck. I want my TK box to be unique. Right now its pretty plain, but I'll try and keep up this thread with my progress. To Do: 1. Add custom etched plates TKID/501st Legion Decal/Carolina Garrison Decals 2. Add Black Handle Opposite extending handle. 3. Add lights/blinkies/OLED? 4. Design/3D Print a bracket to go across extended handles that will hold the removeable drawer...which contains my ICOMM 5. I'll take any other suggestions! Beginning state! Paint and Wheels side! paint and wheels top1 point
-
Hello everyone. I wanted to first say thank you to everyone on this platform. As a newbie to this (trying to decide what to build, etc.) I've literally spend the last few months diving down this rabbit hole of information. It's was a little overwhelming at first, but as I started getting more knowledgable about the information layout it definitely got easier. And I'm very appreciative of the knowledge you have all been willing to share, especially for people like me who are just getting into this. I've been to a few of the build parties with my local chapter, helped volunteer at some of their events and I couldn't be more excited to start the process myself. I just got my TK kit in (much to the surprise and chagrin of my wife haha), but in truth she thinks it's pretty cool, and I can't wait to get started building it. Thanks again.1 point
-
So, you found us! Thinking about becoming a "real" Stormtrooper? Well you are in the right place, I promise. Welcome to the TRUE home of shiny (and sometimes not so shiny) white armor! While some may dive right in, others like to check things out and see what this crazy hobby is all about and learn about what it takes to join the 501st as a shiny white spaceman/woman. One thing I can promise you is that any questions you may have (no matter how strange you may think they are) will be answered in a friendly and supportive manner. We don't judge. Every single one of us has been in your position, and our goal is to assist you in any way we can. SO, it's time to stop lurking, introduce yourself and let us know how we can help you join the ranks and become a member of the 501st and FISD!1 point
-
Congrats on BBB Day! I can't wait to see your build thread! Best of luck to you and be sure to ask questions. No matter how silly you may think they are. There are a lot of knowledgeable people here ready to help.1 point
-
With changing out a helmet and a few other pieces you could do both Great spreadsheet on the differences between versions https://drive.google.com/file/d/10tEVteIreh6AHMogW010cuH_Bf8TBfU6/view1 point
-
I really appreciate it. I've decided to go with the TK (Stunt) from ANH, and I purchased my build kit from RS Propmasters. I've been watching their build videos on YouTube and found them very insightful and interesting. I've also been watching a few others on top of reading the threads on this site. I know there's definitely a lot more that goes into the process, but my OCD is ready for the challenge haha. I was initially torn on whether to do stunt or hero, but the stunt spoke to me and seemed like a the best fit.1 point
-
Thanks all! That's awesome to know that there are other female troopers! I figure being short (5'3") would kind of make one not look uniform to everyone else in the troop!1 point
-
I haven't had as much time to work on my helmet as I hoped but I have made progress with the eyes! Sent from my Pixel 7a using Tapatalk1 point
-
1 point
-
I did see posts that the Hengstler was angled to match the folding stock, but I thought it sat low, like what I did. I didn't see that it was actually higher. It's actually glued, so I won't be able to raise it up without ripping it apart...1 point
-
Was a while ago since I modded that one bit I think I used power from the momentary switch and the other directly from the battery pack, uses a hibright torch LED, also added a resister.1 point
-
My Gervious Blaster can in today. Over all, sounds loud enough. Can't wait to tear this sucker apart. http://i.imgur.com/N6eHKHT.mp41 point
-
I pretty much finished my post. I hope I did things right with the whole thread.1 point
-
Here is a wider shot of the blaster, still without the power cylinders glued on yet.1 point
-
I got the Hengstler Counter from that same build on Printables, since it was a more accurate part. I printed the front part (with logo) with resin, to keep the detail, and the rest of it was FDM.1 point
-
This is what the trigger mechanism looks like. I was able to find the right size trigger switch. The original build called for a rotary switch where the button is, but for what I was doing, I didn't use it. The button worked fine, and I hot glued it onto the assembly. Being that the spring for the trigger is part of the 3D print, I pull the trigger carefully, so it won't snap.1 point
-
Important comes first, hope everything is better now If you need any kind of help over here, just whistle!1 point
-
Not weird at all. There are a number of female TKs across the legion. For the most part things should be the same for you but if anything comes up we do have an all female section the Valkyries you can check out. https://www.whitearmor.net/forum/forum/255-vaders-valkyries-armor-open-discussion/1 point
-
it's as if this post was written JUST for me excited to get started - but is it weird to be a female stormtrooper?1 point
-
Mine isn't done yet. Still need some shading. But I like it. Sent from my SM-N981U1 using Tapatalk1 point
-
1 point
-
Just a little work this week. Cut down the sides of the ab/kidney. Before and after:1 point
-
Did a test fit. Things that went well: the side extensions and the velcro work. The snaps work and everything is relatively fitted in the right place. Things I will fix: the shoulder straps are raised and need to sit lower onto my body. I'm going to hot water bath the chest armor and bend the area where the shoulder straps insert and get them closer to my body. I might then lengthen the nylon straps that hold the chest and back armor together to get it to sit just a little lower. And because the armor runs a little big on me, I might trim the sides of the chest armor a bit too. Looking at the CRL and gallery/screen captures first. So I did both: bent the top of the chest armor and lengthened the straps by about an inch and a half. I also cut the width of the shoulder down a little based on the CRL and gallery images. I also trimmed a little from the sides of the chest armor. I did another test fit and then shortened the length of the shoulder armor. The CRL and gallery images show the length to be about even or a little below the horizontal line created by the pectorals. Mine were too long. I also added velcro to the shoulder straps and inside of the back and chest raised trapezoids. Drilled the 8mm circular indent described in the CRL. When looking at gallery images (two of them below), it certainly looks more like a hole than an indent. Any advice on whether to add a piece on the inside so it becomes an indent and not a hole? Latest test fit below. Still need to cut down the ab/kidney so it doesn't show above the extension pieces. I'll take any advice you have.1 point
-
Used "SNAP Setting 101 by justjoseph63." Didn't mention that last time but that post made the work a lot easier. Used a soldering iron to put the holes in the webbing. The shoulder strap took a bit of trial and error until I could get the chest and back armor to sit at the right place. Below is the strapping with all the different snap placements I tried. In the end, I used the two closest ones and that's the second picture below. Had to heat and bend the back armor so the shoulder straps would go in better and so the armor sat on my shoulders better. The arrows show the angle where I had to bend them down. Also had to lower the chest neck opening by about 1/4 inch. It was riding too high for comfort. The two picture below show the shoulder strapping from the underside. Second picture includes the shoulder armor. Fitted the extensions between the chest and back. Had to trim them a little once they were fitted. Also had to heat and bend them a bit more too. Might trim the back plate so it's the same width where it meets the extensions. Painting them black will happen this week. I was originally going to snap the extensions to the chest and back armor like I had seen in other builds, but I've decided to try velcro first. We'll see if that's strong enough once it's all in use.1 point
-
Good luck! Have fun! All questions will be answered to the best abilities !1 point
-
1 point


