Leaderboard
Popular Content
Showing content with the highest reputation on 01/05/2024 in all areas
-
3 points
-
My son just received his scout trooper kit from RS propmasters and they included a 2024 Calendar with the kit. I was so excited when I turned to Mr. August and saw @Nairy looking back at me. awesome to see you in there. Congratulations2 points
-
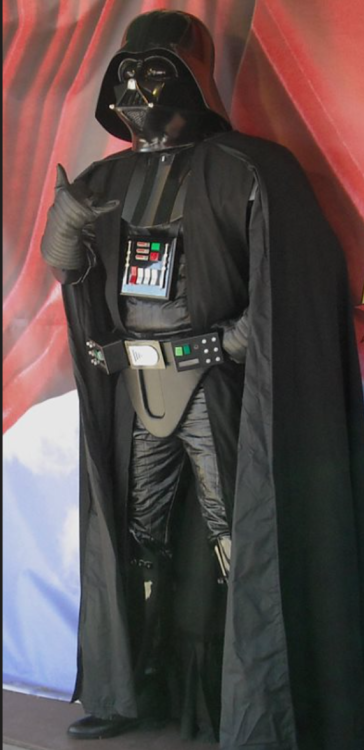
OneDrive has this cool feature where you can see "pix from this day in history" type of thing. Today it regurgitated one of the few times I got to wear a Vader. Not mine, but one of my garrison mate's. I have to say if you've never done a Vader, it's kinda tiring. That shoulder armor starts getting heavy after and hour, and having to keep your posture perfect, etc. is much more tiring that being a TK. Still, it's a huge amount of fun.2 points
-
This is the practical approach. Update basic so that either is acceptable and people can make the one that they prefer.2 points
-
1 point
-
Made the first one up using a "medium scratched" back plate. Worked almost perfectly. I used a few small dots of thick CA glue and there was just enough squeeze out to glue it to the jig I got it out with a bit of careful leverage from one bolt. I will remake the jig with a couple of holes in the back I can poke it out from. I also did a bit of light dressing to the edge to remove the glue but will see if CA remover does a nicer job. And as for this. I was expecting a price of about $ but it was actually not too bad (because China I assume) based on 10 of each scope ring. So each set would be in the $20 ish range at this qty, but I need to buy 10 sets and I have no independent indication of quality atm. I'll try find some examples of their work and make a decision another time, probably the day after the quote expires. I also requested a price for the scope rail but there was a section that didn't meet the minimum thickness requirements. I could probably make it work for me but then everyone would need a custom matching hub as well so I suspect that's off the table. I will have a think though, it's a problem with the screw hole location so maybe leaving it off and relying on adhesive is an option.1 point
-
They were intentionally cut to allow more range of motion. IMO, allow both since there is clearly precedent and don't let these things keep you up at night when there are already so few people building these kits to standard, let alone submitting them here.1 point
-
1 point
-
Congratulations Barry, welcome to Centurion rank sir1 point
-
So much detail work going into this, Chris, what an amazing build thread. I can't wait to see this one complete and of course a video of it in full action1 point
-
Greetings again Leander, the Captain Enoch section shall be your new home and will be great to have a build thread to start populating this new sections with excellent content. As you have already seen, we are building resources and preparing to create a CRL for this new and exciting costume. You will be one of the first to take this journey with us, and we are here to assist as much as possible in brining this costume to life for Legion. Once again, welcome aboard.1 point
-
TE July 2005 Matt Gauthier To: Noah! Enjoy and have fun! Your 1st Stormtrooper!1 point
-
Hello! My name is Nick and I am from Columbus, Ohio and the Ohio Garrison! I have been in the Legion for three years now and have three costumes: TFA Kylo Ren, an Imperial Officer and Emperor Palpatine. I've loved every minute but something has always bugged me. My friends who are more faceless characters get to PLAY! While I love my time being Kylo or the Emperor, I can't exactly break character. My local squad has some incredible Stormtroopers who have fun and meaningful connections with so many who come in contact with them and I want in on the action! I have no idea about a build right now. I am 5'10" and around 210 lbs. so I know I likely need a "large" kit but would love some guidance on my options. Thank you all!1 point
-
Welcome to FISD Nick. I think the 2 choices offered above are currently the right solutions based on your stature. AP redid their moulds a few years back to make the armour more accurate, but to also suit a wider range of body types. It's well-made and certainly suitable. AM has always been on the slight lager size. I have built a few of both these kits for members, and you won't be disappointed which ever path you take. Enjoy your new journey into hard armour, we are here to help.1 point
-
1 point
-
Hello and welcome! AM from Dave's Darkside Depot may be the best choice for you here in the US, pending how your weight is carried, but many maker's kits can be modified to fit your frame. Good luck with your research and ask plenty of questions!1 point
-
Barry Hicks 52586 Letter TKSpartan Thanks you! Way to go, brother! https://www.whitearmor.net/eib/certificates/52586-centurion.png1 point
-
Barry Hicks 52586 EIB Letter TKSpartan Thank you! My pleasure, Barry... see you at Centurion! https://www.whitearmor.net/eib/certificates/52586-eib.png1 point
-
This Poll is now closed. Thank you to everyone who participated. The majority of votes were a positive to make changes allowing some more flexibility with First Order blasters per the descriptor explanation at the top of this thread. This will be taken into consideration and further discussions had regarding the potential changes.1 point
-
1 point
-
Happy new Year to all, I hope this year brings plenty of joy and good fortune to every member in some way shape or form. 2023 for many was challenging, now we have turned the page and the Empire will be victorious, for we are the bad guys doing good. Here's to Troopers helping troopers around the world in every way we can.1 point
-
How bright do these need to be? 5mm can be made pretty bright, and you can use multiples. the other option is 1W or higher LEDs mounted on aluminium heat sinks.1 point
-
Depends on what batteries you will be using, generally I am using 5V power source and use 1K resistors This may be of help https://www.digikey.com.au/en/blog/atm-how-to-select-a-resistor-for-an-led1 point
-
I wonder if I could fit a normally closed Microswitch in the hinge block or something.1 point
-
Okay some more progress on the torch which is totally worth all this effort I am sure..... At least it's a distraction from breaking the 3D printer. So I ordered 2 of these torches from ebay that looked small enough. In practice they are too long and only just about fit down the available space, after a big mod to Germain's file to make it. First job was to cut one open and see what I had to work with. I measured down the inside of the barrel to see where I could cut. Once inside I could pull the inner section out of the outer metal barrel and found it's just a 5mm LED in a holder that runs off 3 1.5 LR44 batteries. Sadly the leads on the LED are too short to solder to with out melting the holder but a standard 5mm LED fits the holes just fine. The first torch I destroyed modified I cut very short, and a bit sloppy. These have a zoom function where pushed in is wide angle and pulled out is focused. The location of the cut was perfect for the LED mount but left no options for the focus. With that in mind I cut the second a fair amount longer, about 25mm from the chromed ring. This seems to be about perfect. I cut the inner down to the minimum for easy access when soldering. I also sourced some VERY bright LEDs, so bright that to run off a 9V I should be using a 1 watt resistor (I didn't but it was short bursts) and it projected a spot on the wall across the room. The cool thing about them is they are 3.2-4.5V so I can run one right off the 3.7V LiPo without any resistors. They also are projecting LEDs as I think they are meant to make torches with. I have a stash of JST RCY connectors that are nice and easy to connect. They may be a bit big for some of the other connections but here I think it will be perfect, Though I have some smaller ones too if that doesn't work. The plan is to solder a short connector direct to the LED with heat shrink to prevent shorts. This will then connect to another wire in the under barrel which will run down the length, through a hole into the main barrel and then through to the core of the blaster where I can wire in the switch and the power as required. I'll probably wait until I get the soldering iron out to weld the next armour sections before I do this work.1 point
-
Those looking for a economical option PLUS better frequency security. You have this i found on amazon http://www.amazon.com/BaoFeng-UV5R-Dual-Band-Two-Way-Radio/dp/B007H4VT7A/ref=sr_1_6?s=electronics&ie=UTF8&qid=1434999146&sr=1-6&keywords=walkie+talkie They are originally 130, on sale now for under 30 USD. Also has a microphone input and speaker output, incase they arn't loud enough. I THINK, if someone has come up with a box (either inline or for the speaker output) that inserts the static breaks, it would be a perfect alternative. I'm sure someone can program an Audrino board to do this funcion.1 point



.thumb.jpg.e24fa2f1b05735ddddb55fd2434d2a2e.jpg)
.thumb.jpg.0bc4f10eb376336f00bffc43b2685a1c.jpg)
.jpg.5633d38cb8b9ee5b8cf3acd7be8d8aac.jpg)
.jpg.9c6b334f82d0a492c02045321cb89404.jpg)
