Leaderboard
Popular Content
Showing content with the highest reputation on 11/21/2023 in all areas
-
7 points
-
6 points
-
4 points
-
4 points
-
37. Maker Faire Rochester, 17 November 2023 An enjoyable annual troop, although I do prefer Day 2 (general public) to Day 1 (school field trip day), which this was. Pre-troop pictures as this was @andyman97's first troop as a TK: Group shoots, but something's a little different: @Manbehindthemask on important guard duty:4 points
-
3 points
-
2 points
-
The bayonet lug was absent and it took a bit of work, as I had to sculpt one out of layered ABS. An hour or so of carving, filing and sanding and off to be molded. I cast it in black resin and DONE! The last thing to do was the folding stock, which brought a welcome surprise... this is yet another part which I believe was replaced with the "real deal" by the last builder. Let me explain.. While they are very similar and both function, the details are way different in some areas. These are NOT "bad" things, mind you, only different. Airsoft 1. Pivot point is rounded and curves under the front. 2. Hinge pin/washer is farther back. 3. Bottom (and top) of the front is more angular. 4. No divot to hold the stock in place. 5. Opening is a slightly different shape. This is the one that came with it (after refinishing). After comparing it with one of my vintage Sterling stocks, I am convinced that this an original. Like the rest of the metal parts, it had been painted with a really rough finish and had a grainy texture (2). Since it had to match the rest of the paint, I stripped it down to bare metal, sand and repainted it and oiled the moving parts. 2 Real Sterling stock Added the greeblies to the stock, and everything is assembled! After countless hours of work and almost one year exactly, I'm pretty proud of the results. Will I be painting all the parts I replaced? Well, at least a few of them, but for now I haven't in order to see the details. I did some weathering on the scope and power cylinders, and will do some on the rest later. Still a few minor touch-ups, but for now here it is: Weight: 6.75 pounds Gotta' fix that hole! Shout-out- I'd like to thank Chris @fieldmarshall for carrying all the parts I needed and allowing me to use product pics from his website. SUMMARY: This prop arrived unexpectedly when I really needed it. With all that has happened in my life over the last year it gave me something to focus on... a goal. Yeah, I procrastinated at times, but I wanted to complete it to honor the man who gifted it to me. My apologies if I missed any details during the build, but I appreciate anyone who has (unwittingly) been a part of my "therapy" (lol) by viewing it. Last but certainly not least... thank you, Paul. I hope I did it justice.2 points
-
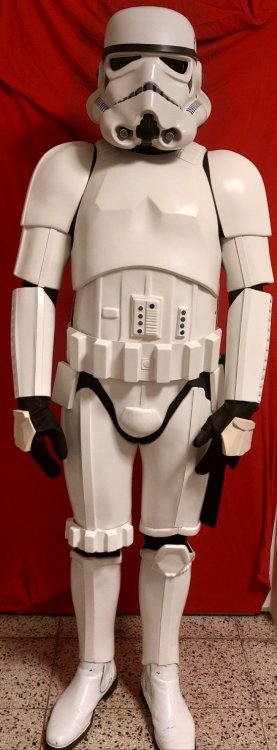
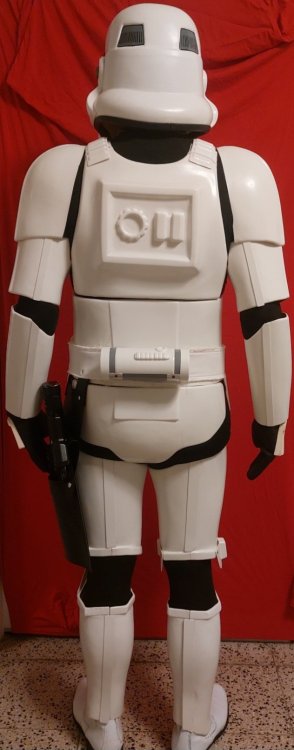
TK-13239 Requesting ANH Stunt EIB Status Name: Matthew Sawa TK-13239 https://www.501st.com/members/displaymemberdetails.php?userID=37125 FISD: Sawanator Garrison: Canadian Height: 6’2” Weight: 225lbs Armor and helmet maker: Dave’s Darkside Depot Blaster maker: QuestDesignCanada Boot Maker: Custom boots made by Jasmine Martins. These boots were based of a pair of Crowprops that did not fit. I have a size 14 wide foot and I could not find a shoe maker. She did a pretty outstanding job IMO. Canvas Belt Maker: ImperialIssue Handguards: Justjoseph63 Holster and Neck Seal Maker: DarmansProps Here are my pictures for submission:1 point
-
Hello everyone! I just wanted to share this, at one of my troops recently I got 3D scanned, and I'm going to get a 3D printed copy of this very soon that I'm going to paint and have as a statue at home! If I get ahold of the file, maybe I could make it available to everyone if you want to print a screen accurate TK and have at home? Edit: File here Height of model: 180,79cm || 71,1771654 inches1 point
-
Hello everyone, first of all, thank you very much for letting me join this exclusive club. I would also like to briefly introduce myself here: My name is Markus, I am 44 years old, I have been married to my beloved wife for 11 years (she is currently very stressed out due to my new hobby). I have 2 daughters (12 and 9 years old). , who are in the most relaxed time for parents, puberty... That's probably the one reason why I spent the last 3 months of my free time mainly in my workshop in the basement;-) The second, and actual reason, was and is my "project" and childhood dream Stormtrooper armor. After starting problems (bought a used kit at" Kleinanzeigen" which i was able to return due to the major defects) and a lot of research, I decided to go with a kit from Ross (RWA Creations) . After a very nice contact via Facebook Messenger and the following detailed tips and information from Ross, I ordered an ANH stunt kit made of 2mm ABS... at this point a big thanks again to Ross for the great kit and the support. When package finally arrived about 6 weeks later, the joy was immense; but everyone here knows what followed: a roller coaster ride of emotions ranging from highly motivated, devastated, scared (especially when trimming), extremely annoyed to euphoric... but it was worth it and finally led me here. And because my children are still going through puberty and my wife is already annoyed, my next goal is to reach EIB status and possibly Centurion after that. Which will probably involve a few more hours of work in the basement... because it requires a decent blaster, which I still have to put together (when it arrives). At the end I would like to apologize for the text being a bit long, it wasn't planned that way ;-)1 point
-
1 point
-
OK, folks, as mentioned in the title this will be my final (OT) E-11 build. Before I begin, let me give you a little background: This blaster was gifted to me by a dear friend who actually received it from a fellow trooper who has unfortunately passed on, and it needed some attention. The person who did the mods obviously had great intentions, but there were some issues which I have done my best to address. Keep in mind that during the time it was created it was a work of art, but with the advent of detailed screen caps and such I have tried my best to do it justice. Side note: I have been working on this for over a year off-and-on. Is it 100% screen accurate? Nope. After receiving it I dove into research on Airsoft E-11s, and found more than a few inconsistencies (mentioned later). I'm just doing my best to make it as close to screen accurate as I can, so bear with me.... Now, on with the show. This is how it looked when I started. Great in it's day, but just so many issues. 1. Copper tubing power cylinders 2. Wrong Selector switch 3. Shroud has a piece of black PVC glued inside. 4. Wrong muzzle. 5. Missing pieces on the magazine . I will have to strip it down to bare parts as best as I can. The first thing I had to do was remove the black PVC interior in the shroud, which was blocking all the holes. I drilled them out but it looked terrible. I ended up using a blow-torch to melt the PVC. It removed the interior as well as any chance of grass growing in my future patio area, but I am pleased with the results. Here comes the most difficult part. The previous builder had WELDED some sort of odd muzzle on, Sort of like an ESB, but not quite, so It's gotta' come off and be replaced. Ugh. The end of the shroud was not too pretty either. I cut off the muzzle and was left with this: To Be Continued!1 point
-
Happy to be afflicted! Why have just one set of armor when I could choose from many?!1 point
-
Definitely bitten by the building bug, happens to the many of us, most have a few projects on the go at the same time1 point
-
Lookin' sharp, Matthew! A few tiny issues, but nothing that can't be remedied, and I can definitely see an EI badge in your near future! You might want to think about extending the paint on your vocoder a little. It doesn't have to go all the way to the top as seen in the first two reference images, but even the ones that didn't (last image) went a bit higher. I would suggest covering the ridge(s) as seen in the first pic. The imprinting on your rubber gloves will come off easily with a small amount of Goo Gone or any stain remover. I think you pretty much have this nailed, and looking forward to seeing you at the next level!1 point
-
Wow, that looks awesome translucent, stick it on one of those light bases and bam instant hologram Star Wars style. Nice work Nairy.1 point
-
We did look into it, but worldwide shipping costs and breakages placed it firmly out of question to do them as a merch item run, unfortunately.1 point
-
I always have trouble finding someone with a coffee mug big enough for me to get some artwork printed on. That doesn't seem to be an issue in the States, as I have seen some tankard sized coffee mugs with on demand print service.1 point
-
1 point
-
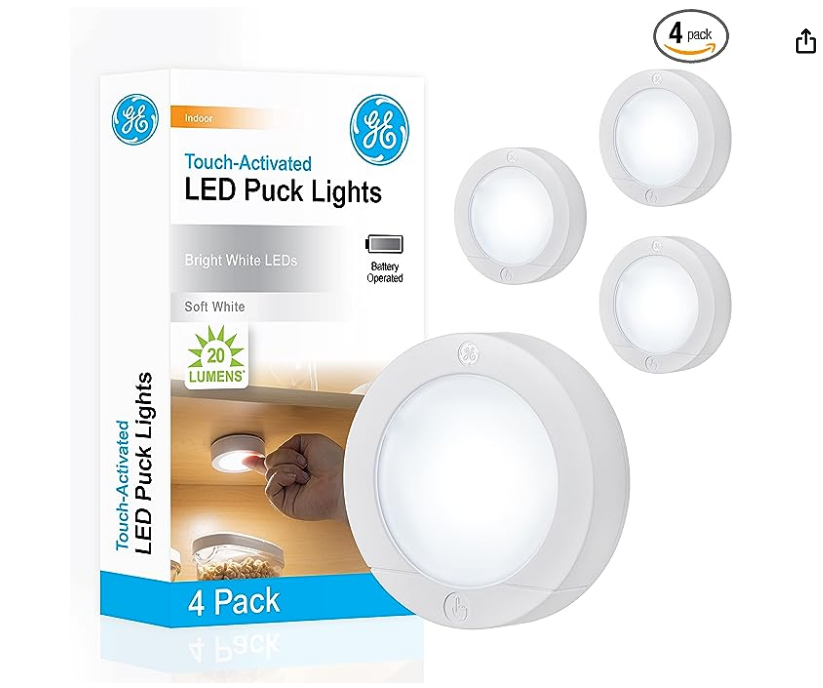
Oh yeah! I work at the makerspace at my college and we had a guy laser cutting clear acrylic pieces which go into these. They look very nice and not a bad idea for a hologram. I actually ended up going with these puck lights on amazon. They are battery powered which is good for holding in my hand which will hopefully look nice in fun pictures and such. I'll post a picture once they come in and I mess around with it a bit! https://www.amazon.com/gp/product/B07RQMC2S2/ref=ppx_yo_dt_b_asin_title_o02_s00?ie=UTF8&th=11 point
-
1 point
-
Very nice, a couple of tweaks and you'd be all set to apply for Expert Infantry hint, hint1 point
-
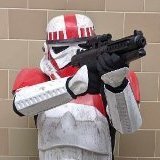
I've retired my TK Death Trooper (for now). I have since become fortunate enough to find a good deal on a complete set of RS Propmasters ANH armor. I made a few small adjustments and promptly earned approval from my garrison. I'll be adding to my kill count with this costume for a while! 7. Barbara Bush Childrens' Hospital Visit - Portland, ME 11/17/23 My first troop in the clean white armor brought me to the Barbara Bush Childrens' Hospital in Portland, ME. We were only in costume for about 45 minutes but it was a really positive experience. I hope to get more opportunities to do these kinds of troops again in the near future Troopers in attendance: TK-80494 TK-71319 TB-81414 DZ-122871 point
-
1 point
-
1 point
-
1 point
-
Wow that would be super special event! Bart1 point
-
1 point
-
1 point
-
1 point
-
1 point
-
1 point
-
Ugh, so as an update, I ran out of time trying to get suited up so as a consolation prize I have built a mannequin for him and now he can stamd watch over my gaming sessions. That was a seriously fun project to undertake and got me all geeked out again on star wars. I am working on printing a DLT-19 for this guy and want to spend a little research time on constructing a Shoulder paldron and backpack as the sandtrooper from ANH is without a doubt my favorite trooper. I seriously love this pic of him holding a skull wondering why I have it. He seems a bit upset as he is gripping his thermal detonator a little too aggressively...1 point
-
1 point
-
The scope: Again, big props to the original builder for going with a real metal scope. Not just metal, but an original Sherman! The natural pitting on the body just adds to the authenticity, but sadly it is an M38-A2 model and this particular one was not used on any of the blasters seen in the film. So, another order from the BF for the 1942 M38 version was needed. Being machined the body didn't have the pitting, but the accuracy and details are phenomenal! A few coats of paint and the obligatory "lost greeb**" (yellow arrow) glued to the top and this part is DONE! ** What the heck is that? Link here to find out. T-tracks The T-tracks that were on it had a lot going for them (pic 1). Although they were a bit wide and covered up the holes in the shroud, they were rubber. Unfortunately they were glued on with an epoxy that I doubt even Emperor Palpatine could have removed with a light saber and were destroyed while trying to remove them. Instead of being tucked in to the holes (pic 2), they were cut off as squares (pic 1) due to the fact that the holes in the shroud were sealed closed from the black ABS pipe inside. I contemplated purchasing new T-tracks, but I ended up making one out of scrap ABS (pic 3), making another silicone mold and casting them in black plastic (I didn't think resin would hold up well when bending the ends). The ends were trimmed on the sides, cut to length, gently heated up over the burners on my stove and then inserted into the appropriate holes. I'm pretty danged happy with the result (last pic). By the way... As you may have picked up on I sculpt a lot of my own parts for my builds, make silicone molds and then cast them in either resin or plastic. Many (if not most) of the items I make are available either for free or just my cost for materials. All I ask is that you pay postage.1 point
-
DISCLAIMER: Before I move on, no, I do not get any discounts or such from the Blaster Factory, lol. I have been ordering parts from them for many years for various builds. Their accuracy is unparalleled, and they are always available for questions/help. They are not the least expensive source for reproduction parts, but you get what you pay for, and I know I will never have an issue with their products.1 point
-
1 point
-
Great work. I don't think there has been a 3D print project yet that I haven't had to make an adjustment or two to them, all a learning experience. Now get stuck into that AM kit, it's getting lonely sitting in that box1 point
-
I am calling this blitz project DONE! It has been a very enlightening experience: for how the armor is constructed How the strapping should work 3D printing snafu's and ultimate impacts to the overall prints The challenge of suiting up The repairs to sub-par velcroing and why real troopers use better solutions Painting is hard Good news is I am much more aware of what needs done and why on my AM kit. Here are some pic of progress: i.imgur.com/76YrNsv.mp4 (snippet of helmet dome printing)1 point
-
Ah where does the time go? So here it is almost Halloween 2023 and my AM kit is still sitting in storage waiting for assembly. While I found building Vader straight forward, I couldn't get my head wrapped around all the concepts and parts without getting overwhelmed. Even working to overcome that by focusing just on one part at time, I was/am hesitant to cut into the ABS and make an unrecoverable mistake. So after several valiant attempts to get moving, it has been packed back up for quite a while. Fast foward to now, with a new 3D printer that has a build volume of 420 x 420 x 500mm (16.5 x 16.5 x 19.7 inches) I used the referenced files to print my 2023 Halloween costume! It has been great to be able to hold 'completed' sections of the armor and understand how it is constructed versus holding the 2 halves of the AM kit together and trying to imagine what it would look like. I will update this thread with some of the final prep work with the suit getting ready for Halloween and trick or treat night of course, but here is a black series helmet with the printed armor. I have been working on the velcro strapping and getting the sniper knee and thigh ammo pack e6000'd in time. I know the strapping is not up to the trooping level of snaps or original equipment, but this is all for one evening of fun so I am alright with it.1 point
-
1 point
-
1 point
-
1 point


