Leaderboard
Popular Content
Showing content with the highest reputation on 11/19/2023 in all areas
-
Totally forgot to post a picture, but it turned out great! I've printed 3 so far. First one had a print bed issue, so you had a really flat foot. Second one was good, the last one I made larger sized.4 points
-
I'm blown away by the amount of detail that you put into this Joseph. I'm going to go back and read through the thread a second time to ensure I'm getting it all. Had I known just how much work it would have taken to complete it, I may have been reluctant to send it to you without sending in detailed photos first. I'm relieved that it was able to be a source of distraction during a hardship. The details you included I think the casual observer may not notice from more than a few feet away, however the mind works in mysterious ways and I believe that the net effect of all these details is something they would pick up on. It has certainly found a better home than any I could have provided, and am glad that it can be a source of pride and comfort. It is truly a remarkable re-construction that you have accomplished.3 points
-
Cool! A few years ago at a con there was a booth doing 3D scans. At the time I didn't need a scan of myself but if I ever get that chance again I'm digging out the wallet and getting one in my armor too after seeing yours and remembering this! Bart2 points
-
2 points
-
26th of October 2023 Convenience modification Arms connected from glove to shoulder to glove I forgot to post this. Remember mittens on elastic running all the way up your arms when you were a kid in winter? That inspired me twice on this build: 1. The shoulder bells are connected with one piece of elastic running across the back of the shoulders to minimise painful snaps pressing into Mini Imperial from above. This also means she can easily put the arms on first before getting into the torso. [will add photo when I remember to take it] 2. The gloves have elastic straps glued to them and are snapped into the bottom of the forearms so that they won’t get lost, ride up, slip down or misbehave in any other way. And they’re free to dangle when she needs to take them off.2 points
-
WAY cool, Eric! I honestly would not even paint it. Being translucent, if you could find (or make) a lighted stand to put it on top of it would make one heck of a display piece!2 points
-
28th of October 2023: first troop with 501st Legion Hong Kong Garrison Took Mini Imperial on her first troop for the Hong Kong Red Cross Blood Drive2 points
-
26th of October 2023 Recap of 90%-finished armour and size comparisons to my WTF kit That’s as far as I got before Halloween rolled around. Mini Imperial’s blaster (below) is a Disney Parks repaint from Tokyo Disneyland2 points
-
26th of October 2023 Comfort modification Forearm padding in elbow recess While most of my comfort fixes and convenience hacks are designed to be invisible, this one is necessarily visible. Mini Imperial repeatedly complained that the forearms were cutting into her elbows, even after I shortened the forearms by one ‘dimple’ and cut the recess progressively deeper. I realised that I would be forever removing meat from the inside curve that would look more and more strange while not increasing comfort. I had to pad the curve. Using off-cuts from my tried-and-trusted butt EVA foam, I created little crescents and glued them into the recesses, creating padding that, close up, looked awful (especially after being worn once or twice and becoming a bit wrinkled) but, from a distance, was barely noticeable. No more complaints! Problem solved!2 points
-
The bayonet lug was absent and it took a bit of work, as I had to sculpt one out of layered ABS. An hour or so of carving, filing and sanding and off to be molded. I cast it in black resin and DONE! The last thing to do was the folding stock, which brought a welcome surprise... this is yet another part which I believe was replaced with the "real deal" by the last builder. Let me explain.. While they are very similar and both function, the details are way different in some areas. These are NOT "bad" things, mind you, only different. Airsoft 1. Pivot point is rounded and curves under the front. 2. Hinge pin/washer is farther back. 3. Bottom (and top) of the front is more angular. 4. No divot to hold the stock in place. 5. Opening is a slightly different shape. This is the one that came with it (after refinishing). After comparing it with one of my vintage Sterling stocks, I am convinced that this an original. Like the rest of the metal parts, it had been painted with a really rough finish and had a grainy texture (2). Since it had to match the rest of the paint, I stripped it down to bare metal, sand and repainted it and oiled the moving parts. 2 Real Sterling stock Added the greeblies to the stock, and everything is assembled! After countless hours of work and almost one year exactly, I'm pretty proud of the results. Will I be painting all the parts I replaced? Well, at least a few of them, but for now I haven't in order to see the details. I did some weathering on the scope and power cylinders, and will do some on the rest later. Still a few minor touch-ups, but for now here it is: Weight: 6.75 pounds Gotta' fix that hole! Shout-out- I'd like to thank Chris @fieldmarshall for carrying all the parts I needed and allowing me to use product pics from his website. SUMMARY: This prop arrived unexpectedly when I really needed it. With all that has happened in my life over the last year it gave me something to focus on... a goal. Yeah, I procrastinated at times, but I wanted to complete it to honor the man who gifted it to me. My apologies if I missed any details during the build, but I appreciate anyone who has (unwittingly) been a part of my "therapy" (lol) by viewing it. Last but certainly not least... thank you, Paul. I hope I did it justice.2 points
-
Maker here from Rhode Island. I have 4 FDM and one resin 3D printer. I build freestyle drones, built about 40 so far in all different sizes. I was 12 when A New Hope came out in 1977, and I've been a fan ever since. I've always wanted a Stormtrooper blaster (E-11 as I learned), and found the Blaster-Master files on MyMiniFactory. I'm close to halfway done printing/assembling, but I'm having a hard time finding an electronics kit that will work in it. I've seen a few, with parts and schematics, but they are pretty old. I'm not afraid of putting it all together myself if I had the parts. Can anyone point me in a direction to find electronics that'll work? EDIT: This is the blaster I am printing/building: https://www.myminifactory.com/object/3d-print-star-wars-storm-trooper-blastech-e-11-blaster-rifle-by-blaster-master-722831 point
-
Greetings all. My name is Tom Tilmon, I was already a member of the Carolina Garrison as DS-74759 TFA Kylo Ren. My ultimate goal was to be a stormtrooper, although, I'm a bit too big to be a TK. I'm 6'3" 240#......so fitting in armor was difficult and required a lot of shimming! I have had this kit for 4 years, traded a MPP Lightsaber for it to a trooper that built an Anovos Kit. Thing sat in the closet in boxes needing trimming and assembly for years. But, I finally got my kit built. I would now love to build another one to Centurion or EIB standards, and turn this one into a TD. But that will have to wait until after my BOBF Mando, Shoretrooper. Both of which are in the works. PS, I also own a lightsaber company called: Megtooth Sith Sabers. i was one of the first to innovate neopixels in lighsabers, as well as using open source electronics, and helped bring about "smoothswing" implementation/testing in open source boards. I built an E-11 with a Proffieboard in it, posted in FISD, didn't get much of a reaction, but I think its pretty cool! At any rate, I'm proud to be a member with you all, and I'm finally living the dream of being a stormtrooper, which I also kind of am in real life......I am the FUZZ. PS: I got to troop my TK with 501st Legion Founder, Albin Johnson (TK-210) in August at Soda City Comicon. Albin is in my Garrison, but it was pretty cool meeting him! Check out this link: Youtube Short with Albin Johnson! Live video of my E-11 in action! Me on the left, this picture I think shows how big I am compared to people. I'm almost as tall as the wookie on stilts! Ha.1 point
-
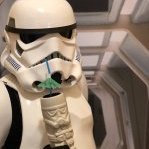
Ugh, so as an update, I ran out of time trying to get suited up so as a consolation prize I have built a mannequin for him and now he can stamd watch over my gaming sessions. That was a seriously fun project to undertake and got me all geeked out again on star wars. I am working on printing a DLT-19 for this guy and want to spend a little research time on constructing a Shoulder paldron and backpack as the sandtrooper from ANH is without a doubt my favorite trooper. I seriously love this pic of him holding a skull wondering why I have it. He seems a bit upset as he is gripping his thermal detonator a little too aggressively...1 point
-
1 point
-
This is the definitive kid's build. This is incredible. Meanwhile, mine is waiting till she's 16 to get her TK armor... because not all dads are nearly as awesome as you are. She has to Jawa and Sabine until then.1 point
-
The amount of work you have put into this has paid off, James... phenomenal job! This is without a doubt the funniest BBB day photo EVER!1 point
-
31st of October 2023 Mini Imperial’s birthday & my deadline! Had a minor setback in that the school didn’t let kids dress up on the day. So we went trick or treating in our neighbourhood that evening. Here are a few photos shared by our wonderful local community:1 point
-
26th of October Comfort modification Padding I wanted to show you some of the ways I’ve padded the costume for comfort. It also gives more space for Mini Imperial to grow. For now it keeps the forearms, thighs, shins, etc. from wiggling and clattering while sitting snug and centred around her limbs. Later, as she grows, I can reduce, then remove padding to fit her better. I removed the codpiece straps as the snaps were pressing into her hips. I plan to eventually glue some elastic straps to replace the ugly-but-effective gaffer tape. Put foam covers on the shoulder elastic snaps to stop them hurting Tiny Trooper’s shoulders. Shoulder bells spaced and padded (also used a loop of elastic in place of the ABS bicep hook to eliminate any discomfort) Foam padding on snaps on the shoulder-bell-to-bicep elastic Biceps spaced on four sides Forearms padded top and spaced on four sides Thighs padded top & bottom and spaced on four sides inside1 point
-
You can still sign up and join an event as a wrangler. No need to have a costume. But you'll probably want one after you see all the fun we have. No pressure Future Trooper1 point
-
Long post, but I'll read through it. My main focus is an authentic blaster sound, a red LED at the barrel tip, and MAYBE a real screen for the scope. I've seen people using LED strips down the barrel, but to me that's not authentic to the movie. I'm not in a position to be looking for certification (just started reading all about that...), but I want it to be as real as possible. I'm printing all parts in ABS, sanding as I go. This site has tons of great posts as well, so I'll make sure to try to read the best I can. Thanks for the reply!!!1 point
-
Remarkable work Joseph, a beautiful piece to be very proud of.1 point
-
1 point
-
Troop 33 Ronald McDonald House Character Breakfast. Sent from my SM-N981U1 using Tapatalk1 point
-
This is phenomenal (as usual), Joseph! Certainly something I desire to do myself at some point, and I already have one of your folding sticks and those newly found greebs that you provide. I love, too, that your build came at a perfect time for you personally. Therapeutic E-11 building! Sent from my iPhone using Tapatalk1 point
-
Adam & Caleb, thank you. You guys are too kind. Will try to get the rest of the thread up soon. And that TD really is so cute!1 point
-
1 point
-
Thank you all, I'm very happy to be here at FISD, and living my lifelong dream of being a Stormtrooper!1 point
-
1 point
-
Oh that's awesome! I have a resin printer with transparent blue resin which I've been wanting to use to make a hologram and this model would be perfect for it! I'll post a picture here once its finished printing1 point
-
1 point
-
Scope is bored out and I installed the FXBlaster software. Thanks for the help Andras installing the software on my Anduino.1 point

