Leaderboard
Popular Content
Showing content with the highest reputation on 10/28/2023 in all areas
-
10/8/23 - Albuquerque International Balloon Fiesta - Day 2 Sunrise 81st TK troop, 36 for 2023 Day 2 - everyone was a little less than full powered. I didn't even find a full group photo for the event, just this one with the 501st only. We had some Rebels, Mercs, and GA in attendance as well, but less than 72. In the 60s I think. BTW, 72 for the previous day was very near a garrison all time record. I think we were 3-4 short from the most attended DRG event of all time. It was quite a party. Day 2 was still great! Just less of a party. This is a GA member!!! Ace (I think this is Ace) and his dad modified his small TK over a couple evenings and he night troop'd like a pro! Getting ready to march in. That's a flood lamp in the distance, not the sunrise. Still about an hour before sunrise. I spent most of this event helping guard the crown line (the big line at the top of the balloon on the right side of this shot) and keep the crowd safe. The lines can move around a lot and clothesline people quite nicely. That's why the troopers are here, in fact - to help the balloons. A couple hours of crown line work with my VERY LOUD TRamp chest speaker deserved a crowd selfie. "Move along" indeed.4 points
-
3 points
-
30. 2023-10-27, Trampoline Park Birthday Party, Stockholm (Hero) Number thirty!!! A birthday party for a very excited 12 year old Star Wars fan, who got 12/11 on the Star Wars quiz that I had with me (got all the bonus points)! We made him an Honorary Stormtrooper, signed by Papa Palps and Vader!3 points
-
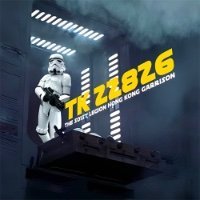
Troop 7, also listed in Fire Team Sousa Troop Log (2023 / OCT) Event: Hong Kong Red Cross Halloween Event 2023 (Day 1) Location: The Mill Date: 28 / OCT / 20232 points
-
68) 28/10/2023 - Hong Kong RedCross Halloween Event 2023 @ The Mill (Day 1)2 points
-
A sound idea to me, giving a member a screen accurate BUT custom item to their specific costume, what's not to like2 points
-
10/7/23 - Albuquerque International Balloon Fiesta - Day 1 Sunrise 80th TK troop, 35th for the year Day 1 of AIBF!!! Day 1 of waking up at 2am to meet at 3am. But it's fun! Right? We had an incredible turnout. I believe there were 72 there from all four clubs (501st, RL, MM, and GA) including handlers. I'm standing next to ARC Trooper Jesse with the arrow pointing at my bucket. I mean, in a crowd like this even Darth Maul is kinda hard to find right off. We had troopers. We had pilots. We had Mandos. We even had rebels. (I think this is my fav selfie of the whole 8 day event) Regardless of our club affiliations and belief in the Force, we were all united in one purpose - the security of Vader and Yoda. Vader ascending to the clouds. Once the balloons were up, we were allowed a break. If only the suit had a recycler in it...2 points
-
PLEASE READ BEFORE PLACING YOUR VOTE Detailed explanation and criteria We (FISD staff) have had a long-running discussion regarding Stormtrooper Blaster variants as seen across the sequel trilogy, and how best this might be integrated into those CRL's. The last thing we want to do is make an over bloated section for each of those CRL's with too much information, after all, blasters are not a requirement for 501st membership. We don't want to make it overly confusing for GML's or Deployment officers, which could have the potential to create more delays than necessary on approval times. So how do we propose to move forward? I have broken this down into what will stay, and what could change. The current Blaster requirement for EI and centurion will stay as is. These are the most common seen on screen versions for each of the films. This is the basis on how all our CRL's are formed top to bottom. It gives everyone the chance to look as much the same as possible, the ideal garrison of Troopers. What would change is the ability to build a blaster with the identical layout of one seen on screen in the specific movie for the costume. The driver for this is to add some fun for the individual. Now it would be pointless to move on this without some form of guide as to what might be permissible and what may not, so we have looked at a set of conditions that would need to apply. Acceptable references 1. Blaster must be a production asset seen on screen, or from openly available to all, behind the scene references, including Disney+ specials. This keeps us aligned with how all legion CRL's are formed but gives some bandwidth. This keeps it fair for all members, clears speculation, and has photo evidence to back it up. No hearsay, or anecdotal info will be accepted. 2. No clearly damaged or taped together blasters, we don't allow on the go gaffer tape patch ups on costumes, this would extend to the blasters we want to look our best after all. 3. The blaster must be appropriate for the film the costume belongs to. If the specific layout is seen across multiple films, that should not be an issue, but additional references would be required to prove so. (Images of said blaster in both films) 4. Blaster must be built to some of the benchmark Centurion level items, such as foldable forward grip and working lights, no visible print lines. We expect that those looking to go this route would build their blasters with a higher degree of accuracy and want the bells and whistles that make them stand out. How would the process work, when would a member need to submit a request or references? If it is so desired by a member to build their blaster under this change, it would make sense to alert your GML and Detachment Deployment office to the CRL and the version you wish to build before you complete your costume. The member will be required to produce at least 2 separate readily available visual references of the same version they wish to build in advance of submitting for approval. A final decision will be determined by the Deployment officer staff. Refer to the above list of what is considered acceptable references. This would reduce the chances of added delays to an approval, give both the GML and DO's a chance to discuss with the member what is satisfactory and what may not be. This also prevents the potential for disappointment at the last moment. If you believe this could be a beneficial change, add an element of fun, and a low level of individualism, then please vote for or against. Footnote: We would be starting with the First order version to trial how this may work. If this Poll recognises merit, we will work to install it with additional text to the specific CRL's and seek LMO approvals. If down the track this proves successful, and without excessive issues, I would hope the expansion of a similar treatment to other CRL's under the FISD purview would take place.1 point
-
I can contribute to this one. Notice on mine there is both the padding and the "V" clips to straighten it all out. Not hard to do and I was terrified to do any mods to the armor but I'm happy I did as it fits much better. Bart1 point
-
ooof this is a lot of blue boxes! But to my defense I did have to dress myself so hopefully I can tweak this and report back! Thanks again for the counsel super helpful with this way overdue completion. I think I can handle the adjustments versus a complete redo lol.1 point
-
You really want to have the armor parallel to your body, in the first photo the abdomen and cod are slanted baackwards. Albeit I'm not the skinniest person I have seen in armor I have 2 x 2 inch blocks of foam behind my abdomen to help push the abdomen out so when I close my belt it doesn't squash the sides together. You may also want to try close the gap between the posterior and kidney, some use V tabs to help that issue or tighter strapping more towards the ends. With a heat gun you bend strips of ABS plastic into the shape of a V, only glue one side and the other remains free to allow movement when you bend. Just helps stop the butt plate from pushing back from the back plate. A few threads for those of the smaller frame may give you some ideas of how to trim. https://www.whitearmor.net/forum/topic/38416-crickets-rs-stunt-build-for-the-vertically-challenged/ https://www.whitearmor.net/forum/topic/38842-fragarocks-rs-stunt-build-not-to-scale/ https://www.whitearmor.net/forum/topic/42868-sha-shas-wtf-anh-stunt-build-complete/1 point
-
Troops #29, #30 and #31 This weekend marked my 1st year anniversary trooping with the Imperial Scottish Garrison. It was an honour to serve at the same events and locations as the previous year. The science centre in Glasgow was a Halloween event for kids of all ages and at the Gyle in Edinburgh we again showed our support of the children's charity.1 point
-
1 point
-
That's ok, once you buy them you can PM me with proof of your purchase and I can get you the modified version I haven't modified the ears on the Nico helmet. Those were one of my least concerns. If you check out my thread about the mods you can see what I did change though.1 point
-
Congratulations Tom. Welcome to the ranks1 point
-
Welcome, and congratulations on completing your Stormtrooper armor!! Good job!1 point
-
Hi all, This is my first foray into this sort of thing, so I know many individuals on this site might shake their heads. But I'll try to give context... I bought an S&T STAEG68 (Full Metal Custom Sterling Airsoft AEG SMG with Heat Sink and Scope) from evike.com: From this I wanted to put together a decent looking R1 E-11 Blaster for me to admire once in a while that is mostly metal / not resin. I did not intend to use this to get certified or to go trooping with. So, you'll notice that in the final pictures the Eagle on the Hengstler counter and the scope are wrong, among other things I'm sure. I had some basic tools already, like a handheld electric drill and a Dremel, but ended up buying some other things in addition to the blaster parts/accessories. I've tried to list everything below. Parts/Tools S&T STAEG68 Full Metal Custom Sterling Airsoft AEG SMG with Heat Sink and Scope Flashlight and Mount Phoking M300A Tactical Light ($33) Flashlight Rail ($18) MLOK Screws for Flashlight Rail ($7) Parts from blasterfactory.com: T-Track, 4 x 17" ($25) Rogue 1 Power Cylinders ($40) M38 Scope ($80) Hengstler Counter ($60) Everbilt #10-32 x 5/8 in. Stainless Internal Hex Socket Set Screw (2-Pack) (< $3) Mounting Hardware for Hengstler 10/32 Tap for Counter and Counter mount ($5) 3/8-inch Countersink bit ($12.50) T-style Tap Wrench ($6) Painting / Decoration Flat Black Paint ($10) Spray Paint Grip ($12) Wagner Furno 300 4095-BTU Heat Gun ($25) Dremel EZ406-02, EZ - Lock Starter Kit ($15) Finer grit sandpaper ($7) Titanium Drill Bits ($10.50) J-B Weld 8267 SteelStik Steel Reinforced Epoxy Putty Stick - 2 oz. (< $7) And here's the work I had to do to get the job done... Order of Operations Remove the stock scope, counter, t-tracks, power cylinders, and orange safety cap on muzzle. All of these needed to go as they were either in the wrong place (scope), were cheap plastic (scope, counter, power cylinders), or were the wrong length (t-tracks). They were all pretty straight forward to remove except the orange cap as it was not only glued but was also stuck as there was a small metal cylinder protruding from the bottom of the muzzle that the cap was locked into, which leads me to the following step. Cut off cylinder at base of muzzle. I cut off the small cylinder extending from the muzzle with the Dremel tool and a reinforced cutting wheel. This left some less than ideal marks on the muzzle that I "fixed" later. Drill new holes in scope rail for scope. Here, I started slow with smaller bits and gradually increased their size until I could accommodate the #10/32 screws that could hold the scope to the rail. Mount the rail for the flashlight. This was a bit tricky as the holes in the barrel were not spaced perfectly to accommodate the flashlight rail. So, I had to extend two of the holes outward so that the rail could be mounted. The darkest dots below represent where the screw posts needed to be: Bend small “wings” on power cylinders. I wasn't sure if this was self explanatory or not but the forward "wings" on the power cylinders were flat and I bent them up a bit to look more like the R1 E-11 version. Design and order a counter mount. I did a quick mockup of the counter mount below and ordered from sendcutsend.com. The red dotted line is where a 90 degree downward bend was needed. The two holes together are for mounting to the scope rail whereas the other hole was for mounting to the Hengstler counter. Make counter sinks in top of counter mount. The counter sinks are so that the screws would sink into the mount a bit and not protrude too much above it when mounting to the scope rail. Drill and tap new holes in scope rail for counter mount. This is so I did not need any nuts on the other side of the scope rail. Cut down Power Cylinders screws. The screws extended beyond the bottom of the power cylinders, so I cut them down with the Dremel. Fill old holes in scope rail. I wasn't sure what I was doing but it turned out as I had hoped. I used some J-B Weld SteelStick to fill in the old holes in the scope rail, sanded it down, and now can't even tell they were there after painting. I also used the SteelStick and some sanding to clean up the muzzle where I had marked it up pretty good previously. Paint with flat black paint: muzzle blaster mag housing (needed repainting after cleaning up leftover glue from the old power cylinders) flashlight rail (needed painting as I could only find these in bronze rather than black) scope rail power cylinders scope counter counter mount Install t-tracks. Here I used the heat gun and it went a lot better than I had hoped. Install all other parts. Getting the scope on was particularly challenging since I could not remove the scope rail. So, the screws that shipped with the scope could not be used. Instead, I ended up screwing two headless #10-32 screws into the scope and then using some leftover MLOK nuts to attach below the scope rail. And here's the final product: All-in-all, I had a fun time doing all of this but was really terrified I would screw something up permanently since I had never done anything like this in the past. I was most worried about cleaning up the scope rail, painting everything properly, and installing the t-tracks. Here were some links that were helpful along the way: References Rogue One Blaster Reference Painting T-Track instructions (preferred) T-Track instructions (other) M38 Scope assembly Hengstler Counter assembly Mounting the Hengstler Counter1 point
-
Welcome aboard trooper1 point
-
Yeah, that's one I'll never forget. Snake in the helmet is FAR far worse than a snake on a plane.1 point
-
1 point
-
Getting ready to submit pre-approval pics. I did end up getting the boots from KeepTrooping. Impressive how fast they can these to my doorstep from China so fast. Printed out blasters from the files here. Just having fun now.1 point
-
Here's Galactic Armory's Helmet in PLA at .16mm layer height. It looks fantastic but I still like the look of the Walsh3D files a touch more!1 point
-
I did reach out to Nico, just to let him know what I had done and that I was wanting to share with others that have bought his files. He asked what exactly I had modded, he said in case he wanted to release a new version (which he's been talking about for the past 4 years lol, I got sick of waiting so I decided to take it on myself). I sent him a list and some images but he never got back to me. But I don't want him to lose any revenue on his files, that's why I'm only sharing with those that can present proof that they've purchased the original files1 point
-
Troop 1, also listed in Fire Team Sousa Troop Log (2023/APR) Event: Books for Love 2023 (Week 1) Location: Taikoo Place (QuarryBay, Hong Kong Island) Date: 23 / APR / 2023 First time as a bad guy doing good. Felt great.1 point


