Leaderboard
Popular Content
Showing content with the highest reputation on 10/19/2023 in all areas
-
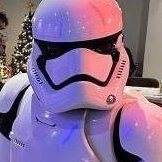
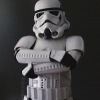
Hello everyone! I just wanted to share this, at one of my troops recently I got 3D scanned, and I'm going to get a 3D printed copy of this very soon that I'm going to paint and have as a statue at home! If I get ahold of the file, maybe I could make it available to everyone if you want to print a screen accurate TK and have at home? Edit: File here Height of model: 180,79cm || 71,1771654 inches3 points
-
I can't resist boasting about this one a little bit - the blaster in this thread is now the CRL image for the ANH E-11. The old one had an inaccuracy at the end of the magazine (OFF pointing the wrong way) and only had one side shown. Andrew asked for some updated images and I was quick to send pix of mine. The chip on the scope and Joseph's beautiful greebs got moved over to my Blaster Factory build (The Leia Leveller) leaving this one to be a pristine yet generic example of an E-11. The camera angle doesn't show the inner spring due to the insanely thick walls on the QuestDesign blaster, but the bolt spring is indeed in there, as are the small electronic bits in my last update. https://databank.501st.com/databank/File:TK_anh_stunt_e11.jpeg This same image is used on quite a few CRLs including ANH Stunt ANH Hero Heavy Weapons Trooper TK Incinerator TX Shadow Trooper Shadow Scout Novatrooper Sandtrooper Imperial Gunner and quite a few more. I'm an E-11 nut and have FIVE in my collection, so having one of them as the CRL model is a very proud moment for me.3 points
-
Good tips. Thank you. I wondered if I needed to cut the tops of "arm holes" back more, but it doesn't sound like that's really the problem. I can get it to set down lower, and I think your suggestion will help that.1 point
-
I added some elastic from the abdomen to the chest to help to pull down the yoke once you move your arms, they do want to ride up, pressure from the gaskets and general arm movements, pretty similar setup to a regular OTTK Looking good1 point
-
1 point
-
Awesome! Thanks! I made a contraption that should mark about .5-.6 of an inch line to trim. I may trim slightly less than that but it should be a good guide. Just wanted to check to see if these pencil line look alright.1 point
-
One stop summary of differences between TFA and TLJ. Thank you very much.1 point
-
1 point
-
I don't use foam there, I would think if it's sealed to your face it would fog up, most just add a lens. I separate and trim so the lenses are just larger than the eye openings, add some black silicon to hold, black as I paint the inside of the helmet. So many different ways to attach, here are a few1 point
-
1 point
-
10/8/23 Histio Ty-Fighters 5K fundraiser for the Histiocytosis Association1 point
-
29. 2023-10-17, The Milton Race 2023, Uppsala (Hero) Earlier this year on May 4th we had a troop at a school, and one big Star Wars fan couldn't attend because he had cancer. He has sadly passed away now and the school arranged a race in his honor. There were about 100 kids in total and we were cheering them on and giving out medals at the end! Very wholesome and fun!1 point
-
1 point
-
Troop 38 Toronto Treat Accessibility Halloween Village Toronto , Ontario October 15, 2023 Treat Accessibility is an annual event that takes place at several locations around the greater Toronto area. A neighborhood street is blocked off to traffic for a few hours and home owners set up tables at the end of their driveways. This allows for children with disabilities to trick or treat in a safe and controlled environment. The group selfie shot. We were joined by the stormtrooper in the middle. He had just finished assembling his Anovis kit. His goal is to get it 501st approved. We directed him here and offered helpful advice. Hopefully he will drop by. I passed him my blaster for the photo. A quick pose with the local law enforcement. Took a minute and did some dancing (the twist) with some residents.1 point
-
Congratulations Trooper. Welcome to EIB!1 point
-
Shiv, Thanks for the interest in 3d printable kits. I've posted quite a bit on the forum about this topic and unfortunately my news isn't ever promising. However, since I've talked about it rather frequently and you can search around for what I've written, I'll just hit the wave tops here. First, just check out what I wrote a couple weeks ago regarding OT armor: 1. Yes, it's 2023 and three years ago we heard that both Paul and Nico were designing 3D TK armor; by now we should have seen something materialize. However, I've spoken with both of them multiple times over the last three years and unfortunately, it doesn't look like either is interested in moving forward with this project. 2. CG Trader will get your feet wet, but a lot of these models have horrible design features and even the ones that appear the most accurate aren't. Team this up with 3D modelers who don't seem to understand costumes in general, what you get are 3D prints that are better suited for making sixth scale action figures rather than something that meets legion specifications without heavy modification. What I mean by this is that the majority of the models I've downloaded and tested have excruciatingly rough meshes and shell thicknesses of up to 1/4" that can't simply be altered through slicing software. If you go through my 3D build thread, go to the part where I discuss the thighs and shins. No person deserves that kind of punishment. 3. The 3D models available on CG Trader were mostly developed utilizing Mesh Mapping which doesn't account for certain discrepancies, or intricacies of the screen used design. The intentional eye bump is a good example of this. Mesh mapping will capture and correct images, then build it into a 3d model. Unless the designer is intimately familiar with the costume, they're not going to correct what the computer did for them. 4. This lack of knowledge of the costumes is a big reason why we get a lot of designers who blow you off when you offer a suggestion. My designer made almost every change I asked for and they've continued to update the kit since. But, the design changes that would have been much more technical went unchanged i.e. totally redesigning the chest, cod, butt, legs. Ultimately, I had to make a ton of changes after the fact and I failed to annotate all of them. 3D printing does have its place in the world of TKs though. I've used this technology extensively in my most recent build and I would challenge anyone to tell me what parts of this kit are printed and which are fiberglass. Here I am two weeks ago: Lol. I'm just doing a little pre-troop adjustment, but when finished correctly 3D prints are great. So, where does that leave us? Currently, there's no accurate file sets out there and our trusted modelers appear to have 0 desire to make TK armor. The amount of work required to get something printed, finished and approved far surpasses buying a kit from our reputable dealers. If you're interested in supplementing an existing kit with 3d pieces, there's options out there, but accuracy will cost you some money. Paul won't piece out his kit if you only wanted the legs for example and others out there are all kinds of messed up. I'm not going to talk badly about anyone's 3D kits, but look closely at what they're showing and you'll start noticing huge issues. Finally, because of this lack of good 3D files, I've started designing my own, but they're a ways off and I'm already loaded with other projects. Regardless, Here's a pic of the abdominal armor I'm developing and I'll be doing the chest and back next. I'm not Mesh Mapping, this is all from the ground up.1 point
-
I have had a few people in my Garrison copy this idea so I thought I would post it here for FISD members too Do you have an issue with keeping TK shins in place? More specifically stopping the shin armor from moving up and above your boots? I know I did! When I had this problem I investigated a few different options, I first tried the hook velcro on boot & loop velcro on inner shin combo, whilst this did help I found that walking up and down stairs a couple of times was enough for it to come apart. So I've improved on this with a "stirrup" setup.. The following setup has been tested with many troops (and stairs!) and I have had no issues with riding or twisting Here is what I did... I made stirrups for each leg using a length of 1inch wide high density elastic, this was glued and stitched to a 50mm x 50mm square of hook velcro. Then I glued and stitched a 50mm x 50mm square of loop velcro to a piece of nylon strapping the same size. Then glued this into the front of each shin just above the top of the boot line. When attached it looks like this This way you can have a "stirrup" setup but you can also put your boots on first Then attach the velcro before closing your shins as normal The elastic allows for plenty of movement and pulls the shin back into place if it rides up Hope this helps someone1 point
-
Thanks I was actually looking for an accurate one in metal for a while, but couldn't finde any, and had to settle for resin. I haven't seen VaderPainter's version, and can't seem to find it - do you have a picture of it?.. Well, I was able to remove the cavity without too much trouble, thankfully it wasn't glued on too extreme. I tried to dissolve the glue a bit first, but I'm actually not sure if it did anything or it was loose enough to pull off to begin with. The aerator part was quite loose, I only had to push it gently from side to side to make it pop out of its socket. There's a small flat piece inside the cavity part securing the aerator's (wrong) position from behind. I cut that piece off, and then I used acetone for removing the remaining and smoothen things out. Be careful when using acetone on any plastic parts, it will melt the material very quickly!! But you can actually use it at your advantage to remove unwanted parts, glue residue and paint. I started with sanding the hole in the helmet to a more uniform and accurate look, then I sanded the cavity part to fit snugly against the hole and when it looked good I began preparing the aerator to be refitted. I filled the back of the aerator with putty and pushed it inside the cavity to make it conform to its shape, creating a larger surface to apply glue on. And yeah, that's about it.1 point


