Leaderboard
Popular Content
Showing content with the highest reputation on 09/08/2023 in all areas
-
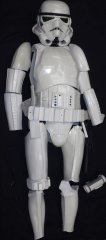
Stirred up some conversation over on the Facebook already, but figured this deserved a thread over here too. A screen matched Hero Stormtrooper costume from Star Wars - A New Hope (1977) has recently come up for auction, and the sales post contains some excellent photos of 1 of only 3 known surviving Hero suits/helmets out of the 6 made for the film. It is pretty much complete and in absolutely gorgeous condition. Enjoy. Per the Auction's description: Original Screen Matched Complete Hero Imperial Stormtrooper Costume from Star Wars: Episode IV - A New Hope (TCF, 1977). Vintage screen matched original Hero Stormtrooper costume constructed of vacuum-formed ABS plastic components. This complete hero style helmet features a one-piece green bubble-shaped lens, original elastic chin strap, original mic-tips, original rubber brow and neck trims, and hand-painted details. Complete armor components include torso assembly (chest, back, abdomen, kidney, butt, and 2 ribbed shoulder connectors), left and right shoulder bells, left and right arm assemblies (biceps and forearm armor), left and right thigh armor, left and right shin armor, belt assembly (layered-stitched canvas fabric belt, ribbed front plate, 2 ammo drop boxes, and distressed leather holster), thermal detonator canister, and white brush-painted chelsea boots. All armor components are assembled and held together with original metal hardware and elastic strapping. Also included is it's original off-the-shelf thin black leather belt which was used to attach the thigh armor to the actor. This belt is the only known example in existence to survive the entire production. Black spandex bodysuit added for display. There were only 6 hero style helmets made for the film, making this helmet only 1 of 3 hero helmets known to still currently exist. After filming was completed in England, this being 1 of 2 of the best condition remaining costumes were hand selected and sent back to the United States for additional pick-up shots such as the 'space trooper' standing at the entrance of Death Star Docking Bay 327 as the Millennium Falcon is drawn in by the tractor beam. This particular Stormtrooper is prominently featured throughout the film and can be screen matched sharing scenes with both Princess Leia as well as Darth Vader. It was also featured in the Donny and Marie Star Wars Special (1977), the Star Wars Holiday Special (1978), and the 50th Academy Awards (1978). This incredibly rare and special Stormtrooper costume rich with history is the most complete and best condition example known to exist from the first original Star Wars film (1977). Exhibits age, production wear and handling, discoloration, scuffing, small cracks, crazing, and minor paint loss. Comes with a COA from Heritage Auctions. Suit Gallery Helmet Details It has been confirmed to match the suit seen throughout the film, as shown: Link to Auction HERE3 points
-
Images taken from https://entertainment.ha.com/itm/movie-tv-memorabilia/costumes/original-screen-matched-complete-hero-imperial-stormtrooper-costume-from-star-wars-episode-iv-a-new-hope/a/7278-89463.s?fbclid=IwAR19BLoEUxtChwBWRryuTXF4-s7XVs4gf7TagcBAP5eUdAJmYSEGgiR9AO4 This find is incredible! "Original Screen Matched Complete Hero Imperial Stormtrooper Costume from Star Wars: Episode IV - A New Hope (TCF, 1977). Vintage screen matched original Hero Stormtrooper costume constructed of vacuum-formed ABS plastic components. This complete hero style helmet features a one-piece green bubble-shaped lens, original elastic chin strap, original mic-tips, original rubber brow and neck trims, and hand-painted details. Complete armor components include torso assembly (chest, back, abdomen, kidney, butt, and 2 ribbed shoulder connectors), left and right shoulder bells, left and right arm assemblies (biceps and forearm armor), left and right thigh armor, left and right shin armor, belt assembly (layered-stitched canvas fabric belt, ribbed front plate, 2 ammo drop boxes, and distressed leather holster), thermal detonator canister, and white brush-painted chelsea boots. All armor components are assembled and held together with original metal hardware and elastic strapping. Also included is it's original off-the-shelf thin black leather belt which was used to attach the thigh armor to the actor. This belt is the only known example in existence to survive the entire production. Black spandex bodysuit added for display. There were only 6 hero style helmets made for the film, making this helmet only 1 of 3 hero helmets known to still currently exist. After filming was completed in England, this being 1 of 2 of the best condition remaining costumes were hand selected and sent back to the United States for additional pick-up shots such as the 'space trooper' standing at the entrance of Death Star Docking Bay 327 as the Millennium Falcon is drawn in by the tractor beam. This particular Stormtrooper is prominently featured throughout the film and can be screen matched sharing scenes with both Princess Leia as well as Darth Vader. It was also featured in the Donny and Marie Star Wars Special (1977), the Star Wars Holiday Special (1978), and the 50th Academy Awards (1978). This incredibly rare and special Stormtrooper costume rich with history is the most complete and best condition example known to exist from the first original Star Wars film (1977). Exhibits age, production wear and handling, discoloration, scuffing, small cracks, crazing, and minor paint loss. Comes with a COA from Heritage Auctions."2 points
-
If you send payment as a gift PayPal will not be able to return funds in case of a dispute with the company you're purchasing from.1 point
-
DIBS on the thermal detonator.1 point
-
Shout-out to the auction house for the great pictures too. Very cool. Sent from my Pixel 7 using Tapatalk1 point
-
This is super helpful. And yes very small [emoji38] I’ll work on this after these strap and snap adjustments! Sent from my iPhone using Tapatalk1 point
-
1 point
-
1 point
-
It is an old thread from back in 2010 which has been archived due to some missing images and broken links, FX armor was quite common in FISD early days but few build these now. Here's some of the text from that thread: HOWTO: Make your FX armor Expert Infantry I get this question asked a lot so figured now was a prime time to write it up. Obviously the helmet has to go in toto, but since that's an all-out replacement and usually taken care of in one fell swoop, and the fact that most already have swapped out their helmet, Id like to focus solely on the armor. Despite what people may say, making your FX armor EIB acceptable actually takes little effort, money, and time. You can pretty much buy everything you need for $60 and an hours worth of work, or if you have time can do it for about $20 and an afternoon. Lets break it down! 1. Replace the ab plate buttons The ab plate buttons that came with the FX kits are the wrong size and color and need to be replaced. Fortunately this is pretty easy on the FX kit and you have several routes you can choose from: 1. Easiest way buy them completed. You could contact other armor makers and buy pieces seperately 2. Next Easiest - buy plain buttons and use decals You can buy plain buttons from Tandy. They need to be 7/16" in diameter. You can then buy decals from TK-4510 instead of painting them for $3 Button Decals : https://trooperbay.com/trooper-abdominal-plate-decals 3. Least Easiest - buy plain buttons and paint yourself As above, you can buy a set of 9 buttons from Tandy and paint them yourself. Painting guide: http://whitearmor.net/forum/index.php?showtopic=8117 Where to buy paints: trooperbay https://trooperbay.com/costuming-supplies/painting/humbrol Maximum cost : $20 Effort : 10 minutes to 30, depending if you buy or build 2. Replace the plastic belt Like the ab plate buttons, this is a pretty straightforward fix if you buy a belt or you can save some money and make your own. Making a Belt HOWTO: A guide to making a canvas belt : http://whitearmor.net/forum/index.php?showtopic=665 Maximum cost : $40 Effort : 20 minutes or more, depending if you buy or build 3. Correctly mounting your holster While most holsters have full straps, in A New Hope (which most troopers do) the belts are actually fastened from behind using rivets. This is a very cheap mod and you there are many ways to achieve this look. If you are doing an ESB trooper, simply wear it on the right instead of the left ($0 cost and time). If you are doing an A New Hope trooper this look can be achieved by simply cutting off the outside strap (free, 5 minutes) and then fastening the holster to the belt like shown in the picture below as a guide: You can use rivets, Chicago screws, or even snaps. The rivets need only be seen on the outside, and you can even use velcro if you wish on the inside to make it more secure. Maximum cost : < $5 in materials Effort : 10 minutes or less Pretty easy so far So far it's been pretty easy and the above steps will instantly make any FX based stormtrooper look more accurate and impressive. Some choose to stop there, but there are two more mods that will need to be done to make that FX kit Expert Infantry. 4. Cutting the butt plate While the cheapest mod to do, this is really the only one people hesitate on and it often takes two people to get it to hang correctly. While there is a seam line on the back of the FX back plate, it's too high and the cut should actually be lower down, about 1/4 to 1/2" below the belt. You can see this in several shots. While the pictures above only show the strapping for the kidney to the butt plate, some people (including myself) also use a strap that goes around the front of the waist to keep the sides from flaring out. Ideally one could use a heat gun to properly shape it, but a strap works well too. Also depending on your body type you may have to put a little bit if padding in the butt plate to get it to sit correctly (OK, maybe just me and my small butt :-)). Regardless of whichever route you go, this is an inexpensive mod in that the cost is just those pieces of velcro or strapping that you use to secure it. The time is the biggest factor, as while cutting it only takes 5 minutes it can take up to 30 to get it to sit correctly. 5. Shimming the side gaps Of all the armor makes, the FX has the largest gap between the ab plate and the back plate. Fortunately this is pretty easy to solve with some extra plastic sheets. While clones advocate a seamless join, FISD is not so picky and simply using a plastic shim is acceptable. There are several routes that people use: 1. Buy spare ABS/HIPS from whomever made their kit (guaranteed to match the armor) 2. Buy spare ABS/HIPS from a plastics store (perhaps cheaper) 3. Use spare ABS/HIPS that they have laying around. The plastic belt that gets replaced by using a fabric belt is often an ideal candidate for this. 4. Buy a cheap plastic sign from a home improvement store and paint it to match Here is a simple fix that a person used as a starting point. Remember it just needs to look good from the outside though it's always a good idea to make these changes more robust as time and budget allow. Conclusion And that's it! It may seem a lot at first, but after going through it you'll wonder what all the fuss was about. Whether you decide to buy everything you need or create all the pieces from scratch, these changes will really make your FX armor kit pop and breath new life in to it, allowing for many more years of enjoyable trooping to come. Where to go next I'd like to encourage those that haven't taken the plunge to make these changes to do so. Making your FX Expert Infantryman qualified actually is relatively inexpensive and not that hard. Not enough you say? Yes, there is even *more* you can do to pimp out that FX kit, from adding side snaps on the ab/kidney to adding return edges to the chest and other parts, but these aren't required for EIB. What do you think? Everyone - we on FISD staff would love to hear what you think of the above. Was it easy to follow? Did you like the changes once done? Let us know!1 point
-
Did some trial and error with the snaps and elastic until I finally found something that seems to work well! So far I just glued the butt plate to the kidney plate but it seems to be working well so far. I should be able to attach the rest of the elastics and snaps to the arms very soon!1 point
-
I got some work to do, man that’s alot of pieces It’s also too snug and my eye lids are actually touching the visor when I blink…well don’t blink then I’ll ad som spacers to make the helmet bigger and if it’s a miss I’ll get my friend to print at a larger scale. Had to do the TK-twist to get it on, that was a pretty fun trivia thing.1 point


.jpg.6f982ac574881d87a3bcb714b3b58d48.jpg)
.jpg.453ff882ed9b6e83fca56f36a14afeac.jpg)
.jpg.7a3fa581db058220d41b611e1fe31501.jpg)
.jpg.6398deb1b8bc5881cc0f27a9e9af7e12.jpg)
.jpg.4c065ae467a3f4ac27b023b451ceb6ed.jpg)
.jpg.1aefdfc5397ce48c938db3986cf75f20.jpg)
.jpg.177eda8e8119d761999c69994b69ee7c.jpg)
.jpg.5994791a3a23814aa3b835a48817a9b4.jpg)
.jpg.e4829289a70ff4e83be43b2d67242c2d.jpg)
.jpg.449630667ce3ccf3b04004bd2c5801a2.jpg)
.jpg.133e811585dc71f7ce709af3c196e7ca.jpg)
.jpg.431726ae9a518e0349cd9044e54b5a5d.jpg)
.jpg.4847dc9ea5b773e0c4b8caa9c04fa478.jpg)
.jpg.d3dfe091bc1c275902e22b2a1a509512.jpg)

.jpg.05e4ef74bef598a2eb14f73c30b72938.jpg)
.jpg.525a6b2128a309e372b661ef6878936f.jpg)
.jpg.b66e1f8a0407be21502fa43f90cf8471.jpg)
.jpg.637a68efa75fc710f83a3d298636bff2.jpg)


