Leaderboard
Popular Content
Showing content with the highest reputation on 07/17/2023 in all areas
-
6 points
-
5 points
-
5 points
-
5 points
-
3 points
-
Your centurion number corrected to 525.2 points
-
2 points
-
No worry, you can open a building thread here or into the German Garrison forum or Here to receive tips and feedback. You can change the helmet and Ab plates in the future to be more accurate and to apply for higher levels badges. We are here to help.2 points
-
Hi Markus, If I may. If you haven't buy it yet , I would suggest to take a look to this section so you can see the options you have for the same or lower price.2 points
-
Cooling down for a while, Chaos Division style! Please welcome TK 66744 to the Stormtrooper Hall of Fame, June 2023! @Morgi Troop log can be found here. Congrats on the badge! Many more to come! With Unquestioned Loyalty Jonatan Östling TK-23592 "Nairy" Curator Hall Of Fame2 points
-
2 points
-
Thank you!! Super excited to have gotten here.1 point
-
1 point
-
Don't forget to add the total number of troops to your first post title for tracking purposes Troop log title examples:1 point
-
Congratulations trooper and welcome to the centurion ranks1 point
-
Hi Alex, and thank you for your Centurion application! CRL and CENTURION Application Requirements: All required photos have been submitted, and on behalf of the entire D.O. staff we are pleased to welcome you to the rank of CENTURION . Congratulations! Other-Armor Fit/Assembly; In this area we review observations made by your fellow troopers and the DO team. Some observations may lead to suggestions to improve the overall look of your armor, and please keep in mind that we consider both text (CRL) and pictures (screen caps/reference images) when reviewing submissions. Awesome job on those fixes Trooper. Welcome to CENTURION RANKS !! 1 point
-
1 point
-
1 point
-
1 point
-
5) Sacramento Rivercats Baseball Game Star Wars night 07/15/2023 Sacramento, CA Sent from my SM-S908U using Tapatalk1 point
-
I' ve been looking this list...but delivery + Import duty to germany is my biggest problem.It makes it costy.1 point
-
1 point
-
Hi again Alex. Could you please help me with another photo please? I need you to take another close photo of the wrists end from the oposite angle. Just want to check the "hump " areas (blue circles) Thank you.1 point
-
it's a preferences matter, to me it looks nice, other people would like more shiny. Nice work.1 point
-
1 point
-
have been busy with cutting, sanding and forming and rigging the past few days. I'm on leave this week and plan to finish up with as much as I can until the rest of my stuff comes in. The dome portion of the helmet was damaged during shipment and the belt face was missing, so I'm waiting on that. I ordered an E-11 from 850 Armorworks yesterday, and the next run of Imperial Boots isn't until August, so we'll be at a standstill for a bit. Some pics in the meantime:1 point
-
Some actual decent photos to make a list of what needs adjusting before submitting, but welcome feedback too! 1) Change straps to grey. I made these black initially for two reasons. First was, some of the original action figures actually had black under suits, and given I already had an abundance of black webbing and elastic plus an existing black under suit from my OT TK (IMO Should be an option in the CRL). Second was that the original under suits that the original crew used were Nike sportswear which has been out of production for years, and getting a grey under suit was near impossible (it took me years of looking before I stumbled on the one I currently have, and the quality is not great so I cant imagine it's going to last long!) 2) Paint grey detail under arm (between chest and back armor) and on belt (looking face on, left of center belt box small square needs to be painted grey) 3) Add Cod strap 4) Source more accurate boot (+ paint sole white/grey. not in CRL but should be added if CRL updated) 5) Under suit on legs could be better fitted. 6) Feedback from detachment on detail on back of helmet. There is an indented triangle pattern, and as the build/ assembly thread on the concept forums were never quite completed on this helmet variant, seems open to interpretation as to whether should be painted. I'd suggest they're painted black, but would prefer to clarify with detachment. 7) Neck ring/ yoke was initially designed to be separate from the chest piece, then was later updated in Kevs build thread on the RMQ forums in a comment that he changed the design slightly, and suggested glue to chest piece and where connects to shoulders to attach via Velcro. I'm going to glue the two together with E6000 and see how it wears (hopefully sits better and gets rid of the gap between the Yoke and Chest plate) and if no issues, can glue more permanently later. 8) Belt boxes are off in the picture, the initial build instructions showed one connector to fix the box to the belt but that leaves too much movement, so looking to add a second connector on the inside to stop them being able to twist while wearing. 9) Run strapping to the biceps to allow consistent height1 point
-
TK-28823 Troop Log - Hong Kong Garrison 2022 1. 29/10/2022 - Hong Kong Red Cross Blood Transfusion Service - The Mills Halloween Blood Drive - Hong Konghttps://drive.google.com/file/d/1CmIRPSQ4Gw-ouY8kBAFgyC3IoNZdUnxI/view?usp=sharing 2. 17/12/2022 Let's Go X'mas 2023 3. 2/4/2023 Book for Love Yr 2023 4. 23/4/2023 Book for Love Yr. 2023 5. 4/5/2023 Hot Toys Echo Base Base Event 6. 4/5/2023 Legoland Discovery Centre 7. 18/6/2023 World Blood Donor Day 2023 8. 9/7/2023 McDonald House Charities 2023 Raffle Sale kick-off1 point
-
Here's a better photo of the armor pieces out in better light. The shine is a bit more muted than I expected, but it still looks pretty good to me. What do you all think? I can always put a glossier clear coat on the armor if needed. The tape in place on the holder for the thermal detonator will be removed when it comes time to attach the thermal detonator. I'll score/sand the part covered by the tape before gluing, and I have tape on the corresponding spot on the thermal detonator for the same reason. I also drilled a small hold in each to allow a pin to be glued in place between the two, which should provide a more of an attachment than just glue alone. I do not have pictures of the thermal detonator as I have not been able to complete the painting for it yet. One issue arose when attaching the holder for the thermal detonator to the rear torso piece. I ended up putting more bonding agent on than I should have, and it didn't look much better after I sanded the extra bonding agent by hand. I then used a Dremel to carefully remove more, but I stopped when I felt I was removing too much material. It doesn't look as apparent in this photo, but it does appear when looking at the armor close up (maybe I just notice it because I know it is there). When it comes time to wear this to cons, I guess if anyone wants to fixate on it, I think I will just say the extra glue was from a "field repair." Another small detail to discuss is the shadow effect I added to the chest armor. Many of the FEM7 photos I have seen have had some sort of shadow effect or weathering to emphasize the front 'plate' on the chest armor itself, so I wanted to try the same. I didn't do a full weathering as I could always add that later (but it would be harder to remove weathering if I did it now), so I took a regular pencil and traced the inside edge of this front plate. I think the results are pretty decent, and will be sufficient for the job. I did this prior to adding the clear coat, and I can tell from my above photo that the shadow is doing its intended job! Here's the shadowing before I applied clear coat to the chest piece: And with the painting for these pieces complete, I have to take a pause on this project for a week or so. I am moving multiple states away from where I currently live, so this all has to be put back in its original box for the move. A bit anticlimactic to have to pause this project, especially at this stage, but I will be picking it back up soon enough! I will be working on the leg armor when I pick this project back up. Any recommended build threads concerning leg armor that I should look at in the mean time?1 point
-
If you do decide to adjust it, it wouldn’t be too hard of a fix, just back the hole with scrap abs and then fill with abs paste and reattach with new holes. Sent from my iPhone using Tapatalk1 point
-
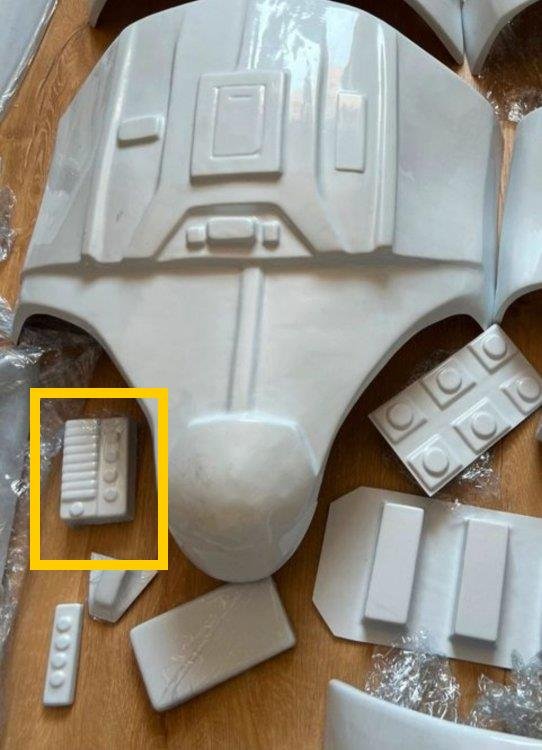
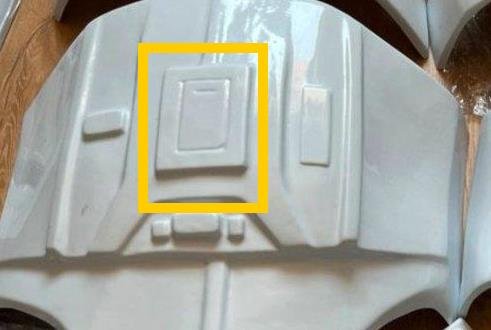
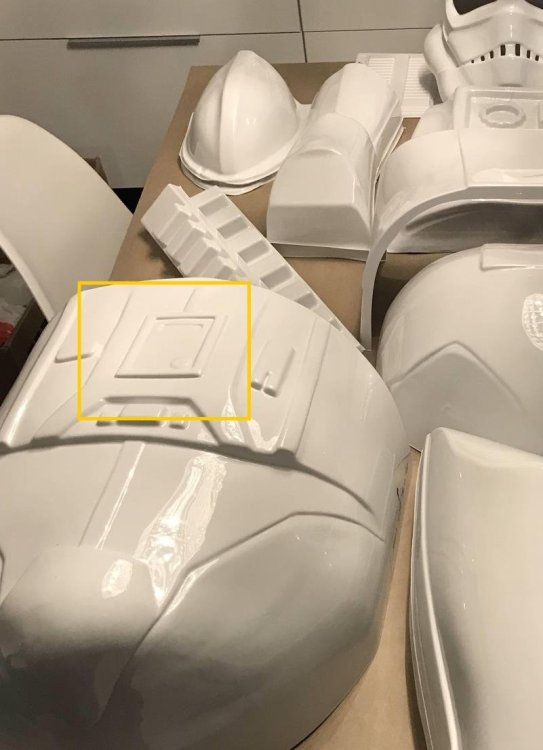
I couldn't see any of the tell-tale tabs on the cod or posterior so I ruled AM out. I did notice the larger ab plate has no return edge moulded in. Example AM cod posterior tabs TD tube is also of the smaller size, ie: ATA, AP/NE (ATA normally lighter grey tube) AM and AP both have some tell tale details in the large ab plate recess on the torso, small circle in lower corner AM AP WTF Compared to the image provided I'm wondering if it's an older recast1 point
-
I normally take off 5mm which is normally enough not to overlap, really depends on your size and how much the elastic has to work, doubling over the elastic here is a good idea. To stop overlapping there are lots of ways, adding slots and tabs can help, I found just adding some bent pieces and gluing behind helped keep them together. Just adding some foam behind the ab or kidney can also help pull out the pieces closing the sides.1 point
-
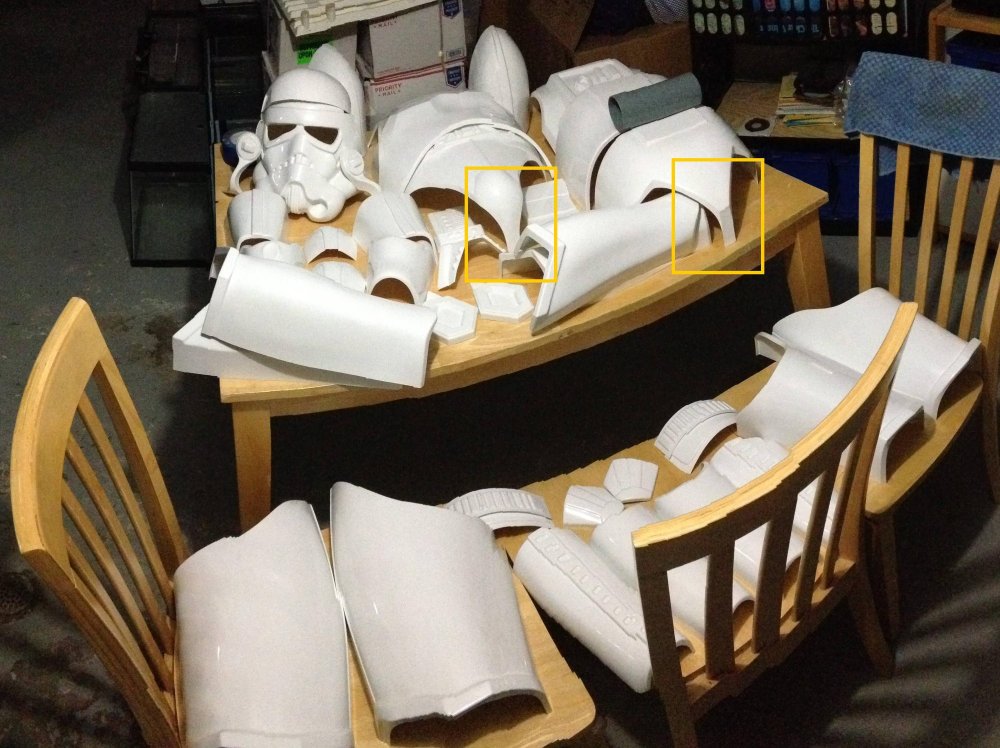
Hi Markus, and welcome to the FISD! To better help you identify the maker of this armor, can you post up a few close-up photos for us? I could also be an old set of AM with that 3 piece bucket 1. Ears 2. Face plate 3. Ab mid-section (including button plates) 4. Thermal detonator The helmet decals look to have a blue(ish) shade similar to ESB, but they could have faded. A close-up of those would help as well. We are here to answer any and all questions (no matter how many), so always feel free to ask about anything!1 point
-
Hello Markus, saw this kit also on kleinanzeigen. For the other, this is the link: https://www.kleinanzeigen.de/s-anzeige/star-wars-anh-hero-stormtrooper-ruestung-1-1-kit-armor-diy-prop/2461303296-282-8676 Are you in the german garrison public forum? Glückauf Wolfgang1 point
-
Due to the delay in any movement on this submission we are considering it inactive. If you would like to continue, please get in touch with any member of the D.O. staff. Thanks!1 point
-
1 point
-
Don't rush, heat can build up if you drill too fast, nice and slow and make sure not to loose your grip on the rivet as spinning can also cause heat.1 point
-
I can’t echo enough the need to doublecheck the instructions on paints. I have done a number of methods as I’ve learned to do a Din Djarin beskar and it’s always frustrating. Here’s my knowledge and it depends on the paint process too. If you are using rattle cans, understand those are more prone to orange peeling, but first, make sure the environment is warm (check paint instructions) and the less humid the better. If you plan to do a 2k urethane clear coat on top (which I highly recommend for durability and shine) You could do a gloss white or even a matte white as the clear coat will shine it all up. I prefer matte when using urethane because it has less additives to make it less likely to orange peel. The best way is to do light layer coats over the surface more times. At first it won’t look well covered but over time 5-6 coats you’ll see that it covers completely, light coats are less likely to run and drip too. Give yourself 10 or so minutes between coats (again depends on paint instructions) After you’ve got the coverage you want let the paint sit for 72 hours or more (depends on paint) because it will need to cure and part of that process is all the chemicals drying out of the paint like bubbles coming up to the surface if you clear coat at the wrong time this curing can cause orange peeling in the clear coat. When doing clear coat 2k from a rattle can I recommend Spray Max glamour gloss. Definitely read the instructions on these cans as they are very particular, but I’d give it 2-3 layers of light coverage and then 1-2 layers of slightly more coverage. Again let sit for 72+ hours to cure. At this point you should be okay to go, however if you want to achieve a higher level of smooth shine you can go on to buff and polish like you would a car finish. If using an hvlp or lvl sprayer for your paint just pay attention to the instructions on the paints you use in detail. The biggest things are the psi to spray at and the coverage of paint. Usually I recommend testing on a similar surface (there are usually some model car plastic test pieces you can get really cheap in bulks) to see how your paint is going to look on your armor. This method has less overall chemicals so it tends to go on with less orange peel, but it still can happen, so similar processes as above. Sent from my iPad using Tapatalk1 point
-
One other thing you might want to try doing is using a heat gun carefully to help the ammo belt shape itself to the bend. Right now at the bottom you see it flares out a little. This is because it’s not used to being bent around the thigh. I made this better on mine by lightly going over the belt with my heat gun, not heating to an extreme of warping or damage, but enough for it to start naturally taking the curved shape on. Sent from my iPad using Tapatalk1 point
-
Troop Mission Report [9] 7/8/2023 Out of this World event at San Diego Balboa Park. Included Imperial Sands Garrison and other clubs. This was a fundraising event for Patrons of the Prado (10 arts, science, and culture centers on the Prado in Balboa. It was a gathering, dinner, and silent auction. The guests were dressed in space-themed clothing as well! The call time was 4 pm and the troop was completed at 8 pm.1 point
-
1 point
-
Got the knee ammo belt on! I’ll probably tackle the sugru on the other knee soon, while I work on the belt and strapping.1 point
-
1 point
-
1 point
-
1 point
-
Yeah mine were also trial and error. My back and kidney originally ended up having a bit of a gap even when I thought I had them short, so I doubled up the elastic (for extra strength in the strain) and then shortened. Sent from my iPad using Tapatalk1 point
-
1 point
-
Thanks for the tutorial! I made some straps with snaps today and it’s coming along nicely!1 point
-
Do you mean the fabric the snap is set in? I used e-6000 to glue it to the ABS Sent from my iPhone using Tapatalk1 point













.thumb.jpg.d5282f66012c891acf8163f75bfd42c9.jpg)
