Leaderboard
Popular Content
Showing content with the highest reputation on 07/03/2023 in all areas
-
Hi Jonaton, Thanks for the extra detail. Just sp you’re aware, the ‘material’ you highlighted with the blue line is just a bit of tape that came unstuck while taking the photo; sorry if that caused confusion. I’ll be measuring out from the red line you added and aware not to trim the return edge to allow for the screws. On a separate note, late last year I was diagnosed with Autism. Whilst I’m ‘neuro-typical’ in most circumstances, any areas around detail like this cause me to overthink. With this in mind, you will probably see me ask more questions clarifying advice, get overly-focused on ‘detail’ or request information in a certain way. This is only so I understand information better and to have it make sense in my own mind (which is probably a reason why my build has taken so long). I just wanted to let you and others watching my thread know just to give some context on why some of my responses may seem different to the typical user. Thanks in advance for your (and anyone else’s) patience. Tim Sent from The Empire3 points
-
Hello, My name is Shawn I'm from Baltimore Maryland. I am not part of a garrison as of yet, but when I get my armor built I will apply to one. I'm starting doing research to build armor.2 points
-
Hi all, My name is Ian from Melbourne, Australia & I've just joined the 501st Knightfall garrison there. I'd like to build up an ANH Stormtrooper costume - no experience whatsoever (but willing to learn ) so would appreciate any guidance on getting started. Especially if there are any reputable local Aussie vendors that I could support by buying from them. Cheers, Ian2 points
-
Denver Fan Expo My first big con was a blast. Definitely the most fun I've had at any trooping event as far as volume of people, photos taken and number of club members. Our area was combined with the Rebel Legion and Mandalorians so we had a great mix. Unfortunately I had an obligation on the last day, so I feel like I missed some of the best moments, I would have kitted back up for the rest of the day if I hadn't had to leave, but what I got to do was definitely plenty of fun. Great image, but not the friendliest of backdrops. The Garrison, Mando Mercs and Rebel Legion put together an amazing set for our corner of the con. A young trooper stopped by with a great armor kit that I had to get a few extra shots with. (pun intended) The kids parade. Our last day had a much bigger crew that Saturday. Of course there is only One Way Out! Nutty fun.2 points
-
Regarding the sniper knee position, Every armor maker has their sculpture details that needs to be considered when building . In this case the RS sniper knee typically doesn't has a perfect alignment with the ridges , so what we could suggest to ge it close to the ideal position is like the bellow image. Try to align the Sniper Knee with the shin ridges the more you can and trim a little over the ridge. Or a small gap in the lower section is allowed too . References2 points
-
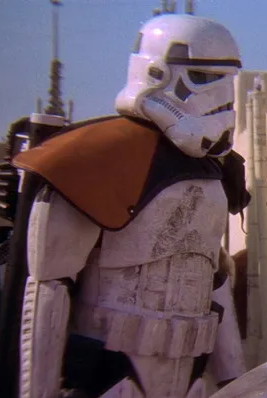
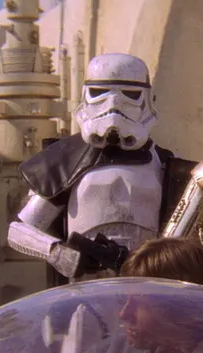
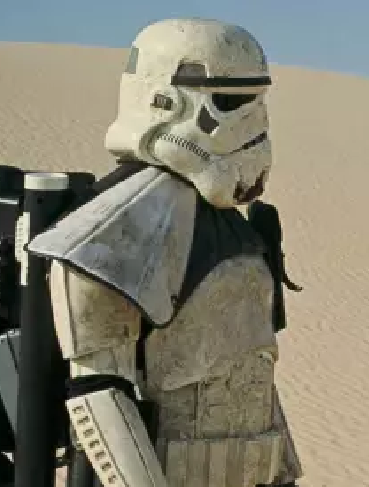
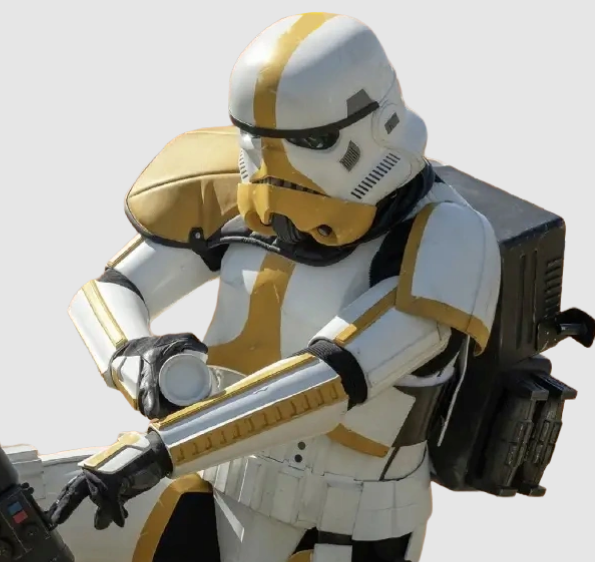
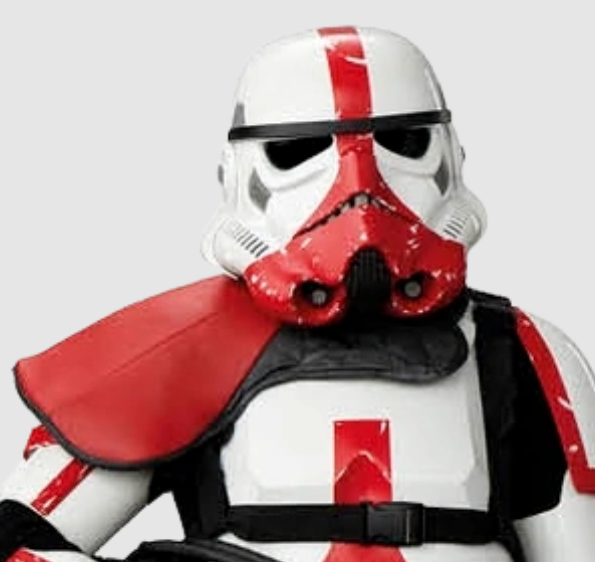
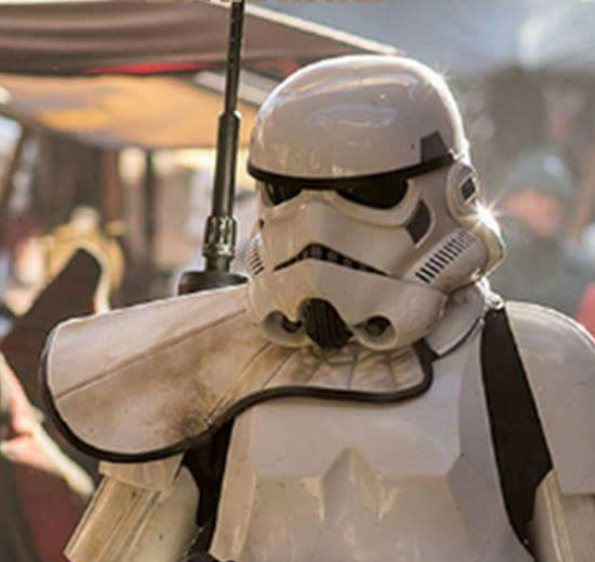
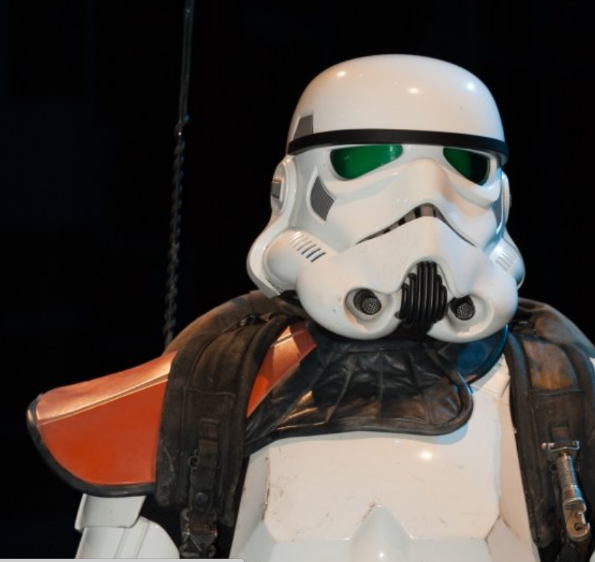
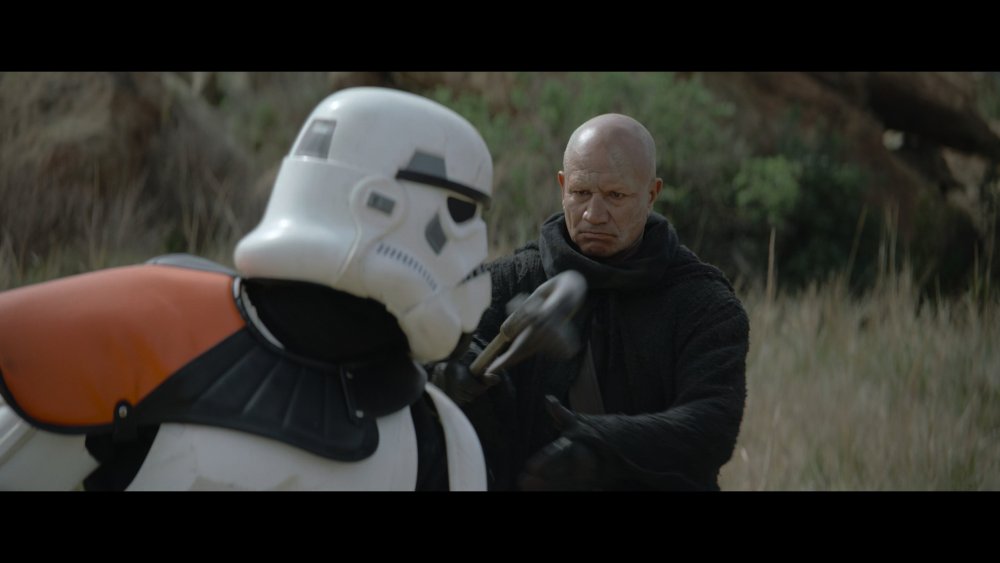
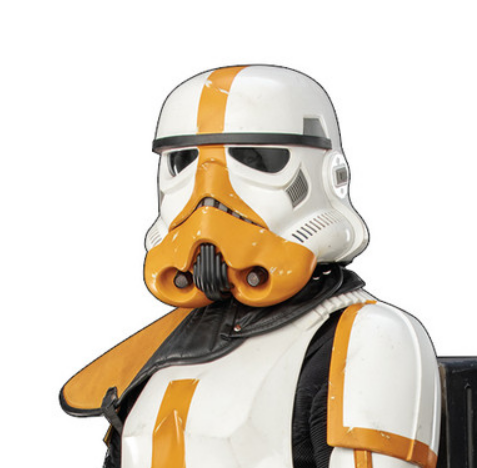
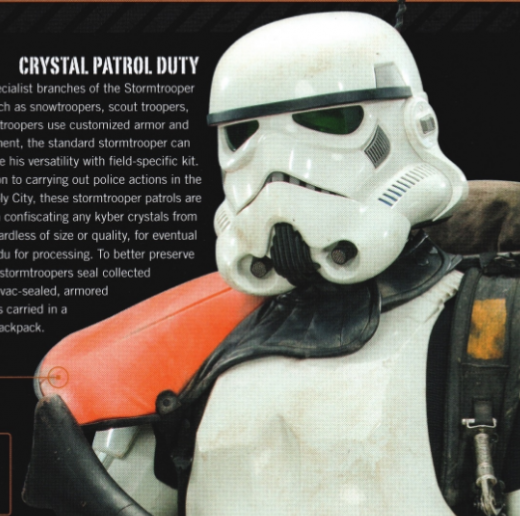
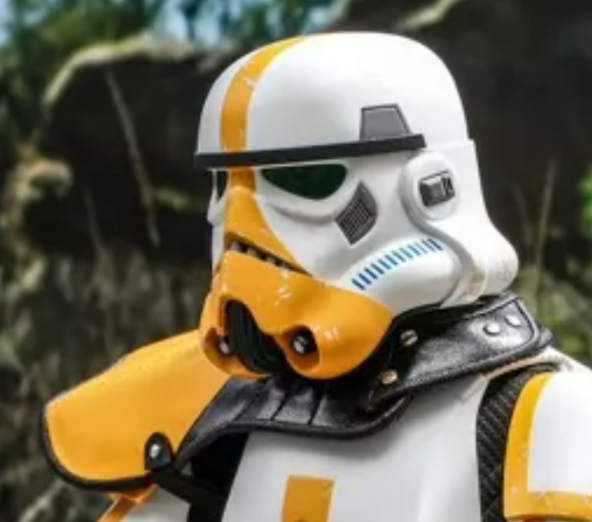
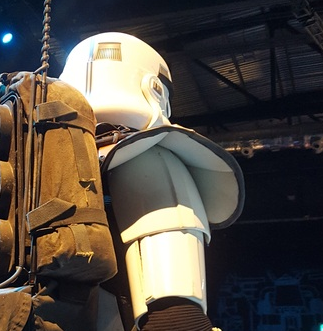
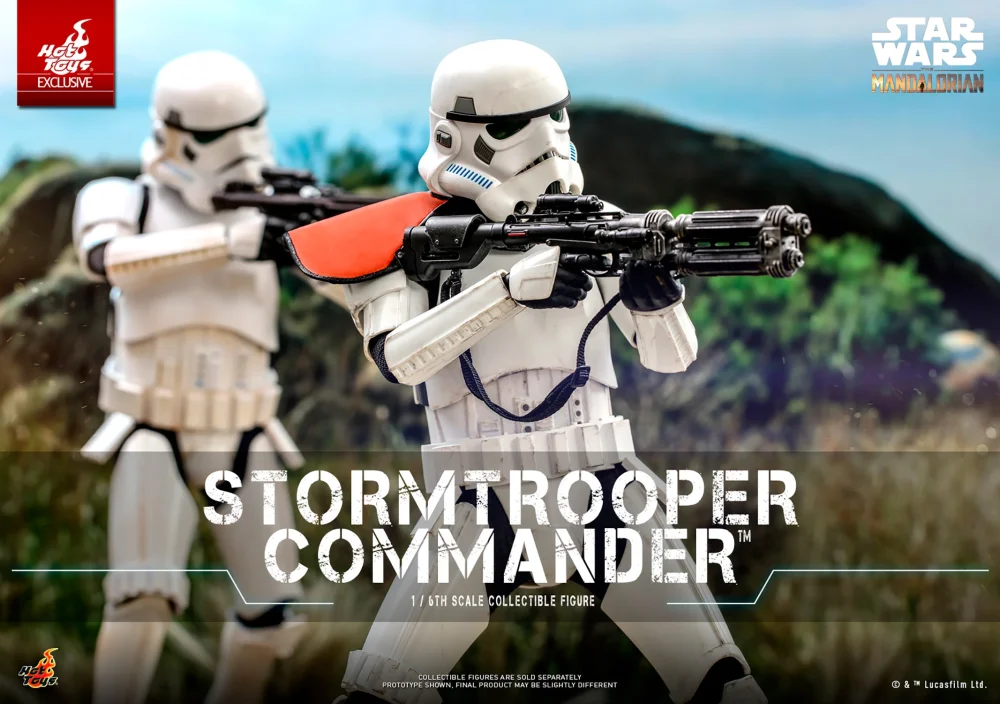
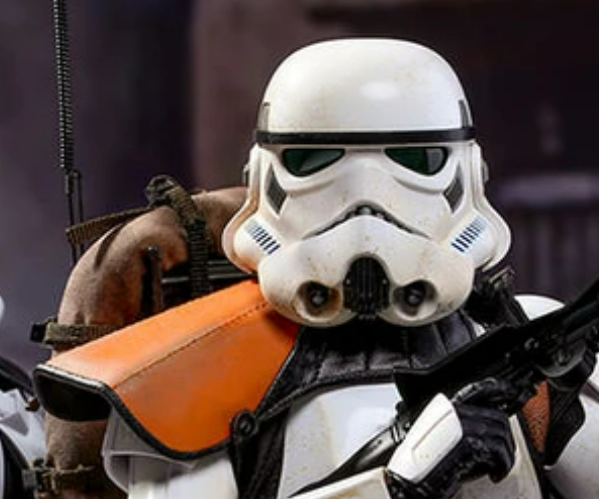
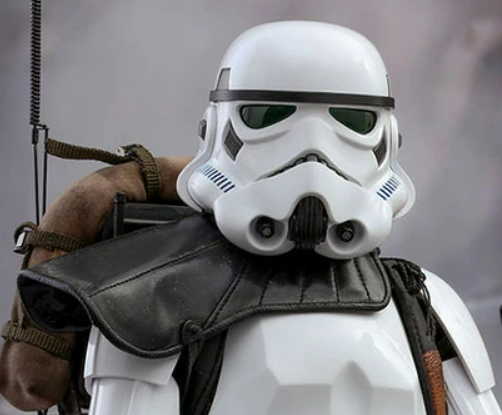
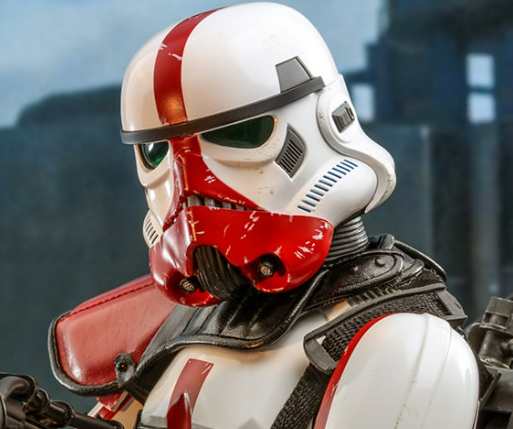
A little new era trooper pauldron research, mainly for the Mortar and Incinerator troopers, there always seems to be an exception though. So here we go, most of the new era pauldrons are a little different to what we have seen in the past, ANH and other original movies/series the colored sections have no lines (bare in mind these are for Sandtroopers) ANH Orange ANH Black With the exception of 1 white pauldron on a sandtrooper, it did indeed have sewn lines. New era pauldrons have 2 sewn lines/3 panels in the colored section just the same. ANH White NEW ERA 2 sewn lines / 3 panels Mortar - what is different to other new era pauldrons is a silver rivet is on the lower colored panel (arm strap) and also 2 rivets on the closure and the closure is on top of the pauldron not underneath like other new era, identical to the ANH white pauldron (the supplier confirmed it was created ANH style) hence the rivets. Hot toys same silver rivets, closure on top and silver snaps Incinerator - 2 sewn lines / 3 panels, no rivets, closure underneath pauldron, black rivet shoulder strap Black rivet shoulder stap. Can also make out 2 black snaps on closure NEW ERA Sandtroopers 2 lines / 3 panels. Note closures are affixed under the pauldron not on top and no rivets same as Incinerator. Also black rivet for shoulder strap Orange Note 2 black snaps on closure Hot toy black rivet/snaps Also note the white underside of pauldron Black Hot toy black rivet/snaps White (and an exception, some may note the CRL model is wrong for this pauldron, it is the only one that has a colored closure, being white, unless there are other references of course) It's closure is also attached underneath the pauldron and no rivets. White rivet shoulder strap Hot toys same, white rivet & snaps We come to another exception, someone has to be different, it has an ANH style with no lines in the colored panel which does not match other new era pauldrons, also showing 2 rivets on top of the closure and the closure is attached on top of the pauldron ANH style. Mandalorian Season 2 Hot toys same, no lines on color area, silver rivets, closure on top and silver snaps Hot Toys refer to this trooper as a Stormtrooper Commander What does this all mean, well research is the key, the more you research something the more you may learn and for those uber accurate ones make sure you research others research1 point
-
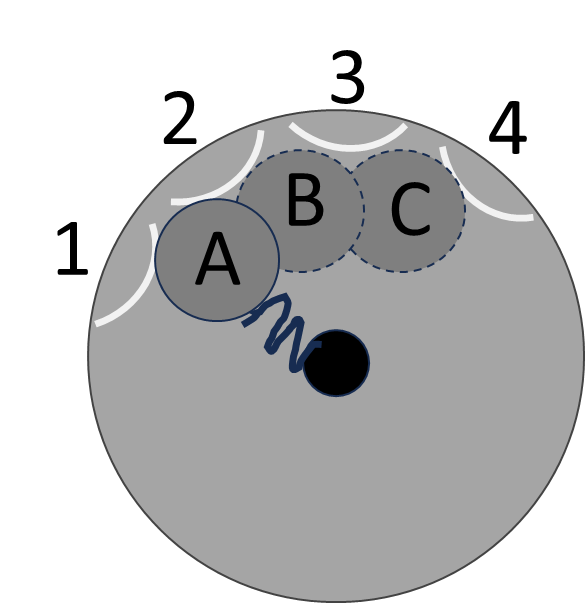
Back from the camping which was awesome! Tino, the issue is the switch included with my Blaster Factory E-11 will not work with the MY BlastFX system (stay tuned for why Adam...) So, the switch diagram provided by Adam for the Blaster Factory switch is incorrect. 1- 4 are the curved contact points inside the switch. They are attached to corresponding soldering tabs on the outside of switch as seen in Tino's post. A is the little metal circle that is inside the switch lid. B and C are alternate positions as you rotate the selector. The squiggly line between A and the central black circle is a spring inside the switch lid. See my previous pics. There is no "common" ground in this switch as is required by the BlastFX program and wiring The little metal circle sits between 1 and 2, not ON TOP of 1 as seen in Adams pic. Therefor, A will short out contacts 1 and 2. As you rotate the selector to choose another fire mode (position B ) the metal circle squishes against the spring and snaps into position B and now shorts out 2 and 3. Same for position C. So, Adam, you are correct in your explanation of what to do with the BlastFX memory card. HOWEVER, I bought my system in 2020 or early 2021 (I believe) before this was probably an issue and solved. I'm just getting around to installing it now. I just confirmed on my card that there is no Fieldmarshall setting for my version of BlastFX. I've attached a link to the BlastFX FB page video concerning the build he did. At timestamp 14:30, he explains the switch issue as well. In this video he hasn't solved the issue yet. BlastFX in Blasterfactory E-11 Hence, I am on the search for a switch that will work (with a common ground). I know the BlastFX owner does an amazing job, and helped me solve an issue I had with DLT-19 build. I shipped him my BlastFX harness for the DLT-19, he fixed the issue then updated the software for free. I just paid for shipping. If I can't find a good switch I may have to do the same with this one...1 point
-
G’day Ian I’ve just replied to your post over in Knightfall, but good to see you here! Looks like you’ve already been given a good few starting links. Most of your parts will come from OS, however your under suit and building supplies can be sourced locally. Btw, I’m the FISD attaché to Knightfall, so please do reach out if I can be of help too [emoji4] Sent from my iPhone using Tapatalk1 point
-
Thanks the both of yall. My main problem will be I'm 6'4 305lbs and a 42-44 waist. But been on threads looking.1 point
-
Thanks so much for the links & warm welcome! I'm sure I'll be picking Andrew's, Glen's & everyones brains - well off to the interwebs to do some reading1 point
-
1 point
-
Ears part III More sanding. I got it thinned out quite a bit. The front fits pretty well. I used a little glue to pull the side of the helmet to close a small gap. The back still has a space. It just wouldn’t close. Hopefully will do better on the right ear. Is there an option to add a little filler into the space? Bondo or something? The angle is as far as I can go and still have room to fasten the two halves of the helmet together. Feedback? Please and thanks!1 point
-
Looking for feedback on arm fitting. Forearm just taped for fitting at this point. No strapping installed yet. Thanks!1 point
-
Hi Ian and welcome to FISD mate. This is also a good resource to use as everything is in one post with links to a lot of things that are going to come in handy for you. This one is specifically for the ANH Stunt variant, there is also the Hero version with a few differences. The Stunt ANH is by far our most popular Stormtrooper around the world. Best of luck on your new and exciting journey and don't forget, if you have any questions, please ask away, we are all here to support you in every way we can.1 point
-
Hello Ian! First off, congratulations on taking the first few steps!! Now the ball is rolling! Being willing to learn as you say is exactly how you become a good builder, and research is key when doing builds! We have a good list of vetted vendors here! Some armors are maybe better suited for you depending on your measurements, like height or things like that! I am 182cm and 90+kg, and I've got an RS Prop Masters kit, but taller humans might go for other makers! I personally love the RS armor because it is currently the only armor with direct lineage from ANH Have a look below!! If you have any questions, we're here for you! Good luck in your research!1 point
-
21. 2023-07-01, Pride Parade, Västerås (Hero)1 point
-
Hi all, Just a few things I want to check. 1. I’ve already started trimming the sniper knee but please could I get confirmation that my trim line is correct 2. Check on placement of hole for snap fitting on right side of ab 3. Check on placement of holes for the rivets attaching kidney armour/ab armour 4. And as a final question, what drill bit size should I use to make the holes? Thanks everyone, Tim Sent from The Empire1 point
-
A new video with an Imperial Officer and Princess Leia. https://www.youtube.com/watch?v=G8wKfe8S8gA1 point
-
Troop Mission Report [8] 6/18/2023 Star Wars Day at the MLB Padres game HPE event. Included Imperial Sands Garrison and other clubs. Incredible hosts and the fans were amazing! Mostly pre-game photo ops this day. About 4 hours in armor and loved every second of it!1 point
-
Definitely looks like another modified E-10. This one appears to be the same basic concept of the extended barrel SMG with an HK-416 stock, M.H.R. 1943 M43 scope and a few similar accessories. However, I'm having a difficult time determining if they're utilizing another Sterling SMG for the base of the blaster or if they went with something else. I robbed this pic from another thread, but am curious if there's anything else showing this blaster in full frame?1 point
-
I find wrapping masking tape around the whole piece or across pieces that need pulling in helps the armor from expanding while the glue is drying. Make sure when you trim the two pieces that they are very straight and this reduces any pushing when drying.1 point
-
Very informative. Can I just add that you really shouldn't use Mr Sheen on your armor as it does contain amonia which will in time yellow AbS. Best to find a polish without this in it.1 point





.thumb.jpg.d5282f66012c891acf8163f75bfd42c9.jpg)
