Leaderboard
Popular Content
Showing content with the highest reputation on 06/24/2023 in all areas
-
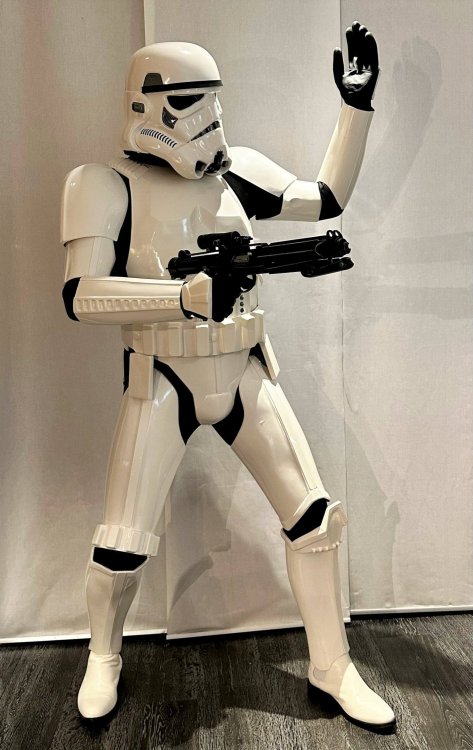
Hi folks. This is Mike from 850 armor works. For the past month or so, we have been working on bringing the new super commando to life. We're at the cusp of full launch now. The few parts that will be vacuum formed, the final molds are in progress now and will be 100% ready within a week. The majority of the suit is being resin printed for maximum detail and ease of finishing. I've been through all the prototype printing and ran all the parts for the first round of production printing. This project started with the helmet. Six different helmet models were purchased and only two made the cut to bother printing. The first was nxt3d then Big Fred's customs. Initially, the nxt3d was great. It was missing a few things to turn it into THE helmet. Big Fred's was next. The initial print was great. Perfect set up. It does seem a bit small. For my production version, I increased the overall scale a small amount then widened it slightly. Either one is probably fine. Pictures of it later. If you want to print all your own, big Fred's customs is the set to use. It's excellent. This initial post is from my phone and a bit of a pain to do. I'd rather do it from a computer. We were able to finish the chest molds late this afternoon and did a quick test assembly. This is with the standard big Fred's helmet. Collecting and organizing parts for the first test run Jetpack...love this thing Helmet comparison. Dark gray modified, light gray standard big Fred's. More pictures later Hopefully this link works for all the pictures uploaded so far. I'll post more when I have time at a computer and as the final build progresses. https://mglover54.imgbb.com/?list=images&sort=date_desc&page=2¶ms_hidden[userid]=1sR95M¶ms_hidden[from]=user&seek=MnqvJ5f2 points
-
In order to prepare for the belt, I first needed to get the abdomen details attached. I sanded and filed the 3D prints. I worked on the back armor cog and bars as well as the thermal detonator holder at the same time. Before sanding and filing them, I was researching ways to reduce print lines. I came across XTC-3D. In the end, I chose to use it not to reduce the print lines (because unless you are painting the print, the lines are still visible through the clear finish), but rather to give the pieces a glossier finish. The original print was a flat white and it stood out against the armor. In the end , the finish is a little glossier than the armor, but I still think it's better than the flat white. A couple of the pieces need a light, second coat to get the finishes consistent. I also painted the blue, gray, and black on the ab details. Once those are dry, I'll attach them to the abdomen.2 points
-
1 point
-
Getting there I know it's a test fit but I think you have the left shin on the right leg . Keep up the good work Future Trooper1 point
-
No worries Glen, I hope you get well soon, I was hoping to make it to supanova this time around so I could meet some of the people from the garrison but one of my colleagues put a stop to this by coming into work with a nasty cold, knocked out half my team and me but I am slowly on the mend. Ill hopefully get some pictures in the pre approval section soon, I really want to get this sorted now. Ordered a blaster from sheartech last week and sorted the import and customs paperwork with WA Police, not as hard as I was expecting thankfully.1 point
-
Hello, I've attached the additional requested photos. Please let me know if you need anything else.1 point
-
Small update. All the main pieces are painted except for the bolt. I actually thought the bolt was supposed to be bright aluminum, but ref pics of real Sterlings show them as a worn blackish metallic color. I basically sprayed all the body pieces a rattle can semi-gloss, but now I think it's too shiny. It leans more towards the gloss instead of the semi. I'll see how it all looks when put back together, then maybe overspray with a dull coat. I'm also trying to figure out the speaker placement. Black is the new black. Some pieces aren't pictured as when I brought them into the better light of my workbench I noticed I had missed a few areas with the spray paint. Pictures of the speaker sitting in the back end of main tube. The little soldering stubs (it is sticking out of the right hand side of speaker in the pic) just catches the edge of the main tube. The whole assembly is about 1mm to wide. My thought is to cut two grooves opposite each other in the main tube to allow the soldering connectors to just slip inside. Once the new wire is attached (remember they snapped...) I'll wrap the speaker outer ring in electrical tape to protect everything from shorting against the tube body. And my scope greeblies arrived! I ordered a pack of 10 off Amazon. If I don't hear from Joseph about his greebly bits, I'll take a look at what he designed and make my own. It's not a dig at him, I just know he's got stuff going on. I'll just have to decide if I will install just one at the front of the scope, or two, with one over the rear lens. Cheers!1 point
-
Another thing I’ve noticed going with what Glen said is that a lot of people want to join 501st for “social media and swag” it seems these days. One of the things that drives me nuts is how many will show up to a photo shoot and TikTok video or something like that for the recognition and the social media like but when it comes to charity or other types of things they don’t. I find that this has led to a lot of “what’s a cheap way to get a stormtrooper costume so they end up buying from stormtrooper costumes.com or something like that and then when they are told it’s not approvable they don’t care and just go on to make their TikTok’s but never strive to join further and research and build. Some do though and that’s always great, but I also see that many just want to buy something out of the box and don’t want to build it which in many cases makes a TK much more expensive and slow to arrive, so that also discourages some from building a TK vs. a simpler cheaper costume just to join. Finally my other consideration is how many I’ve seen join in the past years I’ve been in a GML capacity that seem to want a quick costume so they can get access to the cool swag. This is something that seems to push many to just go the route of an officer or tie reserve so they can get on the current racing shirt runs and all. I don’t think there’s anything wrong with what motivates anyone to join and so long as they are active and do their part, hey, that’s all that is required, but I do believe that some of these reasons has led to what costumes seem to get more submissions these days vs. the heavier duty costumes. Sent from my iPad using Tapatalk1 point
-
Great work trooper You can request trooping awards when you hit trooping milestones, info here:1 point
-
Good to see another Dave’s build thread. I’ve got my main armor pretty much done, just waiting on my commission helmet. I wanted to comment here though to follow your build along and also help answer questions too.1 point
-
It is understandable, the general induction bar is lower for Tie (Reserve). Our garrison has a large number of them as they are more "accessible" for new people with no prior knowledge on crafting armor and stuff. They can participate in visits and activities literally "right out of the box". many of them move up to full Tie Pilot gear gradually. Even many of our more senior Stromtrooper has his/her own Tie (Reserve) costume which is great when you have the fill the role of handler during an activity but also want to stay in character.1 point
-
1 point
-
GF, he sculpted the original FX kit, and later on sold TE derivatives in a deal he made with TE back in the day. One of the first guys to sell TK kits. He went on to sell his moulds to AP I think. He was also as far as I know the only maker to get a cease and desist order from LFL.1 point


