Leaderboard
Popular Content
Showing content with the highest reputation on 05/31/2023 in all areas
-
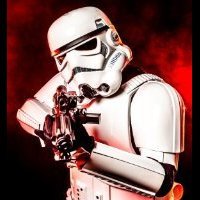
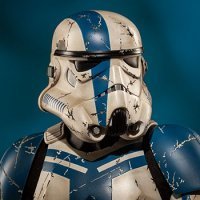
***WORK IN PROGRESS*** Soooo what's the difference between a TFA and TLJ style FOTK? And what would it take to convert the primarily TLJ-focused Denuo Novo First Order Stormtrooper kit to TFA-style? Let's get into it. The Force Awakens ("TFA") First Order Stormtrooper CRL The Last Jedi ("TLJ") / The Rise of Skywalker ("TRoS") First Order Stormtrooper CRL We'll start with noting the difference in general, but with special emphasis on the Denuo Novo kit, which is clearly intended to be TLJ style, but has several parts that are actually more suited for TFA. I have grouped several elements together and will explain my plan for each element. Is this inclusive of all changes made? Probably not, but hopefully it is enough for multiple approvals utilizing the same base kit, with a little extra intentional work.3 points
-
Alriiiight then. I had to go and buy a new butt plate. But here’s the update. What do you guys think? Edges are cut the same way.3 points
-
I mean, if we're all commenting on that fine looking buttplate, I'm gonna join in.1 point
-
1 point
-
Forearms For this build, I will be utilizing a set of Imperial Surplus TFA-style ABS forearms. Let's build them! *Working on updating - pic links are the hard part!1 point
-
Helmet The helmet is one of the most noticeable changes, especially the addition of "teeth" on the TLJ model, though other small updates are present.1 point
-
OMG! I'm back in town but going on vacation! updates coming after I get back!1 point
-
Apologies if my diagram was unclear, but that's looking much closer to the reference photos now - great work!1 point
-
1 point
-
1 point
-
1 point
-
Chatting about Avatar with @Morgi this morning got me inspired and side note - I had to wrap [ img ] ... [ /img ] tags around my links to make them post. I guess imgflip changed how it works1 point
-
Sean Pringle Kosikowsky TK 21103 EIB A4 Chemi Congrats, Sean!! https://www.whitearmor.net/eib/certificates/21103-eib.png1 point
-
1 point
-
1 point
-
I personally removed the tab. Looks better to me and also don’t have a trooper suppository every time I walk. Sent from my iPhone using Tapatalk1 point
-
You have obviously put a great deal of work into this armor and paid attention to details, Sean, and I can definitely see a Centurion badge in your future! The D.O.s will go over any issues for Level 3 in your review, but if you want to get a jump on it one that will need to be addressed is the position of your ABS belt. As per the CRL for Centurion level: The top of the ABS ammo belt should sit at or just above the bottom of the central and vertical abdomen button panels It is usually held in place with snaps attached to the ab plate, which can be hard to adjust. An alternative to moving the snaps would be to use industrial strength Velcro AWESOME job on that blaster, by the way! As an E-11 enthusiast I was well impressed with all the details. Well done! Also, I know one D.O. (@Chemi) who will be very pleased with the position of your Han snap, lol. Perfect!1 point
-
1 point
-
@KC Grim / @citizenkace had said that they are okay to share if credited properly! I bet he'd be stoked if you shared them. Fantastic Imperial propaganda materials haha Thanks all! I just showed up and stood around in armor but a lot of awesome people made this happen and we had some fantastic looking troopers and props. I'll get @Morgi a link to more!1 point
-
Truly incredible pix!!! I bet someone would share them on the FISD Insta if social media consent was given...1 point
-
Incredible photos! Would look very good in a propaganda format! *cough cought hint hint*1 point
-
Fantastic photos Justin! Looks like it was an awesome day.1 point
-
Dude these are freakin' amazing shots! to all those involved! Man I can't wait to get my own DLT someday.1 point
-
*Southern California Garrison Photo Shoot - "Endor" Theme, Porter Ranch, CA - 3/5/23 Not a troop, but figured I'd share some photos from a recent photo shoot event for the Southern California Garrison that @KC Grim organized with an "Endor" theme. Understandably, attendance from the Pathfinder's Detachment was excellent, with both the Detachment Leader, @BikerScout007 and our Garrison Commanding Officer @ramey making it out as well. It was nearly a two hour drive up from south Orange County to north Los Angeles County, but @Dsposato0 (with his recently submitted ROTJ Scout!) and I carpooled and the location was beautiful and green after recent rains. It was also pretty easily accessible, considering we had armor and... a full size speeder bike to haul up there! Super cool and big ups to @mrpoopie and @JollyRajR for making that happen. Credit and many thanks to KC for these incredible photos and edits. In all of the photos, I'm the TK on the right unless otherwise noted. Enjoy. @Surfintrooper @TK-12248 above, and both he (left) and I (right) below! There were HUNDREDS of beautiful shots that were the result of this super fun day, but I picked just a few of my favorites (especially with TKs) to share! It was well worth the drive for the fun of spending time with these awesome people (and sharing some In-N-Out burgers after) and the incredible photos to show for it!1 point
-
Now, if there’s a consistency among owners of AM armor it’s that they love their armor and consider it the best around. However, AM owners admit that the armor does have a couple quirks and the bottom edge of the Back Plate is one of them. For some armor, the bottom edge of the Back Plate has a nice, flat return edge that mates flat on the top edge of the Kidney Plate. AM armor is different: That bottom edge isn't anywhere near flat, and the outer tips bend down and out like little "wings." The end result is that no matter what you do, those wings will overlap the Kidney, which is a no-no in general, and a roadblock to attaining Centurion. This detail from the back photo from my EIB submission shows the problem: Notice in the above photo that the actual bottom of the Back Plate is right on top of the Kidney where it's supposed to be (red arrow), but those wings overhang at the sides (green arrows). What's worse, with those wings overhanging they tend to pull the Back Plate out and down over the Kidney pretty much every time you move. Here's a look at it from the side with the armor on my worktable. How bad the overlap is varies from Trooper to Trooper, depending on body characteristics. If your upper back/shoulders arch out at an angle, it's a bit easier to get the bottom of the Back Plate to rest atop the Kidney. In the photo below, I'm holding the Back Plate out at an angle, and you can see that it almost works. If your back arches out, great, but even if the Back Plate is resting in the right place along its width at this angle, good luck getting it to stay there -- your strapping is likely pull the Back Plate down over the Kidney every time you bend forward. I had brought up this issue way back during my build and got a number of suggestions, most of which dealt with heating those wings and bending them up to make them level. But I could tell that heating and bending would really warp the side edges of the Back Plate because of the amount of return edge I'd retained there, so I balked on heating. I corresponded with JustJoseph -- who also has AM armor and knows exactly what this issue is like -- and he agreed that just trying to reshape them with heat could badly mis-shape the side edges, and suggested that the only real way around it is to start cutting off return edges to reshape those pesky wings. Again, I put it off because I wanted those edges to stay (my shoulder blades tend to push the Back Plate out, creating gaps at the side that I wanted to minimize with as much return edge as possible). You may feel the same way, but if you want to reach Centurion level those edges have to be dealt with. After giving it a lot of thought, I determined that a combination of return-edge trimming and heat would be the best way to go and that’s the fix that worked for me. I started by outlining the cuts I planned to make, and here you can see my proposed cut on the sides... ... and, rotating the Back Plate, you can see how that proposed cut moves along the outer tips of the bottom. My proposed cut line ends short of the center of the Back Plate, leaving most of the return edge along the bottom/center in place. It took a while to pencil in these cut lines, as I kept redoing them to ensure I started with the minimum amount needed -- I didn't want to cut too much. I wanted to do this in extreme baby steps: Do some cuts, then do some heat and see what I got. Then trim some more and heat some more, and check it out. By the way, remember that last photo above. You'll see it again a bit later. So, first I used Lexan scissors to cut off most of the waste up to my lines. After that, I used a cutter drum on my drill press to shave the Back Plate smoothly down to my lines. Don’t have a drill press? A sanding drum in a Dremel-type rotary tool won’t be as fast, but it'll get the job done. Then, I heated those trimmed wings up using a hair dryer and did some bending, starting with the right side wing. In the photo above, you can see the result after several cycles of trim/heat, trim/heat, trim/heat. I was indeed taking it slow. Satisfied that I had the right side as good as I could get it, I did the same trim/heat, trim/heat, trim/heat routine on the left wing. OK, both sides are looking pretty good, and you can see how the bottom edge is now more or less straight across with no corner wings dipping down. Lastly, I heated both sides a bit more to curve the outer edges inward to more closely match the curve of the top of the Kidney to help the Back Plate rest more firmly in place. This whole process may take several hours, but it’s best to go slowly. You don’t want to trim any more than you have too or, worse, ruin the Back Plate and have to buy another one and start over. Hey, remember earlier when I said you'd see that photo of my proposed cut lines again? Well, here's that same photo, but I've superimposed red lines where I ended up making my actual final trims. Yeah, I ended up taking a lot of plastic off, and as time-consuming as it was it was worth it when I reassembled all the straps and hung the torso on my mannequin to see how it came together. As they say, your mileage may vary -- you may not need to take off as much; you may need to take off more. The amount I cut and reshaped ended up looking like this: That's about as perfect as I think it can be. I still don't like the way the AM armor isn't flat along that bottom edge -- that bottom return edge is angled, not flat. I may address that somewhere down the road and you may want to, as well. But this fix will eliminate the issue with the overhanging Back Plate. A.J.1 point
-
I posted this a little while back on the Florida boards, but they can't take anything seriously over there. LOL!!! Any way, I was never very happy with my MR E-ll, so I decided to so upgrades to it. I still have more plans for it in the future, but first off I added an original Hengstler counter........ Here's everything stripped down.... ...this is the mounting bracket attached to the Hengstler casing.... ...the bracket and casing painted and mounted on to the sight rail.... ...it took a few adjustments to the bracket, but I was finally able to get the rail back on the blaster.... .....and here's the end result, once everything got painted. Now if I can just get my hands on an original M-38 scope, I'll be really happy. 8)1 point


