Leaderboard
Popular Content
Showing content with the highest reputation on 05/04/2023 in all areas
-
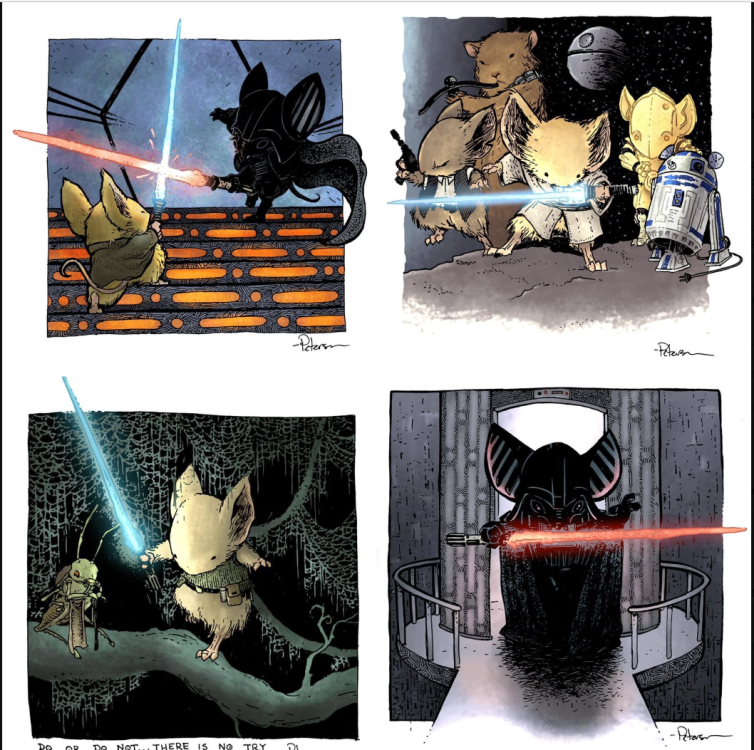
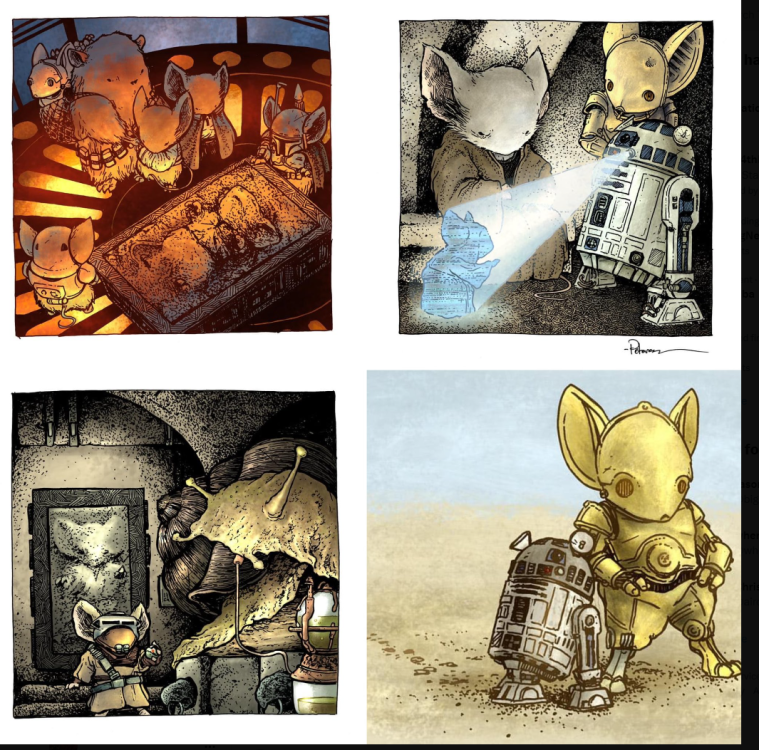
I hope everyone is able to find time and a way to celebrate today, Star Wars day, May the 4th. I'm a big fan of David Petersen's Mouse Guard series, and today he posted on Twitter some really cool artwork that is SW related, using mice of course! If you haven't read his books, I highly encourage you to check them out. If you have read his books, these are a joyful way to enjoy two fandoms together. Cheers, Paul3 points
-
Thanks!!! I've got 3 tomorrow as well. Wish there was a free comic book day one here... I'm hoping to get to 100 by the end of 2023. That's my goal anyway. I'm aiming for it. 5/2/23 Bernalillo County Fire Department May the 4th promo 61st TK troop, 16th for 2023. This one was a mid week troop at a fire station in the mountains. They wanted clean, white TKs and nothing else. Five of us answered the call. Randy wasn't in the group selfie above because he was a little tied up. We were there to help Fire & Rescue film a promo video for May 4th. We were "new recruits." Tye and I got to practice our aim with the big hose. We did well. The cones were completely safe. Don't want to risk any cones after all. They're expensive. Brandon and Wayne tried on this strange off-world gear. And their weapons. Not sure what to do with these weapons... Ah, yes. That's more familiar. Fire Team Rio Bravo signing off. (I'll be pasting this to our Fire Team log too!)2 points
-
Continuing on with the torso, adding the boxes Drilled the holes and placed the screws in. Used the nylon screws and nuts, will cut down. Time to fill the seam. Using the flexible filler in hopes that I don't get any future cracking.2 points
-
Besides Star Wars my other hobbies include photography. This year I decided to combine the two. Giving me an accuse to take costumes out of storage and share some observations in character. All from a satirical pro-Imperial point of view. I was planning on sharing the first video later this year but felt with it being May the 4th I should release it today. Give it watch if you can. https://www.youtube.com/watch?v=Q8iRhyUnPTw1 point
-
Been a while since my last post, hopefully my helmet ships soon so I can finish this build up. For now I got the D ring installed and painted for my blaster. I also touched up the black paint for t tracks and the grip. Sent from my iPhone using Tapatalk1 point
-
I would suggest as he is kneeling the ab/back was pushed upwards, it's also on the back not the front like yours, standing you shouldn't see any white.1 point
-
That would be your shin not your thigh Appears you can go smaller, standard sizing of coverstrips below, although they can be larger if need, if you only need a little more room you are better adding bigger coverstrips to the backs as that is not as noticeable as you are mainly seen from the front. Arms front and back 15mm Thighs front and back 20mm Shins front 20mm, rear 25mm Once trimmed you could use a block of wood with sandpaper wrapped around to help get a nice straight edge.1 point
-
That's awesome! I was able to watch ANH in the theater a few years ago and you are right that it's a completely different experience than watching at home. You are so in to enjoying the movie you don't notice any small flubs, etc. Glad you had a great time.1 point
-
So! It's out of the box!! I started trimming on one of the thigh pieces. Tapped together. Pretty sure it still needs to be trimmed more yet. But I just ran outta time last night. Seeing as had to also get ready for May the 4th event. and This weekends comicon! BUT Its started. And thats the most important bit of this! I CUT SOME STUFF!1 point
-
1 point
-
Hi Nairy, Happy May The 4th. To be honest, the incredibly nice people aka lovely specialist prop makers at RS Propmasters built my armor. Because of my work, time, child, etc. … and also this is my first armor I wanted to be on the safe side. I took care of the details in the helmet, changed the lenses (by OPLE Props), and installed the Stormtrooper audio system by Anthony Jobe (UKswrath). Right now I am adjusting the padding so that the armor will fit perfectly. So almost done and this Saturday my daughter will help me with the pictures. Currently, I am working on my armor bin and a DLT-19. I'll show you my progress in the build thread.1 point
-
My belt snaps must be too high then. I got velcro and snaps on the back of the front to hold it. The chest should be easy, just make longer straps on the inside. Ammo belt, also easy thanks1 point
-
1 point
-
Yes that's what I use, I find the nylon forms to the curves of the armor well unlike plastic plates, E6000 does take a while to dry but if you ever have to replace them it's easy to remove. If you have a soldering iron you can make holes with it so they don't fray. Also when you cut the nylon pieces run a lighter across the ends so they don't fray1 point
-
Yes be very careful not to use too much, can melt as you found out. I've seen some use this glue on snap plates only to find the heat transferred to the snaps and deformed the plastic they were glued to.1 point
-
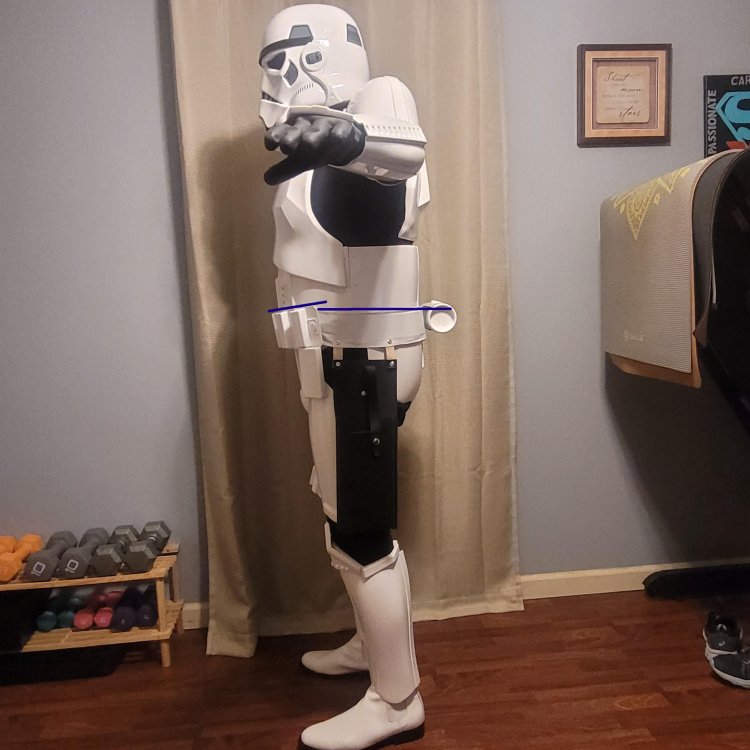
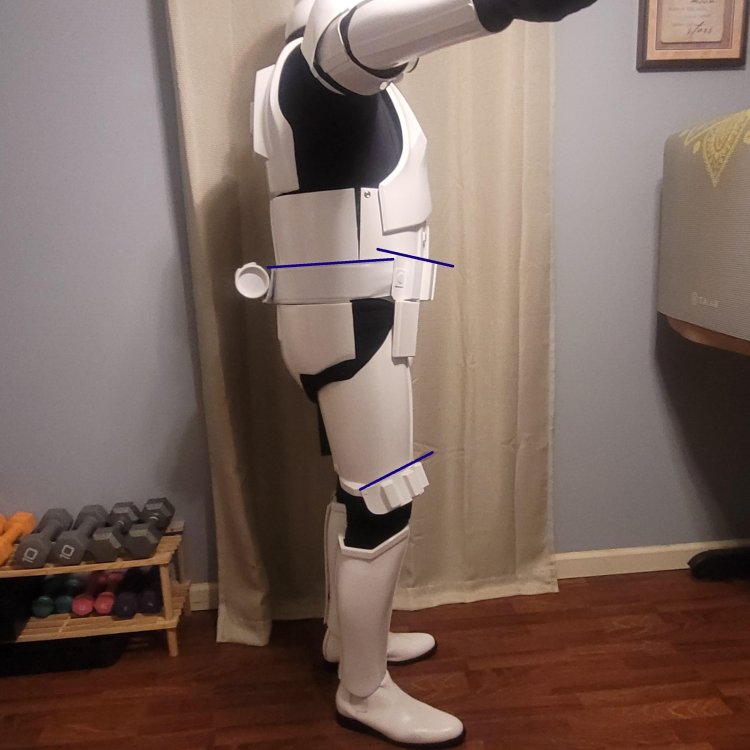
Looking better, you still have the issue with the belt on the sides, fabric should follow the angle of the plastic belt. Also noticed your thigh ammo strip is angled quite high. I still think your chest could come up a little, this would reduce the gap between the chest and backplate, giving you more overhang of the shoulder straps.1 point
-
After having a chance to look at it more, it seems more like it has scratches than yellowing. I'm gonna work with another friend in my garrison to see what can be done about it and also receive help assembling it.1 point
-
I had these same questions. I thought about hiding mine behind the drop boxes. Didn't because of access to the clips. I went with straight down the side...being an 850 AW kit I attached the top to the abdominal. Easy peasy! Remember to have fun! Check out all the build threads....1 point
-
YES!!!!!!!!!! That double strap thing is something I (am pretty certain I) read and then couldn't remember the exact details. Thank you Glen!! Front offset + side would be great for action, sitting, and not rotating. Excellent. That's what I'll replicate. Cover strips glued on the outside edge - check. I also especially like the relief cuts. Much better than the regular Jimmi thigh cuts. My whole beef with updating the CRL to have the back coverstrips offset is exactly as you mention - how they look offset depending on the wearer. Since many stunt actors wear these costumes, the thighs are different depending on who's inside. I'm sure there's someone who would fit the costume perfectly and have a nicely centered cover strip. Maybe the whole stunt cast that season did their squats and have tree trunks, thus the wide fitment. But that's my beef. Since we make our armor sets specifically for our bodies, and no one else is likely to be in our armor, there should be no requirement to have the rear thigh cover strips offset. Passable? Sure. Just not a requirement to have them offset. Centered is the ideal fit for the ideal trooper, which is everyone here. Stunt actors don't have that luxury. Anyways, didn't mean to soapbox. I understand why they're often offset on screen. I just really hope we don't have to emulate that here. and again, thanks for those photo references!!1 point
-
1 point
-
It was so good! Can't wait to use it again. Almost caught up with my log. 4/29/23 - Special Olympics Unified Events TK Troop 60, 15th for 2023. This was a troop to support Special Olympics at a nearby school. Schools all around the state had these preliminary events with the main competition happening in a few weeks. This troop was hosted by our Galactic Academy. LOOK AT THE DRESSING ROOM!!! So much nicer than our 501st hosted events! I'm gonna demand GA host everything from now on. Gotta help those jawas look their best you know! And keep their hands off our thermal detonators. My daughter practicing her force powers. This is not the selfie you're looking for. All the teams came out this big jaguar arch with the 501st (and GA and RL) leading the way! In between cheering on teams and athletes, we got to clown a bit. Little Leia has some football skills! Lucas and I had a friendly TK race. The crowd cheered us on! And that's all the pix I got. We trooped for several hours, cheered, high-fived, and hugged hundreds of kids, and then presented award ribbons at the end. It was a great day and my first Special Olympic event. Can't wait for the next!1 point
-
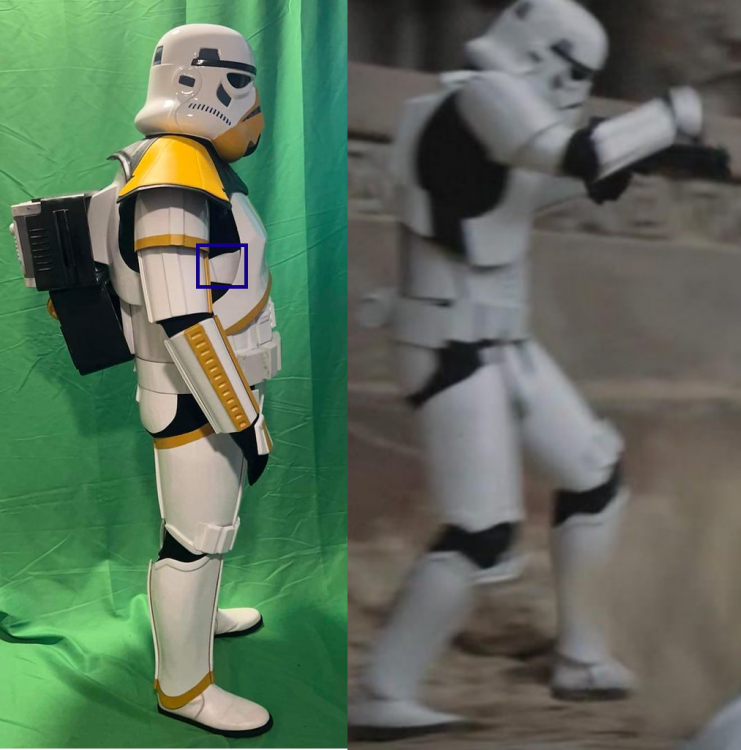
Heck yea. You look phenomenal, my dude. Very exciting to see someone finish this costume to a high level and grace our boards with it so that others can follow in your footsteps and look similarly awesome. While I'm still not a fan of 850's sculpt and ABS in general for these, this is genuinely the best I've seen their armor look yet and is a fantastic build. I agree about the underarm area (difficult just due to the shape of the 850 chest plate/connectors), and would check the trim of the lower section of your posterior against reference photos as well. Only other thing I can see is that the backpack appears to be riding very low and should sit up above the back box. Couple of little adjustments and you'll make for a heckuva CRL model. Great work.1 point
-
It can be difficult (and often impossible) but the correct way to do a green screen photo is with several lights lighting the screen itself, then a decent chunk of distance, then some lights on you. You should be rather far away from the back wall. 10 feet at least, but more if you can manage. The more distance, the less green shows up on your armor. If you're right next to the screen, your armor turns green as well. Additionally, it looks like the white balance is different in most of these. Force your phone or camera to a specific white balance for all of the shots in the same session. It depends on the temperature of your lighting equipment. Choose one that makes your armor look whitest and stick with it. Not too yellow or too blue. Most phones and all cameras will allow you to do this in a manual or "pro" mode. Also, +1 on Glen's input.1 point
-
Your images don't appear to be of a high resolution, these are 1334 x 625 pixels. Watch the lighting, you can see the light is on your right side back so the front is darker, normally I have a few lights from the front which helps. It's entirely up to our DL the quality of photos used in the CRL's, he may offer some tips/requirements Also you may want to try to bring your chest upwards it looks a little low compared to the back plate. There is also a large section of white (ab plate) showing on the sides, reference below1 point
-
1 point


