Leaderboard
Popular Content
Showing content with the highest reputation on 04/25/2023 in all areas
-
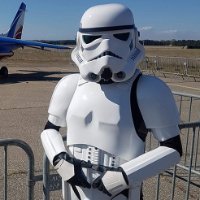
4/22/23 -Family Fun Day TK Troop #58, 13th for 2023. Lucky troop 13 for the year was a family event put on by a local biker gang to get some toys, bikes (the pedal kind) and fun into the lives of some local kids who might not have it otherwise. I decided since the weather was nice, I'd wear my HWT pack and bring my DLT... and carry them for 2 hours... It was honestly a great time, even though my shoulders were a begging for death at the end of the day. The pack looks SOOOO COOL! But 2 hours is a lot. One of the officers here was interested in my DLT. He asked what it was and I answered something about "standard Imperial issue DLT-19" which produced A FACE on the officer . When I went on about it being based on an MG-34 and started showing the differences, he made the other face and was super stoked to talk about it. Just a couple GMLs inspecting a local transport. Nothing to see here. There was a good sized tent FILLED with beautiful parrots and exotic birds. Mesh sides so you could see them and they wouldn't get too hot. Kids could go in and pet/feed the birds. I asked and was instantly denied, even though I promised to leave the BFG outside. I had to be content with just a routine interrogation. And then there was ducky fishing. But it was okay since me and The Colonel (also named Adam) were the highest ranking troops in attendance. Two Adams fishing. There's a joke somewhere in here. And instead of Disney Princesses, they had actual pageant winners at this troop. Miss Senora New Mexico looked like she needed a DLT in her life and got a kick out of posing with it. She was SUPER kind and didn't mind selfie-ing with me. She tracked down the rest of the Beauty Queens and then all posed with our group. A+ troop! Would troop again, but maybe I'd leave the pack at home. I clearly need to work out more...5 points
-
Turned out great. Just need to finish taking pictures for pre-approval. I left room for my TK number to go above the cog in a similar manner. I'll paint the handle and latches after work today if the rain holds off. Mod Podge FTW!4 points
-
I have quite a few updates to include at some point, but I have been focusing primarily on actually finishing my suit and less on documenting, especially as I can add to this thread with additional photos of mentees I'll be helping build once I've kind of got this all figured out (hopefully). But let's go on a tangent real quick to hopefully help clear some things up - as much as Denuo Novo got right on this suit, and the fact that is a massive improvement in quality and design over the original "Alpha" TFA suits that were briefly somewhat available(?) from Anovos... they still messed some stuff up pretty bad. On a few of these, I remember early on thinking that I was going crazy, but they turned out to be just known errors in manufacturing. Consider this all constructive feedback but unlikely to change, as it's not uncommon for even licensed makers to make concessions in order to make manufacturing easier or less expensive, or to appeal to a broader customer base. In addition, sometimes things are just lost (sometimes literally) in translation between the design (usually stateside) and manufacturing (usually in China), and other things are simply just missed entirely. Let's take a look at what DIDN'T go right on these suits (or at least the one delivered to me) and how we can potentially fix or improve them. I'll flesh this out more and add pictures or any others that I'm forgetting, but let's start with: - The forearms are shaped incorrectly at the wrist and should be larger and more square - The forearms are molded incorrectly at the elbow and are indicated in the instructions to be cut in a shape that is not accurate (not TFA/TLJ/or "Finn Mod", really) - The tall belt pouch is too short to accommodate the ABS panel - All gaskets are sewn inside out, without velcro attached to a potentially L1/2 usable shiny side - Forearm rails provided are TFA style, without a provision for a hex-headed bolt for TLJ - The ABS Standard line TLJ helmet features TFA-style clips (fiberglass Premier seems to be correct) - Several of the included templates in the instructions (like for the "kit-kats" and thigh holster) are just not remotely accurate for drilling holes - The included screws for the belt boxes and holster are too long and will protrude through and damage the part if installed all the way tight. Both should be replaced with shorter ones or a different solution. Though these are almost certainly intentional manufacturing concessions, let's acknowledge that: - All of the resin pieces are beautifully cast, but very HEAVY - I will be replacing several of them - The single-piece resin thermal detonator is more suited to TFA-style, than the 2 piece tube/carriage style for TLJ - Many of the clips need the bottom of the casting reshaped to lay correctly where they go - The included resin holster is not functional - There are visible seams at the sides of the barrel at at the top of the chest/yoke at the shoulder necessary to allow for vacuum forming I'll propose solutions for each at some point in each section of my build, then link them back here in the future, but hopefully at least making people aware will help!3 points
-
We're not making Disney park suits, which have several other concessions to accuracy. For reasons of comfort, service life and presumably ease of manufacture they are quite different. We are making film accurate suits. This is not hyper focus, this is the 501st doing what the 501st has always done. Make the most accurate costumes we can at any given moment. That last bit is important, and the reason why initially it was allowed to wear ANH style boots, because there was no other option. Now there is an option, and the CRL no longer allows for the older style boot. As resources improve, technology improves we get better at making them more accurate and the standards rise along with that. The CRL says no visible seems. The old Anovos kits had a seem that need filling, these kits need a seem that need filling and iirc so did all the other ABS based kits. 378* "pre-production" "Anovos" kits where made and presumably a reasonably number of them where completed, and so had filled seams. Then add the kits for other vendors. Is the seam a huge ugly thing that stands out a mile? No. Will some GMLs approve it anyway, it wouldn't surprise me. But filling 4 seams is not the huge headache people are making out. Unless you don't wear proper PPE and work in a ventilated area. We have it good here: 4 seams to fill and some glue, there is even actual instructions for all of that bar the filling. And a decal sheet! Now consider other hard armour: a Shore trooper, clone, death trooper, scout. All of those are so much more work, and have all their own set of issues with stuff breaking. Fill the seams, this is the way. *according to who made them, but with out double checking their notes.3 points
-
THANKS! And yes, E6000 as it is far more forgiving and I am sure I will make plenty of mistakes that need reverting. Hopefully, I will start to pick up the pace as confidence grows but am happy to finally have real progress after the initial build hiatus.2 points
-
2 points
-
(Please bear with me as I update and reorganize - it is a TON of additional work to document... a ton of work! I decided to commit to a more thorough build guide if it helps people, but wanted to get some work done and a framework set up before inviting comments. I will be continually editing the original posts as well as adding, then linking in the OP, more information as I go. Thank you!) Sections, Navigation & Check List: Helmet Options Discussion a. Anovos TLJ - Fiberglass (Out of Production) b. Anovos TFA - Plastic/Fiberglass (Out of Production) c. KB Props TFA or TLJ - Slush cast resin - KB Props TLJ Helmet Project d. Hasbro Black Series TLJ - Plastic (Modification required) e. Denuo Novo TFA/TLJ - Fiberglass (Potentially Available Q1 2023) f. 3D Printed 1. Chest and Back Yoke a. Chest and Back Trimming - 01A Inner Chest - 01B Outer Chest - 01C - Back b. Chest and Back Assembly c. Shoulder Bell Support Bracket/Tab d. Seams? 2. Shoulders a. Shoulder Bell Trimming - 02A/B Shoulder Bell Trimming - 02C/D Support Lip Trimming b. Shoulder Support Lip Assembly c. Shoulder Bell Strapping 3/4. Biceps a. Bicep Trimming - 03/04A Outer Bicep Trimming - 03/04B Inside Bicep Trimming b. Bicep Assembly c. Bicep Strapping 5/6. Forearms a. Forearm Trimming - 05/06A Forearm Top Trimming - 05/06B Forearm Bottom Trimming - 05/06C Forearms Box Trimming b. Forearm Assembly 7/8. Hand Plates a. 07/08 Hand Plate Trimming b. Hand Plate Accuracy Update c. Hand Plate Attachment 9. Torso 1. Torso Trimming - 09A Torso Front Trimming - 09B Torso Back Trimming b. Torso Assembly c. Torso Rear Closure d. Torso Strapping (Suspenders) e. Ab Box Paint f. Ab Box Assembly g. Roman Skirt Strapping 10. Spine Plate & Thermal Detonator a. 10 Spine Plate Trimming b. Thermal Detonator Accuracy Update c. Thermal Detonator Paint d. Thermal Detonator Decals e. Spine Plate/TD Assembly 11. Belt 12. Cod a. 12 Cod Trimming b. Cod Strapping/Mounting 13. Posterior/Culet a. 13 Posterior Plate Trimming b. Posterior Plate Strapping/Mounting 14/15. Thighs a. Thigh Trimming - 14A/B Thigh Front Trimming - 15A/B Thigh Back Trimming b. Thigh Holster Mounting c. Thigh Holster Accuracy Update d. Thigh Strapping 16. Knees a. 16A/B Knee Trimming b. Knee Mounting 17/18. Shin/Calves a. Shin/Calf Trimming - 17A/B Shin Trimming - 18A/B Calf Trimming b. 25 & 26. "Kit-Kat" and Shin/Calf Assembly 19. Spats a. 19A/B & 20A/B Spat Trimming b. Spat Accuracy Update Soft Goods Discussion 20. Belt 21. Gloves 22. Boots 23. Neckseal, Undersuit/Gaskets & Shiny Shorts 24. Accessories1 point
-
Hello there. My name is Zachary Dignan and I am working an ANH Stunt Stormtrooper. I have been in the Rebel Legion for 3-4 years and am now working my way over to a dark side build.1 point
-
Hi Marek, and thank you for your submission for ANH Stunt Centurion! CRL and CENTURION Application Requirements: All required photos have been submitted, and on behalf of the entire D.O. staff we are pleased to welcome you to the rank of CENTURION. Congratulations! Other-Armor Fit/Assembly; In this area we review observations made by your fellow troopers and the DO team. Some observations may lead to suggestions to improve the overall look of your armor, and please keep in mind that we consider both text (CRL) and pictures (screen caps/reference images) when reviewing submissions. -We would just like to add, as a suggestion, that you can use a small file to remove those little "bits" of abs in the area of the teeth. Reference image -Also, keep an eye on the shoulder bridges. They can break easily. Reference images Nothing more to add Marek. Great job! Thank you very much for taking the time to "upgrade" your armor to Centurion level... Now you can "encourage your Garrison friends" who haven't achieved it yet!!!! Congratulations #524!!!1 point
-
I use soft yellow foam from haberdashery store, I glued velcro to both the sponge and armor so I can remove for washing for those really sweaty troopers, you'd be amazed how much sweat can gather in the armor1 point
-
I got my foam from Joanne's fabric. Some 1/2" & 1". Some spots needed a thin strip. Some needed a little thicker. I use double sided tape to make changing out easier. Good Luck Future Trooper1 point
-
Picture from [21] - 18/05/2019 - "Caserne des Sapeurs Pompiers de Vitrolles" at Vitrolles1 point
-
Picture from [18] - 30/03/2019 - "L'Envol des Princes" at Salon-de-Provence1 point
-
I left mine for 72 hours just because of that. Sent from my iPhone using Tapatalk1 point
-
Thanks! Those pictures helped and I believe I was able to get the correct alignment and made me remember I had strong clamps.1 point
-
Totally understand the difficulty, and it was the reason why they covered C3PO in wax when they were shooting ANH. High reflective surfaces look awesome in the flesh but are the nightmare to photograph. We can clean them up to a degree in post so you are not seen in the image, I am also happy to have a comment line in the CRL that clearly states due to the nature of the High reflective surface some post image work was required to remove the reflection of the photographer. I think that will allow everyone to understand the issues, just like any of those with a metalised 3PO costume do. No one will be concerned with approval photos as it is the nature of the beast, but we don't particularly want people laughing at the CRL images because you are in every one lol. Transparency is the key with things like this under consideration.1 point
-
Honestly it’s a work of persistent adjusting until everything is set. What I did was clamp things in place and mark where the front of the shin was against the back of the knee plate. Then I added glue and clamp/magnets there and clamped with strong clamps the sides down with glue as well. Being sure that the edge line matched up with the shin’s edge line too. Sent from my iPad using Tapatalk1 point
-
Slow but sure progress on a busy weekend. We sized up the calves and I have the back cover strips going with some e6000. That said, I was curious if anyone has tips for adhering the sniper knee. I attempted to do so but it quickly turned into a mess as when I would clamp the sides it would case the other points to come out of line. Is it easier to cure the front and then the sides or is there a tool or clamping spot that I am missing?1 point
-
Almost there kyle, and looking good. maybe adjust the back to kidney strap the lock the side down where you have a gap appearing, also when taking photos for a final submission specially no doubt your pending EI and Centurion apps, just make sure your thermal det is sitting level, aside from that you are looking really good.1 point
-
Here’s a quick suit up I did today (still no helmet yet) forgot to do one without the blaster for better visibility… Top left shin hook came undone here Everything feels pretty comfortable as I’d want to in trooping. Knee sniper plate could use some foam to not press hard into my knee and push it forward a bit. Also looks like maybe using a little heat to bend the bottom of the tushy protector in and under my rump, might be good. Any thoughts on how to minimize the space between chest and shoulder bells up front more? I have a pretty bulky chest and back from lifting and all, so the challenge I’m seeing is it hits the side of my chest and has a hard time getting closer to the chest armor. I’ve doubled up the elastic connecting to the shoulder bridge elastic. Maybe heat to open the bell up more and then tighter elastic to the bicep?1 point
-
Nice work trooper, a few photos I know the DO's like to see: Sniper plate front, side and side Thigh ammo strip rivets inside and out Also side Ab/Kidney rivets Good luck with approval Awesome background by the way1 point
-
1 point
-
I'm a bit concerned that a few vocal individuals still seem to be really missing the point of this thread and the core argument being made. WE ARE ALL AWARE AND AGREE THAT THE MOVIE SUITS DO NOT HAVE SEAMS. No question there. No reference needed. The matter in question and the point that is trying to be made is: Disney and LFL approved the Parks suits, the LICENSED Denuo Novo suits, and the Resistance version to represent their character, the First Order Stormtrooper, WITH SEAMS PRESENT in the aforementioned areas for practical reasons. If Disney and LFL are okay with it, why aren't we at Basic? Is the hyperfocus on this detail at the Basic level worth the exclusion of new members and perceived elitism? This proposal is an acknowledged concession in accuracy in order to remove a potential blocker to membership and to help extend the service life of the ABS armor for more troops, and overall imo, isn't something that makes a significant difference to the appearance or impact of the suit. It is not a question of what is accurate or not, of new CRL creation, or even if the seams SHOULD be filled or not, it's about whether this requirement belongs at the Basic level. I'd like to see it go to a vote of the general Detachment. I acknowledge and agree with this as well, but I see this proposal as a possible effort to increase those numbers and show support for builders of FOTKs now that we DO have a consistent, quality, licensed supplier of what SHOULD be one of our CORE costumes. These kits have been out for over a year now, and ONE SINGLE PERSON has submitted for EIB on these forums, which is telling. Some people just want to troop and don't care about the seams. And the Star Wars-loving public doesn't either. Instead of turning people away from Basic membership, let's welcome them to these forums and encourage them to learn more about how to improve their accuracy while we make our push for 1500 EIBs. I can't see how we're going to hit that number any time in the next several years with the ever-increasing difficulty of DO review and revision of existing CRLs. Per the current administration, they "have never dumbed down a CRL to suit one manufacturer"... but I think this is a prime example where there is precedent, a clear argument, and some level of demand to make a logical exception to a standard of questionable value. I appreciate the debate and everyone's input. I feel like the case has been made, and this can always be revisited under future leadership.1 point
-
Troop 1, also listed in Fire Team Sousa Troop Log (2023/APR) Event: Books for Love 2023 (Week 1) Location: Taikoo Place (QuarryBay, Hong Kong Island) Date: 23 / APR / 2023 First time as a bad guy doing good. Felt great.1 point
-
You need to add a link to your membership profile https://www.501st.com/members/displaymemberdetails.php?userID=99491 point
-
Unfortunately that is not the correct link, try this one https://www.501st.com/members/displaymember.php?userID=36300&costumeID=1241 point
-
Well, my shins officially have cover strips on them. I plan on moving forward with sizing this weekend (assuming I don't need to make an adjustment on my cover strip positioning).1 point
-
#20 Event: Star Wars In Concert (The Empire Strikes Back) Date: 2023-04-14 Place: Scandinavium, Göteborg1 point
-
I have also updated my Soft Goods Discussion post with more info and a brief comparison of the Endor Finders and TrooperBay gloves currently available for FOTKs, and my above post with my completed TLJ thermal detonator. I also finished the included solid resin Denuo Novo TD as a TFA variant using their included stickers and will figure out the best place to post that at some point, maybe even a comparison thread once completed so people can visualize the differences between the two suits. Idk. We'll see. Crossing a few items off this week and trying to forge ahead. Rainy weather and work have slowed me down lately, but I want to get this finished out soon, and still to a high standard!1 point
-
Thermal Detonator Accuracy Update I received my new thermal detonator from my printer utilizing Jesse M's files, and am stoked on it. It is significantly lighter than the included solid resin TD, and more accurate for TLJ. The carriage has been printed in one piece on a large format resin machine by @fabricatorandfiends and the tube was done in PLA filament with a relatively low infill by @supershipley . How does it compare to the dimensions of the included TD? With a spraypaint cap added for mockup... close. Very very close. Prep work began on the printed TD carriage, as even with resin there were several visible print lines and dimples from supports that just wouldn't do. Most areas weren't too bad, but some needed significant work with primer, glazing putty, and lots of sanding to get nice and level. Back in primer... And in final Behr Gloss White: The tube was part of a small run by @supershipley: And after some primer filler and wet sanding to rid it of visible print lines: And finally, in Rustoleum matte black primer: And finally, the whole 3D-printed TLJ thermal detonator, fully assembled with a bit of VHB to hold the tube in.1 point
-
1 point
-
And so it begins, as so many journeys do, with a Big Brown Box on the porch, out of nowhere... So let's get into this! What's supposed to be in the box? More later, but I started very rough trimming off the obviously unused excess plastic before I threw it back in the box. Thus far, I am VERY impressed with the quality of the pulls. My hand hurts from the shears though, so I'll get back on it later this week! Soft goods not really pictured since I'll likely only be using the belt. I also placed my order with Imperial Surplus today, so I should have a complete set of spare forearms, a TFA cod, and a separate thigh holster riser, among a few other goodies, on their way in a few weeks. I also added some prices and links to my first post so people know what I'm using, if curious. I'm getting excited for this build!1 point
-
1 point
-
Spats a. 19A/B & 20A/B Spat Trimming b. Spat Accuracy Update Dino of Sanotized Creations makes an awesome pair of flexible spats and was kind enough to meet up with me at Celebration to deliver! They're made of a flexible resin and are of very high quality.1 point
-
Shin/Calves a. 17A/B Shin Trimming b. 18A/B Calf Trimming1 point
-
Knees a. 16A/B Knee Trimming b. Knee Mounting1 point
-
Thighs a. 14A/B Thigh Front Trimming b. 15A/B Thigh Back Trimming a. Holster Accuracy Update1 point
-
Posterior/Culet a. 13 Culet Plate Trimming b. Culet Plate Mounting1 point
-
Cod a. 12 Cod Trimming b. Cod Strapping c. TFA Cod Update1 point
-
Spine Plate & Thermal Detonator a. 10 Spine Plate Trimming b. Thermal Detonator Accuracy Update The included resin TD is HEAVY. I might try to have a friend drill it out their drill press or mill if I can, but it's silly as is. Also, interestingly enough, though the rest of the suit is solidly intended as a "The Last Jedi/Rise of Skywalker" kit, but the solid TD is more appropriate for the TFA version. As such, I'll likely use the milled out DN TD for TFA, then print a more accurate TLJ TD with the separate interior cannister using Jesse M's files. c. Thermal Detonator Paint d. Thermal Detonator Decals e. Spine Plate/TD Assembly1 point
-
Torso a. 09A Torso Front Trimming b. 09B Torso Back Trimming c. Torso Assembly d. Ab Box Paint e. Ab Box Assembly1 point
-
Hand Plates a. 07/08 Hand Plate Trimming b. Hand Plate Accuracy Update1 point
-
Forearms a. 05/06A Forearm Top Trimming Okay, one of the most important things on this kit... DO NOT TRIM YOUR FOREARMS AS SHOWN ABOVE. I've been led to believe that this particular forearm shape has not actually been seen anywhere in canon, even the "Finn Mod". I highly recommend cutting as below, or being prepared to rebuild the forearm shape with scrap and slurry. b. 05/06B Forearm Bottom Trimming c. 05/06C Forearms Box Trimming d. Forearm Assembly I E6000'ed the side of the forearm with the indents for the clips on each, then used clamps and neodymium magnets (alternating the polarities as I carefully place them) to keep the gaps tight while they dry. As always, I lightly scuff any surface that I'm gluing first, for maximum mechanical and chemical bond. Finally, I used some ultra-thin Velcro to secure the open side, so I can open them up slightly and still fit my hand through. e. Forearm Box Assembly f. Forearm Rail Accuracy Update Instead of using the included rails, which are more appropriate for use with a TFA-style suit, I will be using a set of the rails that I worked with mrpoopie to model and make available to the club, which feature a provision for the proper M5 domed hex-head bolt. These were printed in resin, then primed and sprayed with the Behr Premium Gloss White. Let's put some stickers on next! Lots of stickers on the forearms... I tried to frame it to show where the sticker came from and where it goes as best I can. I used an razor blade to pick up the stickers without touching the bottoms, then a mist of soapy water to "float" them into place, then squeegee out the moisture with a Q-tip. Each sticker reeeally only fits in one place, so you get the idea. Finally, I added two small clips to each forearm, with the heads facing TOWARDS the wrist box. And we'll call that done! Official pics will come with my eventual submission, but these should give you an idea of the completed forearms. Another unusual characteristic of this kit is the forearm shape, which is not particularly similar to how they probably should be shaped... but short of completely rebuilding and reshaping them, I've pretty much confirmed that this is how they are supposed to look as designed.1 point
-
Biceps 03A/B & 04A/B a. 03/04A Outer Bicep Trimming b. 03/04B Inside Bicep Trimming c. Bicep Assembly Screen Reference1 point
-
02A/B/C/D - Shoulders 02A/B Shoulder Trimming Though I believe the first wave of kits included shoulder bells that were still joined, mine had been separated and were pretty well pre-trimmed. There was additional material beyond the cut line at the top and in the curves that I removed, but very little. 02C/D Support Lip Trimming The shoulder lips had very clear cut lines and I removed all return edge, and rounded the edges with a emory board like most of the pieces of the kit.1 point
-
01 Inner Chest Inner Chest Trimming 02 Outer Chest Outer Chest Trimming 01C Back Yoke Trimming Outer Chest Assembly Outer Chest Greeblies + Decals1 point
-
Helmet Options Discussion a. Anovos TLJ - Plastic or Fiberglass (Out of Production) This is the primary helmet that I will be using with this kit and am very lucky to have picked it up a New In Box plastic version off eBay recently, as they are getting rather difficult to find (and therefore, expensive!). If you see one, snap it up. I believe these were among the last items actually delivered by Anovos in limited numbers, and that they were briefly available for purchase the Disney Parks as well. I have a plastic version of both Anovos helmets and prefer them over the fiberglass version - I actually had one for a while that I got again on eBay for a great deal, but sold to a garrison mate, as it was too heavy for my liking, and the paint job was "good" at best, with a few spiderwebs and minor imperfections. The TLJ should be ready to wear right out of the box and features the correct "teeth" and more peaked nose that are the hallmarks of the TLJ update. They also utilize the correct TLJ-style helmet clips without the trapezoidal indent in the head and are very high quality, so I don't feel the need to replace them. I may try to heat and reshape the chin later, or look into replacing with a metal aerator at a late time. I also may mask it and try to paint the inside black, but the shape with the lip at the neck seal is daunting. At 767.1g = 0.8kg = 1.7lbs, it is the lightest of the several I have tried, and I think the best available that you can find... if you can find one. b. Anovos TFA - Plastic/Fiberglass (Out of Production) By contrast, the Anovos TFA in both plastic and fiberglass are readily available on eBay and can usually be had for $250-300USD, but often much cheaper if you keep an eye out. As mentioned in my previous thread, this one I picked up from @Oztrooper by happenstance, and features a reshaped chin, metal aerator from VaderPainter, and a "hero" style neck seal trim. These are also great helmets, and able to be had at a reasonable price point and possibly converted to TLJ....... but won't pair with this TLJ suit without swapping out some other parts, which I address here(LINK). c. KB Props TFA or TLJ - Slush cast resin I picked up this resin slush cast TLJ helmet from Kevin during a sale when he was going through recent hard times. I like supporting other makers and hadn't found the Anovos at the time, so at 1197.5g = 1.2kg = 2.6lbs, this was my next best bet and plan B, though I think @Gh0stxxiv is going to take this one off my hands for his build, so it stays close. As delivered, the helmet did have a fair amount of bubbles, pinholes, low spots, and other imperfections, but nothing unexpected and on par or better than my Jimmiroquai fiberglass ROTK helmet. It had a pretty big seam on the back of the helmet, probably from where he pulls them out of the jacket, but it was sanded down and addressed with some 2-part reinforced filler (too thick for glazing putty!) and is all but gone. I also got bored and recut all of the lines on the helmet with a file to even and straight them out a bit and to make up for detail lost in priming. A final coat of primer and wet sand are next, then final paint with the color matched white and black details. I also suggested Michael order a new lens from Ople Props, as the included flat piece of smoked acrylic was pretty thick and would likely need to be heat shaped. I'll update in a post below as we work on finishing the helmet out. d. Hasbro Black Series TLJ - Plastic (Modification required) These are also a decent option, but only if you picked one up at or near the original MSRP of <$100USD. These are getting pricey as well and DO require some significant modification to make approvable. At a minimum, you'd want to repaint it to match the kit, as the white is very bright with blue notes that are noticeably different than the DN white. There are also visible speaker vents from the voice changer at the rear of the helmet, and an accent line missing just above them. These mods have been covered excellently over here, and might be a challenge, but still a decent option. This is also the heaviest of the helmets I had on hand at 1428g = 1.4kg = 3.2lbs (stock), but could likely be lightened up by removing much of the interior and voice changer electronics, then gluing it back together. e. Denuo Novo TFA/TLJ - Fiberglass or Plastic Denuo Novo has confirmed as recently as 10 October, 2022 at New York Comic Con that they intend to release First Order Stormtrooper helmets in fiberglass TFA, TLJ, and TLJ-E varieties in Q1 of 2023, but that's still a decent ways out and up to you if you choose to pre-order. A TFA version will also be available, but not relevant to this kit as it arrives. f. 3D Printed There are a few good files out there if you look, and with large format resin printers being able to do helmets on a single bed these days, it might not be the worst idea to print and finish a helmet, but I'm personally wary of print lines and the amount of time and effort it often takes to be sufficiently rid of them. I can't imagine being an easier or likely even cheaper process when you factor in time than ordering one from KB, but it's an option.1 point
-
Soft Goods & Accessories Discussion Placing this section a bit out of order near the top, because I'm sure many people are will be wondering... what else do I need order to finish out the suit? Well, let's get into it. 21. Gloves As far as I am aware, there are currently two options for gloves - either Endor Finders on the left, or TrooperBay on the right. Both have their benefits, which I'll get into, but overall, I think I prefer the Endor Finders. Endor Finders In general, I feel the Endor Finders are ever so slightly higher quality, though the soft inner lining will likely get removed, as I did with my all black Rogue One TK gloves from them. I'd rather have cooler hands in the California heat. Both sets of gloves had visible purple staining on the white leather as delivered, from the black thread in the palms and likely just transfer from the material, and the EF gloves also had a clear imprint where the outline of the thumb left a slight impression on the leather of the palm as well. If I purchased these again, I would go for the option to have white palm thread, and while less accurate, I would likely (painstakingly) color in the thread myself with a black paint pen or something that would not stain purple (NOT SHARPIE). TrooperBay These were an older pair of gloves from TrooperBay that came with my fiberglass kit purchase years ago, so I will say I am unsure of the quality when new. They're decent gloves overall, but pretty thin and they are also stained purple on the white leather all over. The handguards are resin cast from original, from Dantooine Props and attached with velcro to the gloves. 22. Boots I have had a pair of boots from Imperial Boots Keep Trooping since I started my ROTK project and will be utilizing them. They're high quality, fit great, and are more comfortable than disco boots. 23. Neckseal, Undersuit/Gaskets & Shiny Shorts I'll likely be using my neckseal and shirt from Sheev's Emporium (which has the awesome and accurate angle change on the arm gasket ribbing), and knee gaskets. I originally ordered them with pants, but I think I'm just going to cut the pants part off of it and have them be sleeves with velcro on the ends like the Denuo Novo ones, but so that they match. The pants were a good idea and they are generally well-made, but make things more complicated. The shiny shorts are from Teresa at Geeky Pink's Phantastic Gaskets, who also make excellent soft parts for FOTKs. The included Denuo Novo gaskets actually look okay but would need to be tailored and are oddly just like... inside out. They have a more shiny/rubbery interior and a cloth exterior - I would just wear them inside out, but would need to remove and resew the velcro, and turn the seams inside out as well. Maybe if I'm having them tailored to fit anyways, but probably not worth the time when I have my Sheev ones. I have no interest in owning actual rubber gaskets at this time and consider their specific mention unnecessary even at L3 - no way would I survive trooping in the Southern California heat anyways. If that's your thing, I believe they are available from Thorsson and Associates. 24. Belt Pouches It should be noted that the tallest pouch that Denuo Novo included does not really fit the largest belt box plate (38A), so I will be utilizing one from TrooperBay instead. 25. Blaster 26. Accessories1 point
-
Below are the parts I'll be using for my build and a few prices and links: TLJ Armor Armor = Denuo Novo ($700*) Helmet = Anovos TLJ plastic Boot Maker = Imperial Boots Keep Trooping "Trooper" ($120) Gloves = Endor Finders ($55) Belt = Denuo Novo Belt Pouches = Denuo Novo + Trooperbay ($68) Neck Seal = Sheev's Emporium ($65) Holster = Dantooine Props (€75*) Handguards = Dantooine Props Spats = Sanotized Creations ($35) Greeblies = 3D Printed, mrpoopie/TheRascalKing files Thermal Detonator = 3D Printed, Jesse M files Gaskets = Sheev's Emporium F-11D Blaster = Classified Shoulder Bell Support Brackets = @ukswrath Chest Pill Mesh = @ukswrath TFA Conversion Helmet = Anovos TFA w/ VaderPainter Aerator Forearms = Imperial Surplus ($105) Cod = Imperial Surplus ($45) Thermal Detonator = Denuo Novo Executioner Conversion Helmet = KB Props ($150*)? with Ople Props Lense ($31) Back Yoke = Imperial Surplus ($160) Shoulders = Imperial Surplus ($55) Decals = Trooperbay ($8) Primer = SEM 39133 Flexible Primer Surfacer and SEM 42043 White High Build Primer Paint = SprayMAX 2K DTM Gloss White Topcoat Custom color-matched aerosol white Behr Premium #52 White Gloss Paint + Primer ($6/can) BPrices and links are for US and do not include shipping, but might help to know when available! *'s indicate the list price, but that I purchased them at a discount.1 point


