Leaderboard
Popular Content
Showing content with the highest reputation on 03/29/2023 in all areas
-
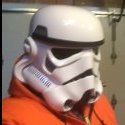
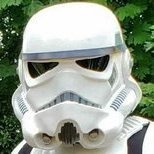
Hi Justin, As you rightly noted , the helmet could be approvable for Basic Level (this is up to the GML) and the items you marked for EIB and Centurion are correct. Regarding the 3rd, bottom ear screw, this is the first time we read that the trim is super glued that you can't see the screw type. This issue will probably have to be corrected before applying for Higher levels. The ear screws alignment (following the rear angle would be ideally preferred) is noted as a suggestion. As a side note: The brow trim lines make it to look rough , this not in stated in the crl (not yet) but could be just mentioned by the D.O. making a review.3 points
-
3 points
-
GLOVES Figured I should have a section for gloves of all varieties I’m going to use. For my centurion aim gloves I’ve got some black rubber gloves off Amazon. I got some flexible hand guards from Justjoseph and used e6000 to glue those to the gloves. I placed a heavy box on top of them for 24 hours so they’d have time to cure with pressure to keep them flat and in place. Sent from my iPhone using Tapatalk3 points
-
2 points
-
Got some good input from Dave (DD) First advice he told me is my Kidney plate is upside down. So a redo oh my snap plates is in order.2 points
-
2 points
-
22. Buffalo Motorama, 26 March 2023 Day 2 Bit less of an initial 501st turnout, but we had a scout and the Rebel Legion join us later: And as the only armored trooper for most of the day:2 points
-
Congratulations trooper and welcome to Expert Infantry and also the Expert Infantry Honor Gallery2 points
-
1 point
-
1 point
-
1 point
-
1 point
-
Congratulations Gary. Welcome to expert infantry1 point
-
1 point
-
Congratulations trooper. Welcome to the ranks.1 point
-
1 point
-
Congratulations Gary, welcome to the Expert Infantry!1 point
-
Congratulations and welcome to Exert Infantry rank1 point
-
Congratulations Trooper Welcome to the EIB ranks1 point
-
11. 3/5/2023 - Emerald City Comic Con Like my fellow TK, TK 91973, I did a little bit of roaming but spent most of my time guarding the emperors throne. It was a very hectic day so I didn't get many pictures, but one of our spotters snagged this one of me roaming. This was my first comic convention and I'm already looking forward to Summer Con in June.1 point
-
Hi Gary, and thank you for your EIB application! CRL and EIB Application Requirements: All required photos have been submitted, and on behalf of the entire D.O. staff we are pleased to welcome you to the rank of Expert Infantry. Congratulations! Other-Armor Fit/Assembly; In this area we review observations made by your fellow troopers and the DO team. Some observations may lead to suggestions to improve the overall look of your armor, and please keep in mind that we consider both text (CRL) and pictures (screen caps/reference images) when reviewing submissions. Starting from the top, it looks like your helmet is too high. You may be able to remove some padding, especially from the upper area so that the helmet can be lowered. And remember:, the CRL recommends the following:" Mesh may be used behind the frown to obscure the face of the wearer". In the photo where you show the green lenses on the helmet, we can see that you are not wearing it. We recommend you to put it on to preserve the anonymity that makes children especially, let their imagination fly when thinking about who is inside the helmet. Reference images -L3.Ideally, placement of ears (and screws) should closely follow the rear angle of the trap above them. As we have commented on other occasions, and they are not too "deviated", we add it as a recommendation. Reference images Your shoulder straps are slightly raised.Perhaps by tightening the white elastic a little, you can make them sit on the armor. Reference images The TD is a little high. It should be about the same height as the canvas belt. Reference images The counter on your Blaster seems to be a little backwards. It's not much, so we'll leave it as a recommendation. It already depends on the level of accuracy you like. Reference images *************************************************** Centurion Requirements: In this section we prepare you for our highest tier of approval. Because Centurion photos must show more detail than EIB, items pertaining to Level 3 might be seen there and not here and additional photos may be required. We try to point out all that we can from what we are able to clearly see, but the final accuracy is the responsibility of the trooper. The left side of your chest armor protrudes too far outward. In addition, it can be somewhat uncomfortable in your movements. Perhaps tightening the straps that connect the chest and abdomen a bit will solve the problem. Otherwise, a hot water bath of that area may be necessary, or use a hot air pistol (I do not recommend it if you have not used one before , as the armor could be "deformed"). Reference images The rivets of the kidney plate are too far from their ideal position. They should be removed, new holes drilled and the old holes covered with abs paste. It looks more complicated than it really is. If you need help, we are here to help you. Reference images -L3. The corners of the plastic ammo belt shall be trimmed at a 45 degree angle that that meets the outer edge of the cloth belt. Perhaps trimming the edge a little will be enough. If not, it might be necessary to move the square buttons to trim a little more. Reference image -L3. Lower thigh ridge joins (front and rear) shall butt-up flush against each other. Any gaps must be backed with ABS or filled as not to be noticeable. It's very little. You will easily solve it with a little ABS paste, sugru or similar. Reference images -L3. The blaster may have minor weathering or base metal exposure however, T-tracks and grips shall be of a black plastic appearance with no silver/metallic weathering allowed. It may be the photo, but there appears to be some weathering on the grip and T-tracks. A coat of matte black paint and that's it. Reference image Nothing more to add. Just a couple of small adjustments and your armor will be ready to receive its Centurion badge. Congratulations!!!1 point
-
That turned out GREAT, Chris! You may have already noticed, but make sure before you attach it to the ABS belt that it lines up with the 45 degree angles on the corners. The left side if perfect!1 point
-
1 point
-
So is it approvable...? I'd love input from the @Deployment Officer Team, but at Basic, I'd say yes - just as the previous Anovos OT offering was, and that the mic tips would need to be replaced for EIB at a minimum, then additional small notes as below for Centurion. Required Costume Components The following costume components are present and appear as described below. Helmet ✔ Traps (trapezoids on dome of helmet) and tears (area beneath the corners of eye lenses) are gray. ✔ Rear traps and tears have vertical black lines. ✔ Lenses are flat material, green in color, sufficiently dark enough to obscure the costumer's eyes. ✔ The “ear” bars have three or four bumps and are gray or painted gray, with a black outline. Painting the bumps with rank stripes (highlighted) in black is optional. ✔ Frown is painted gray and does not leave the teeth area. A total of 8 cut outs in the teeth area of the frown are present. ✔ Tube stripes are medium blue, numbering between 9 and 16 per side with the curve bends extending backwards. ✔ Vocoder (vertically ribbed chin detail) is painted black. ✔ Aerators/Hovi-MIX tips (cylinders on either side of the vocoder) are black or painted black. ✔ Tears, traps, and tube stripes may be hand painted, decals, or decals that replicate hand painted. ✔ Mesh may be used behind the frown to obscure the face of the wearer. ✔ Note: The helmet is accurate in detail and proportion to official references. ✔ Many commercially available helmets or those considered disproportionate in size or shape are ineligible. OPTIONAL Level two certification (if applicable): ✔? Ears shall have three screws per side, one above and one below the ear bar and one at the base of the helmet. ✔ Ear bars have four bumps only. Not three. ✔ Traps/tears and tube stripes shall have the correct ANH TK details. ✔ Ideally, the tube stripes are positioned approximately a pencil width from the side of the cheek. ✔ Fall of tube stripe tops ideally lean toward the front. ❌ Correct Aerators/Hovi-MIX tips are present. Screens used shall be of a wide type mesh, with the rim of the mic and the inside white or painted white. OPTIONAL Level three certification (if applicable): ✔ Ear bars shall have only one bump painted in black (rank stripes). ❌ Ideally, placement of ears (and screws) should closely follow the rear angle of the trap above them ✔ Neck trim shall be of an s-type profile rather than a u-type profile. ✔ Tears/traps shall be hand painted or use decals that emulate hand painted (with correct ANH TK details). ✔? Ear screws shall be slotted, flat topped, countersunk and painted white. ✔ The vocoder must be integrated into the helmet, and not a separate piece. Other Notes ❌ Vocoder would likely need repaint to better define the arches on each "tube". ❌ Frown would likely need repaint to extend paint to last tooth before the end "V", but no longer leaves the teeth into the gums like previous Anovos offerings. ❌ Mic tips would need the interior and lip painted white, though the mesh has been corrected from previous Anovos offerings. ❌ The third, bottom ear screw is not visible and is covered by the neck trim on both sides. It is unknown at this time if it is also a slotted, countersunk screw, but assumed as the trim lays flush. The trim is super glued in place and I was not able to peel it back to check. ❌ The ear screws do not follow the rear angle of the trap above them (but I think this is a dumb rule anyways, personally). ❌ Though not noted in the CRL, the brow trim may need to be replaced with one without extrusion marks.1 point
-
Looks awesome... I've picked up quite a few tips from this!1 point
-
Beautiful old-school build, Gary. Good luck with your submission.1 point
-
Hello all, sorry for being scarce but been taking care of some stuff. I started where I left off and will post some more photos so you all can check my adjustments on my armor.1 point
-
On to the ears! For some, this is a stressful stage of an OT helemt build as you want to find a good fit. Over trimming is probably the biggest cause for concern, so i take the mind set of A little is a lot when shaping the ears to a good fit. Again with the trusty pencil, mark out a trim line that sits away from the mold lines. I use the tin sheers to take this excess off as the ABS is 2 mm thick. These make it easy going to remove what isn't needed. Note they are trimmed still away from those pencil lines. Lexan scissors with a curved blade are ideal for cutting around the shape of TK ears, they are slower going, but simple to carefully trim right up to the pencil marks I've now marked the ears with pencil lines following just below the mold /actual ear shape. Again, leave room to refine these as you begin to test fit, mark and readjust your trimming to get those ears fitting nicely to the sides of the helmet. This is where the process slows down. I shall take my time removing material and going through that test fit stage i mentioned before. More to come soon.1 point
-
1 point
-
1 point
-
1 point
-
1 point
-
1 point
-
1 point
-
Hey peeps, figured I'd update this thread for anyone who hasn't seen my stuff on Instagram. My armor is basically there, save for a couple minor strapping issues and a couple dead LED strips. Once that's sorted out, I'm gonna send a new round of pictures to our LMOs and hopefully get this approved. I took this out for its first test drive this past Saturday at a local convention in Portland, Maine. Biggest issue I had was my powerbanks falling out and swinging around outside my kit, but I have a fix in mind for that. Also need to chop an inch or so off the tops of the thighs to improve mobility. Had a lot of fun though, and the armor was a hit. It was nice to be the very first TFU Shadow most people have ever seen! Hopefully more of us start popping up once we get that CRL green-lit!1 point


