Leaderboard
Popular Content
Showing content with the highest reputation on 03/25/2023 in all areas
-
YES!!! Our first garrison merch this year is a hockey jersey!!! ... which I'm sure is coming shortly3 points
-
Nah, just kidding, there's always something to improve. And this isn't even for Lvl 4 (whatever the criteria might be, aside from "sitting in armor"), but for the upcoming Troops -- and fixing the two remarks on my Centurion Approval Crack Repair Now, the first remark I got, was that I need to repair my cracks. And I do. Always. Now, a lot of these cracks simply come from one bad movement or continuous stress in some areas. Usually, I fix them with poor man's fiberglass -- a thin fabric soaked in superglue -- putting some light scores over the end of the cracks in the hope of preventing them going any further inwards and maybe going over them with ABS paste and/or Acetone in order to hide them. However there have been a few cracks that appear again, and again, and again... and not even a third layer of poor man's fiberglass is helping anymore. So I needed something stronger. I took some of my leftover coverstrip ABS, cut it to shape and glued it into the armor. This is a lot more sturdy and the fabric and will hopefully ease the stress on my armor. Hand Guard Paint This might as well be a regular feature by now -- for unknown reasons my handguards always yellow and whilst it makes for an excellent marker to recognize me, it doesn't look as good as some white handguards and therefore got a mention in my Centurion Application. Although it takes me several coats of a white paint of my choice (anything works, I've used everything from wall paint to enamel paint), I still prefer this over the admittedly simpler choice of buying myself some nice white latex handguards. Holster Repair During a private troop at the end of February, my Holster Chicago Screw came loose. Although I did manage to find a screw (notably not my screw), I didn't manage to find the small black leather square cover. Luckily I still had some fake leather lying around from a different project, so I simply had to cut a square, punch a hole into said square and I had a new cover. Then, to prevent such a thing from happening again, I put a small drop of E-6000 on all my Holster screws. I do need to order myself some Chicago Screws and properly replace the square, but it's a good solution for now until I can properly rework this. Celebration Prep This is something that I maybe should have done a long time before, but with Celebration coming up I finally had a good enough excuse to go through with it. I wrote my ID into/onto every single piece of Armor that I own. That way, if I loose or misplace something, everyone knows who it belongs to. Whenever possible I tried to put my ID somewhere where there would be no staining should the ink bleed through the armor, such as underneath cover-strips. Luckily, there was no bleed-through anywhere. Phone Thigh Pocket A chest pocket is good, but a place for my phone that I can grab without showing everyone my chest is better. So it was time for a thigh pocket. First I cut a square piece of canvas fabric. The fabric itself does not matter, but white or black are better hidden inside the armor. The fabric was about an inch (3cm) broader on each side than my phone and two centimeters longer on the bottom. I marked the position of the fabric inside my thigh, making sure to keep a slight distance to the top (just far enough to be more hidden, but still reachable), whilst checking that my phone would actually fit in there. I then glued the fabric on the sides and bottom into the armor, leaving the top open. If this works as well in practice as I'm hoping it will, I might add another pocket to my left thigh as well. For more security I intend on adding a few extras, but I need a second phone case for that, so it's only on my to-do list for now. Once I get everything ready, I'll be sure to share the final part of this project with you As always, thanks for reading and I hope I'll see some of you at Celebration2 points
-
Just finished adding all the electronics, so thought I’d share what I came up with. Sent from my iPhone using Tapatalk2 points
-
2 points
-
1 point
-
Greetings! I've been here waiting ever since I ordered the Anovos FOTK back in 2018. It finally arrived a few months ago. I recently went to an Armor party held by the FL Garrison Everglades squad, met a lot of great people and went to town on my kit! While I work on this kit, I'll do what I can as a Handler. This will be my first kit going for 501st approval. The List.. Hard Parts Armor - DN FOTK Helmet - DN Standard ABS. Replacement padding - TBD. Electronics - TBD Blaster - 3d printed TFA f11d from 5th horseman files.. printed 2018. Electronics - TBD Soft Parts Gaskets - Currently inside out DN, will be modified for correct exterior surface and tailoring Belt - DN Neck Seal - TBD Undersuit - Black one piece dive skin, may get shiny shorts or the extreme racing stormtrooper suit Boots - Planning on IB Gloves - Planning on Endor Finders Pouches - Small DN and Custom large sized properly Other items considered are shoulder brackets, while I like the metal ones I've seen, I am considering something that has some flex to it. I don't plan on changing the holster unless I see a need for the se44 blaster. I also plan on purchasing the black chest fabric and gaffers tape for the chest box and other cutouts. Thanks, Alan1 point
-
Sounds good, I will go that route. If need be I can always build up later. For now, it will be time for filling the recesses and evening it out. Thanks! Sent from my iPhone using Tapatalk1 point
-
On top of that, the abs pull was very very thin where that "cut" is. It was definitely good to cut it out and ad a few layers to toughen it up.1 point
-
Very true, we did try to advise people early on what may need adjusting for legion approval, shame DN and their "Specialist Builders" couldn't address these areas prior to manufacturing, would have made so much easier for a lot of people1 point
-
1 point
-
As Celebration comes closer every day, I feel like I can do a more or less big update today. I can finally post the first CRL pictures! :-) I hope they are good to work with. The ones that are missing need final strapping which should be done in the next few days. Boots: Spats / Shins: Those parts are glued together as Dan did with his kit. Tricky to get on but everything stays in place :-D Knee plates with gaskets: Thighs: Codpiece: Posterior armor: Abdomen Armor: Detonator:1 point
-
1 point
-
1 point
-
Thought I'd share my framed certificates here, as part of my achievements. I included both my Garrison patches and both sides of my detachment trading card. This is something I will treasure forever.1 point
-
1 point
-
While we can't be 100% certain at this point, if it can be proven that this is FN it should certainly be a case of "Buyer beware", and some more research would be in order for sure. BUT, keep in mind that this person is selling 30 of these kits as one package, which I imagine will end up being individually sold on ebay or the like at some point. While all armorers have unique little nuances in their designs, as seen below this one has it's share as well, and to be honest, I'm not a fan of this kit. Depending on the GML it might be fine for Basic approval and maybe even EI with some work, but not for Centurion if that is what someone is aiming for. Here are a few items that would need some updating for screen accuracy: The ab plate button covers are integrated and not separate pieces. The buttons themselves are not integrated into the design and are separate (like SDS and Maker of Things). The small button plate is way too tall. Reference 1. Separate cod. Not a big deal but should be part of the ab-plate. 2. Oddly shaped ridges on lower thigh rears. 3. Overlap design on all limb joins, not cover strips. 1. 2. 3 1. Zero return edges on limb pieces, posterior plate and kidney. Not ideal for those that like a thicker look to their armor, and could cause kidney/posterior plate overlaps 2. Large center button on TD is convex, not concave. Again, not the biggest of issues, but the buttons look more square than rectangular. Length needs to be reduced (easily done). 1. 2. Reference1 point
-
I always glue/attach the inside cover strips first, and suggest making them wider than the outsides. The reason being is that there is a lot of strain on those seams from opening the calves when suiting up and that will add some extra strength to the join. Another tip is to sand down all surfaces to be glued with heavy grit sandpaper, which gives the glue a better surface to adhere to (be sure to clean them thoroughly after sanding). Be careful on the outside ridges when sanding as to not scratch your armor.1 point
-
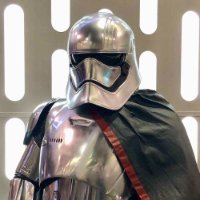
Nice to have another Phasma among the ranks! Looking forward to updates1 point
-
Bring the rain, guys! (Looking at all you March to 1000 EI troopers) @Sly11 I know you had to have gotten one.1 point
-
Hello!!! Take a look at the link posted by Glen. To post all the photos, you need a free image host(like imgur).1 point
-
Yeah I’m measuring where things line up as top of kidney meets top of abdomen, from there that will tell me where butt plate should sit. But yeah, that’s also where that square cut you see in images comes into play. Sent from my iPhone using Tapatalk1 point
-
Post states bulk sale like the FN Armour guy was doing and he wraps in saran wrap like the FN Armour guy, but this guy says he's TKArmour.1 point
-
1 point
-
Hi James, thank you for your EIB application. Meanwhile you add the remaining photos , your applications is added to the processing line. One of us will be with you as soon as possible.1 point
-
As noted in the picture I posted previously there are some oddities on some blasters compared to a standard blaster so that's something to take into account when using references1 point
-
Nice work trooper, if you have any issues with adding images many of us us Imgur a free image host, upload there then copy and past the "direct link" of the images straight into your thread.1 point
-
Sniper knee popped when I tried to open the shins for setting the cover strip, so they are now both glued (cover and sniper knee) and hopefully will set and dry before tomorrow morning. Sent from my SM-N981U1 using Tapatalk1 point
-
As Joseph mentioned the V tabs they are quite easy to make, strips of plastic heated and bent either with heat gun or placed in oven, use pliers and push the plastic over the kidney and posterior. Add glue to the kidney side and let the other side of the clip.float free so it still allows some movement. I find one on either end is enough but some also add extra ones in the middle.1 point
-
I think you will find there has not been one added as yet as we don't have anyone building one here, that and we don't have a finished Remnant trooper or a CRL, no doubt in time this should change as we pretty much see the remnant troopers with just about every shape and size of blaster. No reason an area couldn't be added, hopefully some may share their 3D files . Probably find some build info on Spec Ops as they house the Mud trooper and others who also use this weapon1 point
-
Hi Laura, welcome to FISD! Awesome to see another Phasma under constructions, best of luck with your build.1 point
-
1 point


