Leaderboard
Popular Content
Showing content with the highest reputation on 09/28/2022 in all areas
-
Wow! What an honor! Thank you so much! This would not have been achieved were it not for all the encouragement and support from you all! Thank you @Chemi for always giving sound advice (and for making me sand a lot less Apoxie Sculpt ), and a big thanks to @justjoseph63 who I sought out to terrorize with questions about Centurion long before I even got my armor! You are awesome too and stay safe now in these hurricane times! This has always been one of my goals and I'm super proud! Strange to hit Centurion before my first troop but hey, there it is! Now on to my Hero!3 points
-
3 points
-
Hello again Jonatan. We have included a new "point" in the required information (application header). From today, it is necessary to include a link to the 501st website showing the approved armor for which the EIB is being requested. I have already included it. It is simply so that all members are updated about this change.2 points
-
2 points
-
Hi Jonatan, and thank you for your Centurion application! CRL and CENTURION Application Requirements: All required photos have been submitted, and on behalf of the entire D.O. staff we are pleased to welcome you to the rank of CENTURION. Congratulations! Other-Armor Fit/Assembly; In this area we review observations made by your fellow troopers and the DO team. Some observations may lead to suggestions to improve the overall look of your armor. Note that we consider both text (CRL) and pictures (screen caps/reference images) when reviewing submissions. Nothing more to add. Congratulations Jonatan. This is the result of a job well done. Don't forget to request your Certificate here.2 points
-
2 points
-
Looking GREAT, Adam! Not sure if you thought about this, but for the rear of the pack this is what I did: My oil pan is a bit different, but I cut out the back and used a piece of 3mm black craft foam sheet (EVA) to cover the hole. I have an overlap of about 2 inches around the sides and just glued it on. I indented the foam in the hole, which makes room for the raised OII area and allows it to sit close to the back plate. It also helps prevent scratches from the oil pan on my armor.2 points
-
Troop/Mission Report [3] 9/24/2022 From 0800 to 1100. Walk to End Alzheimer's with Imperial Sands Garrison. Approx 1000 in attendance with activities, photos and a walk. Wonderful people and smiles all around!1 point
-
Congratulations Jonatan !!! Welcome to Centurion ranks !!1 point
-
So I didn’t really feel like doing the same sponge/paper towel dabbing process on the cape for the weathering, and wasn’t too happy with the color in the first place since it was really light and not black enough. So I went the lazy route and roughly spray-painted it black and sprayed grey on the edges for mud. I didn’t completely cover it in black so it has a slightly worn look. In some images it looks a little too saturated, but it’s pretty dull irl.1 point
-
Congratulations trooper and welcome to the centurion ranks1 point
-
Awesome! My apartment is a little too small at the moment for anything more than the Stunt and Hero! But as soon as I buy a house I'll get more (the main motivation to move to something bigger is more costumes really LOL )1 point
-
HA!!! Well done! I had my Centurion on my 2nd troop. Gonna build a Heavy Weapons Trooper for a Centurion trifecta?1 point
-
Well, Jonatan, you're making us work hard... Stay tuned!!!1 point
-
1 point
-
Very cool build. I am very intrigued about possibly going for this as my next build after seeing yours.1 point
-
1 point
-
1 point
-
Hallo Galton nice shot , Welcome to the Legion and FISD!! Enjoy being a Bad Guy Doing Good!! hope to see you more often here in the forum.1 point
-
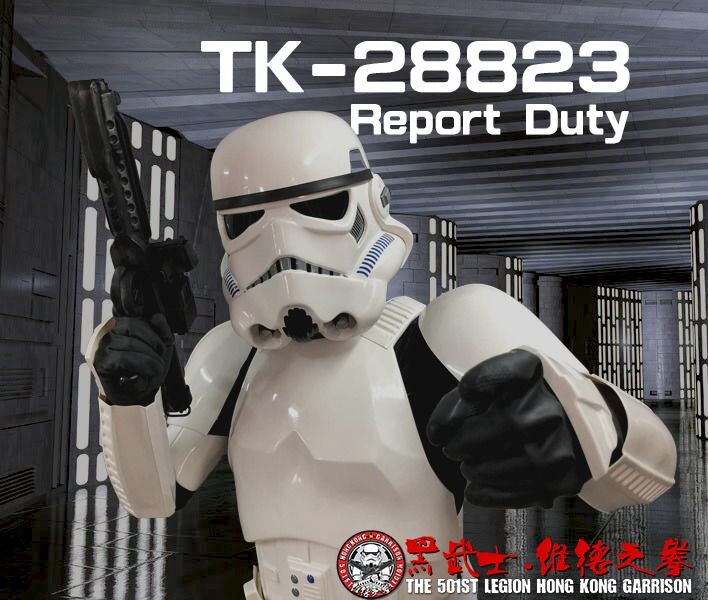
Hello TK-28823 and welcome! You'll make Vader proud! That helmet is looking sharp!1 point
-
Welcome to the FISD, Paige! Lots of information here to say the least, but we are here to guide you through your white armor journey. As Jonatan mentioned, having your own build thread will help immensely. That way you can ask all the questions you want to and post up lots of photos of your progress. Posting pics here is especially helpful when you run into an issue. If you aren't sure about something, always ask before cutting or gluing. Trust me on this one. Most importantly, take.... your.... time. Consider your build as a marathon, not a sprint. We are here for ya' every step of the way, so never be shy about hitting us up with any questions.1 point
-
1 point
-
A testament to AM armor! But if it makes you feel any better I do need to take it in for various maintenance projects I've been putting off because.... that's just what you do, isn't it? The cover strips on the thighs and shins have yellowed significantly (I assume because of the sanding to make smooth while the main armor parts were already smooth or the sanding joints hidden by said cover strips). And my temp fix from "get it approved, deal with it later" of 2016 on my lenses is finally failing- the tape and velcro is finally no longer adhering so maybe I should actually glue them in like I had originally planned all those years ago, . I'm also going to replace my shoulder bell connections- the elastic is shot and one of the snaps is starting to pull through (though it did make it easier to get into it by myself, normally I have someone snap those for me). It could use a good polish and I'm pretty sure there's still remnants of a "special guest" sticker on one shoulder bell from... many troops ago that I keep forgetting about and not removing. I cannot complain, over all!1 point
-
Sorry for the delay folks.. been prepping for hurricane Ian which is due here in a day or so. I may be offline for a week or so as massive power outages are predicted, so thanks for your patience!1 point
-
I bought the new belt mostly due to past advice that it's gonna get YUCKY being on the HWT armor. I'll do removable weathering so I can go back to ANH Stunt if and when desired, but yeah... it just seemed like having a yucky belt and a clean belt would make life easier. As for mounting the ammo pouches without punching holes... gotta be belt straps on the pounches for the solution. You could probably repurpose those angled ones that most of the ammo pouches come with. Slice those off and then redo them straight as high as the material would allow. Since I'm crazy with my rivet gun, I'd certainly rivet them in place instead of sewing. DM'd you the radio box specs. If anyone needs a rivet gun suggestion, I've been really happy with the blue Quinn brand one I got from Harbor Freight for about $18USD. A pack of 500 1/8" aluminum rivets was on the shelf nearby for about another $10. Perfect for this kind of light work.1 point
-
I cannot tell you how much I was sweating this task - getting the belt correctly built and fitted to my armor. See, when @Scimitar and I were building my armor, he did about 95% of the belt work himself. It's really a one man job and not something that allows room for error. But I didn't really know exactly what he did... so I made things up as I went along and very carefully measured 8x and cut/riveted once. The belt sits at Centurion height just like my ANH Stunt belt. I got the snaps set at the right height and the rivets installed correctly. And I still can't get over that plastic match. Slightly angled downwards, but the plastic and canvas line up correctly. WHEW! Yeah, my home gym room has a driving rig in it. Doesn't everyone's? Then I got the ammo pouches added to the belt. The game model has them sitting about as low as possible on that belt, so I copied. The pouches are held on with chicago screws. This gives me some wiggle room for installation mistakes. If the DO Team tells me to raise the boxes, I can still do so. Though there's not much room to lower them... Lined up! Kinda proud of myself here. And my last updated bit for the day - the radio. I was looking on the HWT facebook group for some inspiration and noticed the Dave's Darkside Depot pack. It featured a non-cardboard radio box with a hinged lid and interior storage. And did I mention it wasn't cardboard?!?! I went into research mode and found this conduit box on amazon that looks similar to the one on the DDD pack. It's a bit thicker than the radio cardboard, but not horribly so. Honestly, if anything, it's more accurate to the game model. The radio box in the game is THICK. The cardboard radio box has been bothering me the entire build. It's the most flimsy part of the pack by far and seems like just one good knock could flatten it. The plastic box is a good bit heavier, but will stand up to some punishment. It just needs to be painted, hinged, and get a new faceplate made for it. BAM. Painted and hinged. I propped it open so the inside could get a bit of black spray as well. I installed the hinges with rivets. I'm riveting darn near everything on this pack (the tube mount arms and tube are riveted). Might as well keep at it. Then I measured the box and drew up a new face plate. My laser cutter is making quick work of some 3mm black acrylic. And there's a radio plate. I cut some extra square shapes to spruce up the lower area a little. Not sure if I'll go through with that, but I'll at least have the option handy without extra work being done. That's me caught up. The radio box paint is curing at the moment. Once that's done I'll get the new box assembled and start final mounting of boxes to the oil pan.1 point
-
Here goes the backlogged pic post. All of this was before I got the pack to the above state. I ordered some goodies from Mark at AP - belt parts minus the drop boxes, a set of shoulder straps, and some spare thermal detonator parts. I figured it would be nice to have the TD stuff on hand as well as an extra shoulder strap. Pre-cut to Centurion spec for my pleasure. Thanks Mark!! I am still in disbelief about this one. Look how close a match the new plastic is to my old stuff. That arm was formed in 2017!!! It's not an exact exact match, but it's 95% of the way there. Just incredible. Anyways, I had the belt goodies. Next stop was painting my printed boxes. I gave all of the printed parts a very healthy coating of silver metallic paint. I think this cured for 2 days after spraying. I wanted to have a metallic layer underneath the black top layer for that extra bit of realism in weathering. And if I weather it a bit too much, it's just black plastic underneath, so no problem there. Then I painted everything black again. Everything. The white caps, the grey vent and the grey button panel... alas. Oh well... it's just a little extra work to spray those the right colors. This is the mounting method for my drop siphon - rivnuts. I may add 2 more in a + formation. I won't rivnut most (maybe none) of the other boxes, but I know I want to be able to remove this one in the future for drilling and adding the lighted top ala Ardeshir's Obiwan HWT pack. One shoulder strap pre-mangled. It seemed like it deserved the photo. Heated and formed onto the tube. It got sanded a bit to even up the edges after this. And I think that catches me up to the present.1 point
-
I believe I'm at 23 troops with this bin now. It's been incredible all year. Some early morning troops are coming up that'll have me suiting up at 4am in pitch dark fields. I added a little rechargeable camping light to my bin for those mornings. The lantern has 4 brightness settings, 3 color settings, and claims 72 hours of contestant use. It can even be used as a power brick for phone charging if needed. It fits well in the remaining lid structure and is riveted in place.1 point
-
My Hero got approved by my GML so it should appear any time now on my 501st profile!1 point
-
Ok... not sure why, but I really like the scout trooper. The protocol droid is kind of creeping me out though.1 point
-
1 point
-
1 point



.thumb.jpg.d5282f66012c891acf8163f75bfd42c9.jpg)


