Leaderboard
Popular Content
Showing content with the highest reputation on 09/26/2022 in all areas
-
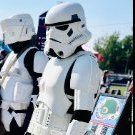
Permission granted to use photos on social media appropriately Troop 1: Hamilton Comicon Sept 25, 2022 Off to an early start, I kitted up for my first big event. Once I got to the con floor, I met up with Lord Vader. We posed for many photos with the locals. Soon enough, we were ambushed by rebel scum, who managed to capture one of our pilots. Lord Vader and myself recruited a Doctor. Who he is, I wasn’t sure, but his strange craft could move us through time and space. We soon arrived at some time in the future where we encountered a new type of stormtrooper. Together, we mounted an assault on the rebels. The battle was fierce with many casualties. We managed with sheer determination to capture one of their droids. Little did we know, this droid was somewhat of a celebrity. Once back home in our correct time, we took a moment for photos with friends All this to raise money for a great cause - Ronald McDonald House. ‘’Trooper TK-96004 signing off.4 points
-
Double troop post!!! (24) 9/23/22 - Tailgate Party TK troop 24 CDZ-5435 troop 8. This was a troop at a high school tailgate party. Kinda odd right? One of the cheerleaders was a past Carrie Tingley Hospital resident (possibly with a spinal issue) who fought hard and is now a regular girl out in the world living her life. She asked if some white armor and jawas could attend the tailgate for some quick pix. Yes. Yes, we can provide some white armor and a jawa. It was a last minute troop. We had five of us with Juno Eclipse doing double duty as handler. My daughter as the jawa. I believe this selfie was indeed our official troop photo since it was the only one that got all five of us. It was fun. Low key and chill. TONS of cheerleader selfies and Be Reals. Lots of snacks and cookies ,which my jawa can stuff under her mask and get into her hungry mouth. I never figured out exactly which kid was the one who called us there, but they were all happy to see us. Good times. (25) 9/25/22 - Railyard Intergalactic Day TWENTY FIVE!!!! I'll be requesting my badge after I hit the post button. #9 for CDZ5435 #2 for TI-50597 This is part of the Albuquerque AT&SF Railyard Shops. It's an amazing structure that is basically the reason Albuquerque is the big city in this state and not Santa Fe or Las Vegas (yes, NM has a Las Vegas). I've spent many hours of my life in this place, most of them illegally. I used to be addicted to urbex photography and the railyard was my favorite subject. The Railyard now houses a weekly farmer's market and fair. It's been incredibly cleaned up since the abandoned days, but most of the charm remains. The mismatched and broken windows, the beautiful light, the huge interior spaces. Love it. I haven't been many times since my daughter was born and it was wonderful to roam through again. Family troop pic! Yeah, I did the pauldron again. I couldn't help myself. Brandon's armor is now out of my garage and on his body. I helped him redo the strapping. Looks good and was able to troop all morning with no suit failures. Life is good. White armor takeover. Sweet sweet revenge for all the photobombs the jawas have done to me this year. Muahahahaha!!!3 points
-
2 points
-
Name: Jonatan Östling TK ID: 23592 Garrison: Swedish Garrison Forum name: Nairy Armor maker: RS Prop Masters Helmet maker: RS Prop Masters Blaster: E11 RS Prop Masters Hight: 182cm/5'11.65 Weight: 100kg/220lbs TK type: ANH Stunt EIB: 1051 Body type: Long legs, long arms, shorter torso EIB post: For the right gap between ab and kidney, please consider that the light source is directly in front of me, and the shadow being cast makes it seem larger than it really is White elastic band Button alignments Shim seam images New and updated image of the ab plate corner New and updated image of the fixed sniper knee angle as suggested in the EIB application Thank you once again for your consideration! TK-23592 out!1 point
-
Hi there, Well my first box arrived today (helmet) and the second (armour) is arriving tomorrow. Wow - what a difference seeing it and holding the items in your hand. Immediate thing on the helmet is I want to do the upgrades. *mesh, green lens, fans are on order, etc.- hoping the local folks can help me out with sourcing good products for some items. I am going to start to put the armour on slowly and move around before taking photos - also downloaded photos from the other forums when people submitted to pick up some more tips. Also it's amazing how light the material is - I was very surprised about this one aspect - was expecting the material to be heavier. Once again - can't thank everyone enough to get me to this point with all the sharing of knowledge. I plan to take this one step at a time...basic approval first, then get started on the next level EIB as soon as humanly possible. What else can I do in retirement! Questions for tonight: #1 - is there a good method to upload photos - mine seem to be quite large format. #2 - when I am ready to get feedback should I go directly to the other forum and post. thanks.1 point
-
YAAAAASSSS!!!!! Congratulations on your first troop Gerald! Looks like you had a fantastic time! I want to do a blast-a-trooper SO badly.1 point
-
After some further refinement this is the new fitment1 point
-
It gets thinner at the bottom again so this is the best middle ground that I found that doesn't compromise my fitment1 point
-
Ok Jonatan. You did a very good job with those fixes!!!. However, we think you need to do one last effort. About the return edge on the right side of the ab plate.....The top looks good, but the return edge gets wider as it goes toward the bottom and should be more straight. EASY fix!1 point
-
That little tool is great. They're kind of hard to find though and typically ship from Japan, but if you can find one, it's awesome. I've been using it on my 3d print and fiberglass kits, but it also works well cleaning up return edges on traditionally formed kits. If you get one, just make sure to buy extra sanding pads in lower grits. It comes with 600, 800, and 1000, but you can get them as low as 200 grit. By the way, I neglected to update my build threads last week, so here's a new picture of the helmet smoothed out a little more. I'd take another picture, but it's covered with painter's tape right now. I'm getting ready to spray the inside with bed liner. While I'm typing, I might as well add a few small pieces to this thread. So tonight, I'm going to print out another set of @TheRascalKing's greeblies in resin and affix them to the helmet before I do any final coats of primer sealer or paint. Regarding the greeblies, here's a little test print I did in carbon fiber PLA a few weeks ago before I left for California. As you can see from the pic, I got a bunch of top layer lines and stepping which is easily filled or sanded out, but I want to avoid this completely for my final set. Also, I will note that the carbon fiber PLA is incredible stuff. Of particular note is that while printing with .2 layer height, the material bonds together with lower layers better than most other filaments which eliminates layer lines almost completely. Of course, the top layer is visible, but that's a result of the shell settings which can be adjusted. I've experimented with different layer heights from .125 up to .3 and the layers are nearly indistinguishable at heights under .3. At .3 they are visible, but even there, it takes considerably less effort finishing the prints. The carbon fiber PLA can also be sanded out nicely and isn't as susceptible to heat deformities like traditional PLA or PLA+. I did see last night that I can also get carbon fiber PETG, so I may test that out next. Here's a pic of the typical prints I've been getting: Even though this part is for another costume, it shows how clean the carbon fiber filament prints. Printer settings are available on request, but the basic settings of this print are .4 nozzle, .2 layer height, 50mm/ sec, nozzle 210 bed 55. So back to the FOTK, here's a few more of the greeblie tests: On this one, I printed it in a different orientation which eliminated the top shell lines and also decreased the settings to .15 layer@ 25mm/sec. Even though it came out incredibly clean, I still think resin will provide a better product. Regardless, this slow approach shows that a person with a FDM printer can still get some awesome results if they take their time. This greeblie did not require any filler or additional sanding. 1 layer of primer and paint would easily satisfy any 3d print finishing requirements. Here it is on the helmet before I sprayed the additional layers of filler primer. Anyways, this was just a quick little update. Once I'm done printing the greeblies, I'll post pics and likely throw them over in Justin's thread for other's reference. Thanks for viewing1 point
-
@Deployment Officer Team Not to worry. Thank you for responding and re-assuring the input provided. The group has been great through this journey. I can see the finish line1 point
-
Sorry for delaying trooper. fortunately we the D.O. are not alone having such amazing group of people willing to help and make real our moto "Troopers Helping Troopers" Glad the recommended solutions made the deal !!1 point
-
hi Jonatan !! super fast Centurion application!! Chemi will be with yo shortly.1 point
-
Hi Jonatan, Thank you for your new EIB application , one of us will be with you as soon as possible. Added to the processing line.1 point
-
1 point
-
Awesome work Gerald, here's to many many more troops in your future1 point
-
Great work trooper, congrats on your first troop, one of many to come1 point
-
1 point
-
1 point
-
Looking sharp Jonatan! And that sniper knee looks amazing. Good luck!!!1 point
-
1 point
-
Well, I hopefully got all of the bugs fixed, (Return Edges, Mobility Cuts, etc., etc;) and laid out everything. I did a pre-fit and I had to round out some edges on the chest and abdominal pieces because they needed to be rounded a bit to prevent cracking. I also used my heat gun to shape the cod and posterior a bit because it kind of drooped a bit when fastened. Full kit up will be done hopefully this week. Just waiting for some black under suit bottoms.1 point
-
Congrats! You and me occupy the first two images of the page 1050-1099 in the honor gallery! Happy trooping!1 point
-
Heat gun did the trick! I finally grew the cahonas to use the heat gun on the armor. If I had known it was that easy ( with a careful eye) I would have used it moons ago. Thanks for the input. Now just gotta add paste to the gap1 point
-
1 point
-
Not a deployment officer, but I had the exact same issue on my AP thighs. About 60 seconds of careful heatgun application had both sides flat and equal to each other. I followed it up with trimming to make them equal and ABS paste to fill the gap.1 point
-
Best for the @Deployment Officer Team to comment on, hopefully they will be along soon1 point
-
I need advice. When it comes to mobility cuts... This is my left thigh. For L2/L3 approval, the cuts can not extend above the raised edge. In my case the armor protrudes away from the back of the leg all the way up to the raised edge. Will I be ok with taking off the edge this far up??? For info... The cuts are being made because of this flaw in the armor NOT for mobility reasons. Though I'm sure this does not matter.1 point
-
Another small update. This is my midsection. Most non-visible parts are cut down. Splits in half on both sides with velcro. Belt was kinda forced to stay in place, that's a thing I'll probably fix soon.1 point
-
This marks completion of the armor (minus so very small tweaks that will be made prior to submission for L2/L3. The addition of the foam really gives a snaug fit for each piece. It also acts as sound dampener. When the armor is knocked on, it sounds solid and not hollow/clanky.1 point
-
My time to join the first order will come one day.1 point

